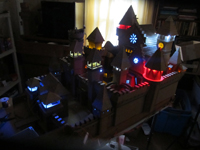
I use LED's all the time. They are in many of my projects including my Worlds Greatest Cardboard Castle Project.
Adding LED lights to a project can take it to another level. And it's easy to do. In this tutorial I show you how.
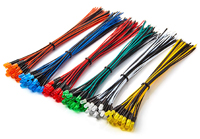
I ordered from Amazon this selection of colored LED's and they cost about ten cents each. And thery already come with a current sinking resistor which makes them very simple to install.
The exact purchase I made on Amazon https://amzn.to/48CBg7E
Five different colors and white.
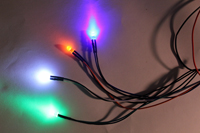
Here are some of them lit up.
When wiring up an LED you form a circuit. Think of it is water flowing through pipes. The electricity flows from the battery to the switch, then from the switch to the LED and then back to the battery.

To connect up an LED you need:
- The LED
- A battery source
- Some wire
- A resistor
- A switch to turn it on and off

You can't see the resistor in the previous picture. It is soldered and covered. And it is pre-made. the LED's I purchased already comes with them. That saves us some time and effort. In the next picture you can see it wrapped under the black heat shrink.
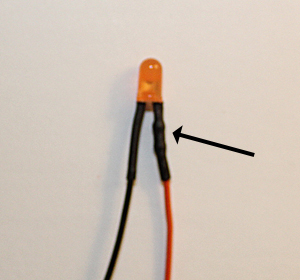
In this next picture I have removed the heat shrink so you can see the resistor.
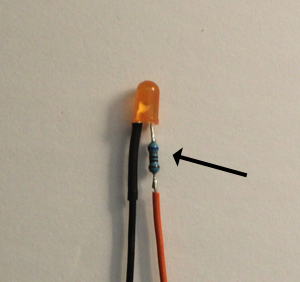
This resistor is important. You absolutely need to have a resistor when hooking up LED's; otherwise the LED would burn out very quickly - less than a second.
We don't really need to worry about this though. Our LED's come with the resistors already attached.
Some Guidelines with LED's
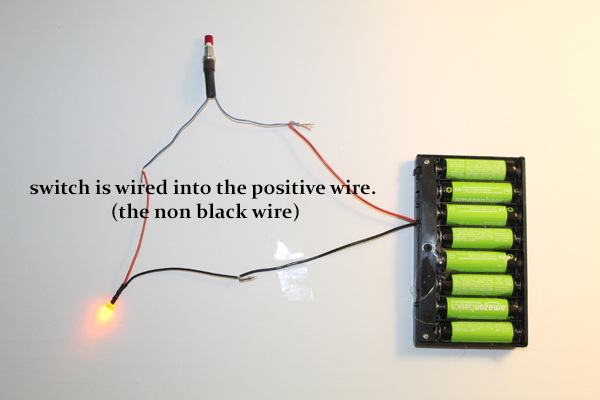
LED's are polarized. This means they have a negative and a positive. You have to hook them up correctly or they will not work. You can understand this easily by the color of the wires. The Black wire is always negative. So, you hook that up to the negative (black wire) on your battery pack. The other wire is often red (positive). But sometimes that other wire will be another color to denote the color that the LED gives off. That is quite okay. Whatever that other color is you hook it up to the positive.
Just remember always hook up the black wire to black wire on your power supply.
Rule of thumb when connecting up the switch.
It isn't mandatory but you should put the switch in the positive line. Not the black line. It doesn't matter a whole lot. The LED will work just fine whether you switch the positive or the negative. It's just standard protocol. It could make a difference if you had a variety of other electronics hooked into the wiring.
LED's come in different voltages
You have to get matching battery packs and LEDs. In the case of my project here on this page everything is 12 volts. I like the 12 volt LED's because they are nice and bright. Just watch out for this. Be sure to get the right battery pack and LED's. Hooking up Multiple LED's
Don't wire up multiple LED's in this fashion: Power to LED, to another LED, then to switch. This doesn't work.
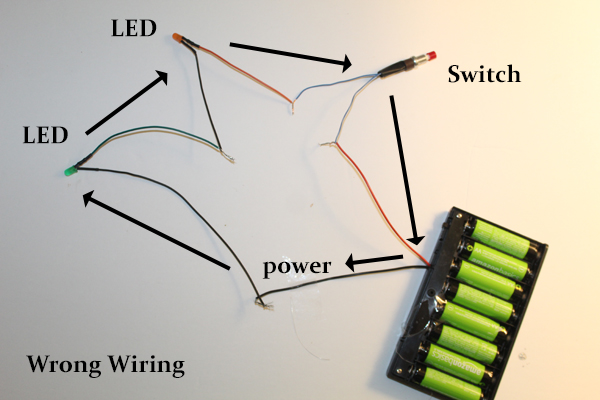
Each LED has to go to the power and to the switch on it's own. And of course, keeping the correct colors. Blacks always go to blacks. 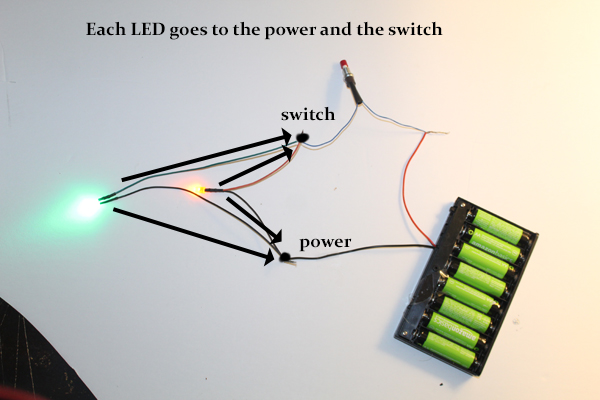
Switch Options
You might just want a simple switch that turns the LED's on and then turns them off.
Or you might want a push button switch where the LED is on only as long as you hold the button. At the bottom of the page I have links to both types.
And that's pretty much it. You have learned everything you need to know to add some really nice little lights to your projects. Below I have links to the items I used in this tutorial.
RESOURCES YOU CAN GET ON AMAZON
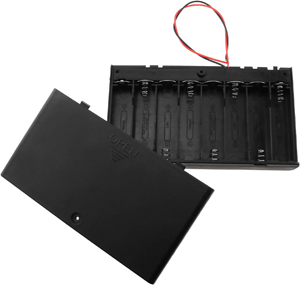
Battery Holder, holds 8 AA batteries to give us 12volts. this one has wires, and an on/off switch. If you use this battery pack, because of the switch you really wouldn't need to have a switch in your project. Unless you have a specific place you want a switch to be rather than on the power supply.
Here is one that is almost the exact same as the one I use : on Amazon
I ordered from Amazon this selection of colored LED's and they cost about ten cents each. And they already come with a current sinking resistor which makes them very simple to install. (These are 12 volt LED's so they match the power supply perfectly.) Five different colors and white.
The exact purchase I made on Amazon https://amzn.to/48CBg7E
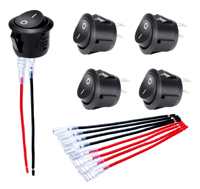
Simple, on/off rocker switch with wires
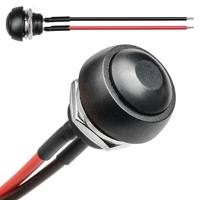
Temporary push button switch. As long as you hold it down the LED will be on.
|