Hi, Thanks for visiting my website. My name is Will and if you have questions
or would like to
contribute projects or ideas you can contact me
How to take (great) photographs of the Milky Way
A common digital camera and a tripod are all you need.
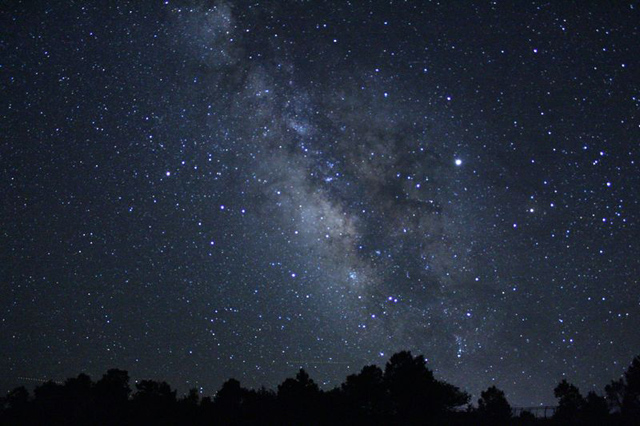
(I also have a video tutorial for this at the bottom of the page) Maybe you have looked through the pictures I have taken of the Milky Way and you are wondering how difficult it was to do.
Well, it was very easy to do. I am not a photographer. I have no training or experience with cameras. So you can see by my photos that you can also easily take great Milky Way photos regardless of your skill level with a digital camera.
There are just a few basic things you need to know and you will be able to get some terrific Milky Way and night sky pictures.
What set up you need to know ahead of time
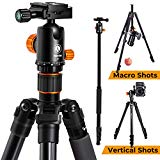
1. You need a sturdy tripod. It doesn't have to be expensive or fancy, just sturdy.
For this I bought a tripod on amazon.com. I am very happy with it. It is sturdy and reasonably priced. Now I use it for all my other tripod needs.
2. You have to seek out dark skies. This is important. The Milky Way is delicate and sensitive. Light pollution from cities will ruin it or diminish it greatly. You need to get away from the city. National Parks and campgrounds are usually good locations for this.
If you are having trouble finding a location you should contact a local astronomy club. They will be able to tell you where you can nearby go. And typically these astronomy clubs have a site that they use on a regular basis.
Get someplace where you can see the Milky Way with the naked eye. This is a good indicator that the pictures will come out good - even better than what you see.
What to set your camera at
Use the lowest power lens you have. For me it is the 18-55mm lens.
Set the camera to Manual
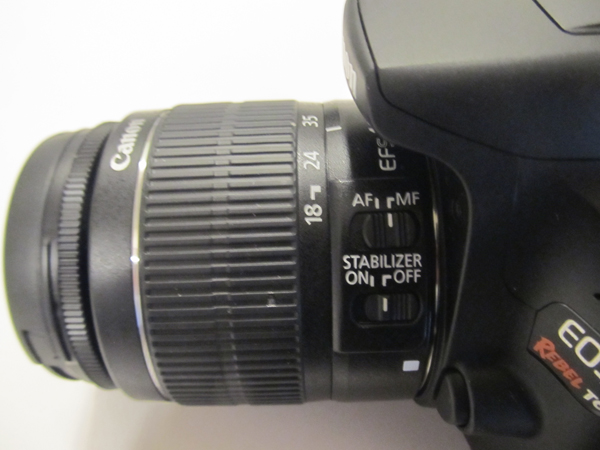
Set the lens to manual focus and stabilizer off (If it has a stabilizer setting)
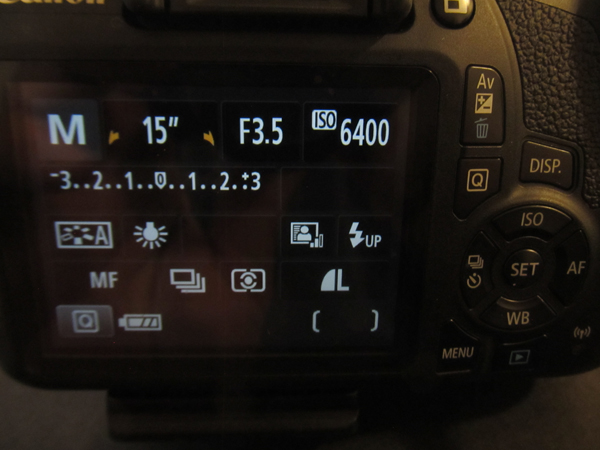
Set the ISO to the highest it will go (For me it is 6400)
Set the aperture to the lowest f ratio it will go. For me this is F3.5 Note that if you are new to cameras be sure the zoom on your lens is all the way out. If your zoom is not at minimal zoom it will affect how far down you can get on the f-ratio. In my case of an 18-55 mm lens I turned the zoom all the way down to 18.
Set the exposure time to 15 seconds.
About white balance - This does affect the coloring of the milky way. Set it to Tungsten or White fluorescent. You can experiment with this once you start taking pictures. In the following picture the little light bulb on the screen means I have set mine to tungsten.
Be sure to set your camera to the largest image size possible. The more megabytes the better the picture. If you are fluent with photography and post processing then you might want to set your camera to RAW.
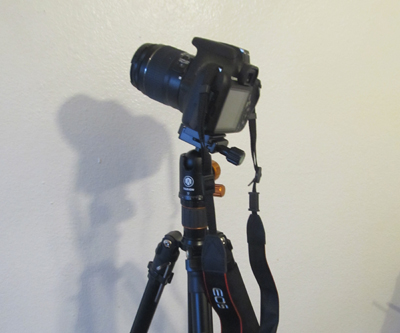
This next picture shows the camera settings
This next picture shows the lens settings. I have the zoom all the way out to 18mm. And I have the lens set on Manual Focus. And the Stabilizer is off.
This next photo shows that the camera is set to Manual "M".
Here is the exact camera kit I bought on amazon and use for this tutorial: I use what they call the Kit lens for my Milky Way photos. I didn't buy any kind of a fancy lens. It's the standard lens that comes with the kit.
You need to do one more thing. And this is the most important thing. You need to manually find the focus.
Simply setting your camera lens to infinity focus usually doesn't work. There is a little bit of a fudge factor in that kind of setting. You have to actually "see" that it is set to focus for stars. Here is how to do it.
Set your camera on the tripod and point it at a bright star in the sky. Then slowly zoom in on that star with the zoom of the lens. Zoom all the way in - keeping the star roughly centered. Then turn the focus ring on the camera until you get the star as sharp as you possibly can get it. Wind the focus back and forth to get a feel for the best and sharpest focus.
That's it. Once you get it focused you can leave that focus ring alone. But remember to reset the zoom all the way back out. In my case it goes back out to 18. Some people use a small piece of gaffer tape on the focus ring to hold it right there. That way it doesn't accidentally move over the course of your photo session. (Gaffer tape is a kind of tape that is easily removed and doesn't leave a gummy residue.)
You are ready to take photos of the Milky Way. Everything is set.
Go right ahead and snap some pictures at the 15 second exposure then take a look at the photos. Iff they are nice and crisp and sharp you can experiment a bit by pushing that exposure to longer lengths like 20 seconds or even 30 seconds.
And, once you have a feel for this you can try re-setting your white balance. Switch between Tungsten and White Fluoresecent. Take a look at the photos so you can see the difference in color that the photos display.
Is there a lot of noise in your pictures? Do they seem grainy?
This is a function of the ISO setting. If your pictures are grainy then set the ISO speed down a notch and take more pictures. In the case of my camera the highest ISO setting is 6400 and it takes great Milky Way photos there but if I had to set it down a notch that would be at ISO 3200.
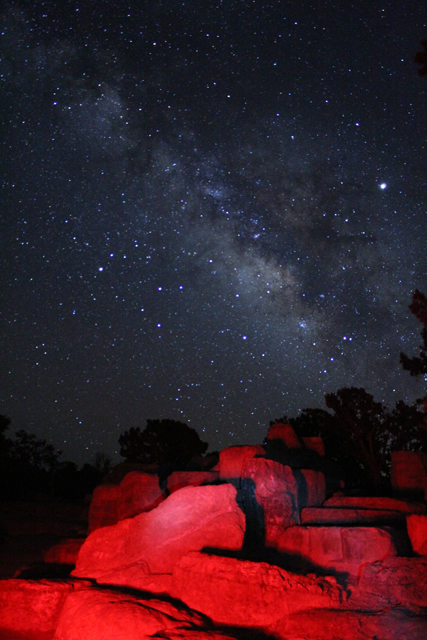
Here is another milky way photo that I took. This one showcases a good looking rock formation in the foreground. I did this with an easy technique callled "Light Painting". Learn how to do this in my next tutorial: Light Painting photos along with the Milky Way


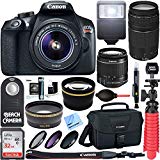 Here is the exact camera kit I bought on amazon and use for this tutorial: I use what they call the Kit lens for my Milky Way photos. I didn't buy any kind of a fancy lens. It's the standard lens that comes with the kit.