


They make a great adapter that will accept just about any point and shoot style digital camera
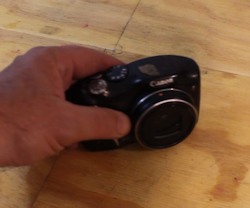
You have a digital camer that is something like this. It doesn't have interchangeable lenses.
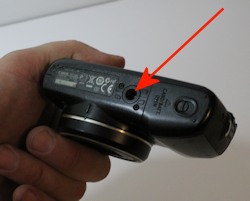
Not a problem. The adapter is designed for just about any digital camera. The only caveat is that your camera has to have a 1/4 20 threaded hole on the bottom of it. This is the standard threaded hole that you use to attach the camera to a tripod.
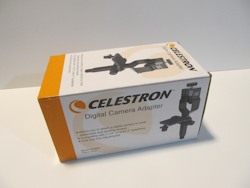
Celestron 93626 Universal Digital Camera Adapter (This is the exact one on amazon that the telescope nerd bought and uses in the video.)
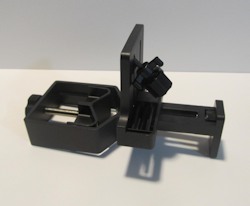
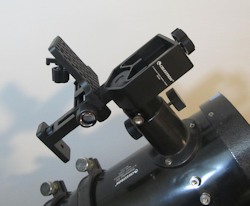
Here is the exact one that I bought on amazon. It's the one I use here in this tutorial. It comes fully assembled. Although there really isn't a lot to it.
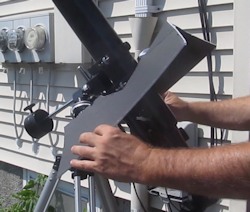
The whole goal of the adapter is simply to hold the camera steady at the eyepiece.
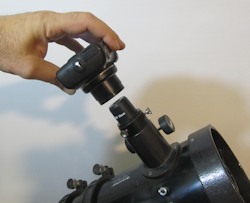
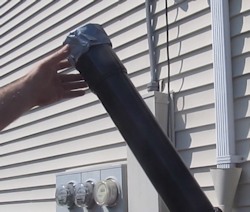
With an adapter like this you attach it directly to the eyepiece that is in the telescope. It clamps right onto the eyepiece.
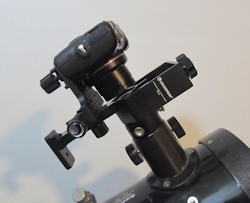
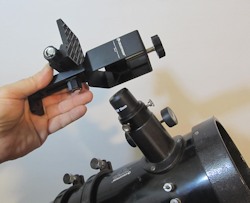
Then you attach the camera to the UDCA. And adjust it so it looks directly through the eyepiece. Be sure to have the camera far enough away from the eyepiece so the lens can extend out when the camera is turned on!
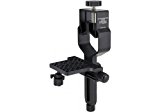
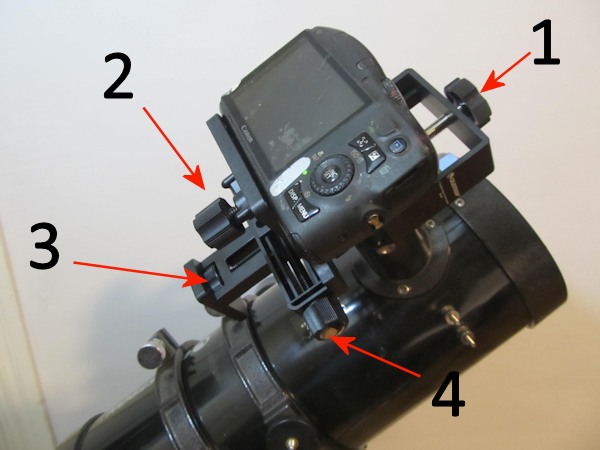
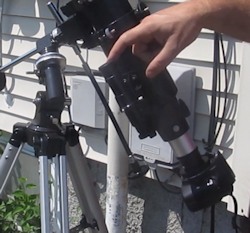
Let's take a closer look.. Here are the various knobs and what they do.
1. This is the knob that clamps the UDCA to the telescope eyepiece.
2. This is the knob that attaches the UDCA to the camera ( the 1/4 20 I previously talked about) This knob is also used to slide the camera in and out closer or further away from the eyepiece.
3. This knob moves the whole camera up and down so you can get it centered on the eyepiece.
4. This knob moves the whole camera left and right so you can get it centered on the eyepiece.
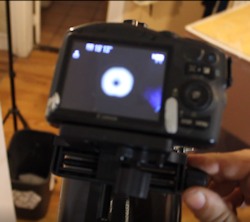
Now you can adjust the knobs to get the picture centered on the eyepiece view. We can't get focus here in the house. The telescope needs to be outside looking at something far away.
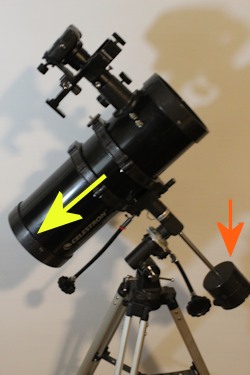
Only one thing remaining and this is important. You have added significant weight to one part of the telescope. This means the telescope is now out of balance. You need to re-balance the telescope so it will work smoothly and it won't slip or droop when you are using it and trying to take pictures. The first thing to do is slide the telescope in the cradle to a point where the tube is now once again balanced in the cradle. Then you adjust the counterweight on the telescope by moving it further out.
Four tips when taking pictures of the Sun: (Note that I used my other telescope and my other camera to take the actual pictures. But everything applies to this tutorial and telescope/camera setup.
Don't forget to place the solar filter on the telescope. Do this first, before you do anything else. And be sure it is secure. Put a rubber band on it if needed. You don't want it to fall off as you move the telescope.
The Finderscope on your telescope (That's the little telescope mounted on the scope).
Never look through it at the sun. It will blind you. And keep the caps on it. Do not allow the sun to shine through it. The sun will melt it quickly. If your finderscope has no caps then cover it somehow or take it right off the telescope.
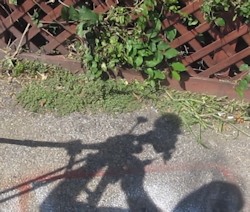
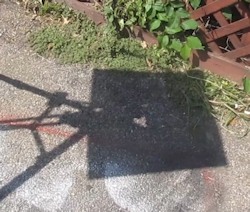
Trying to point the telescope at the sun can be tricky! You can use the shadow of the telescope to get it right. Move the telescope until the shadow of the tube until it is minimal.
Finally, place a large piece of cardboard or foamboard over the telescope like this. It will put your eye and the camera in shade. It makes it much easier to work with the camera and telescope.
There you go! This will make it easier to work with the camera.
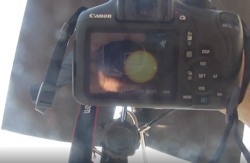
Now you are ready to start taking pictures. This picture here has a lot of glare because of the sun. I was trying to hold one camera while taking solar pictures with the canon! But you get the idea. And, let me give you a couple of tips that will help.
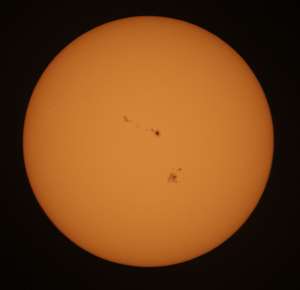
Here is one of the pictures I took:
The Tools and Items in this tutorial
Celestron 93626 Universal Digital Camera Adapter (This is the exact one on amazon that the telescope nerd bought and uses in the video.)
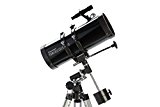
Celestron 127EQ PowerSeeker Telescope