
YOU WILL NEED:
- The template
- Pencil
- Eraser
- Hot glue gun & glue
- Foam board or cardboard
- Foamular or styrofoam pieces
- Utility knife
- Fine grit sandpaper
- Brown acrylic paint
- ¼ to ½ in thick flat tip paint brush
- Silver acrylic paint or enamel
- A black ballpoint pen
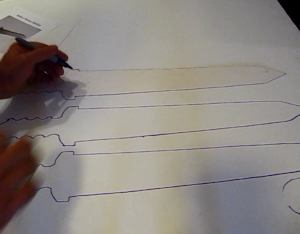 Print out the template and trace out the sword on a piece of foam board with a pencil. You will need to trace out the sword three times because the foam cut-outs are going to be glued together. Print out the template and trace out the sword on a piece of foam board with a pencil. You will need to trace out the sword three times because the foam cut-outs are going to be glued together.
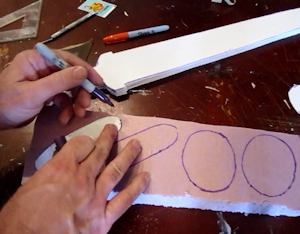 Trace the hilt decorations on a piece of foamular or another thick material of your choice- we recommend using insulating foam free of fiberglass or additional pieces of foam board. Trace the hilt decorations on a piece of foamular or another thick material of your choice- we recommend using insulating foam free of fiberglass or additional pieces of foam board.
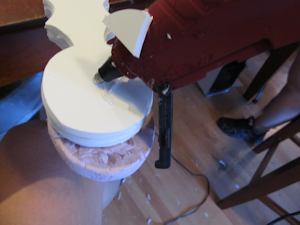
 Once you have all your pieces traced on the foam board, cut them out with a utility knife. Once you have all your pieces traced on the foam board, cut them out with a utility knife.
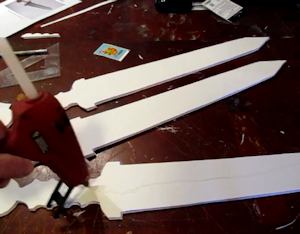
Now you should have three sword-shaped pieces of foam. Use a hot glue gun to glue them all together. Make sure they're lined up as perfectly as possible before you glue!
 At this point you should have one sword that is pretty sturdy, three layers of foam board thick. Now it's time to sand down the foam board to take off any sharp paper edges. As always, this step both enhances the shape and overall feel of your replica blade while ensuring you and your friends will not get any paper cuts. We used very fine-grit sand paper to smooth out all the edges and soften the hilt's finger notches. (The part of the sword you grab on to that is shaped to fit perfectly in your hand.) At this point you should have one sword that is pretty sturdy, three layers of foam board thick. Now it's time to sand down the foam board to take off any sharp paper edges. As always, this step both enhances the shape and overall feel of your replica blade while ensuring you and your friends will not get any paper cuts. We used very fine-grit sand paper to smooth out all the edges and soften the hilt's finger notches. (The part of the sword you grab on to that is shaped to fit perfectly in your hand.)
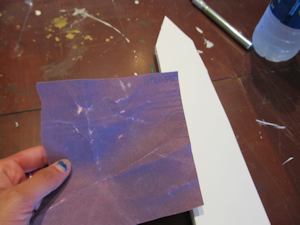
• Now that the blade is smooth, dust off all excess paper lint to the very best of your ability. This is necessary for painting.
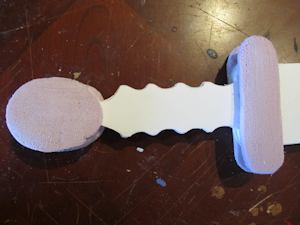
 Once completely dusted, it's time to glue down the pieces of the hilt you cut out in foamular or another thick material. Hot glue those pieces in place and allow to try. Once completely dusted, it's time to glue down the pieces of the hilt you cut out in foamular or another thick material. Hot glue those pieces in place and allow to try.
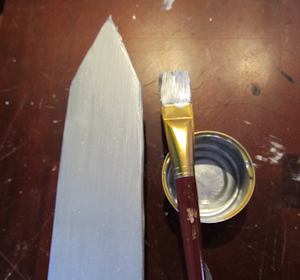
• Now the sword's body is entirely complete. Set your work station up for painting by putting down recycled magazines or newspapers to protect your work surface, grab your paint brush and a small container of warm water and silver paint. We used silver Testor's enamel for this part, but any gray or silver acylic should suffice. Paint both sides of the entire blade and let it dry for about 10-15 minutes.
• When that's dry, it's important to make sure all 360 degrees of the blade are painted. This means that the half-inch thick sides where the foam board is layered should also be completely silver. Touch up any remaining white parts and allow to dry.
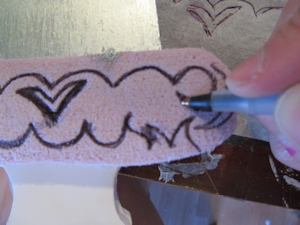 It's time to decorate your hilt. Because foamular is so easy to create an impression in, we took a black ballpoint pen and drew a couple designs on either side of the pieces. For the top, we drew a freehand vine design. For the bottom, we drew a simple lion roaring. You can do this if you want, it's your choice. This part of the sword is really up to you. Let your imagination run wild. It's time to decorate your hilt. Because foamular is so easy to create an impression in, we took a black ballpoint pen and drew a couple designs on either side of the pieces. For the top, we drew a freehand vine design. For the bottom, we drew a simple lion roaring. You can do this if you want, it's your choice. This part of the sword is really up to you. Let your imagination run wild.
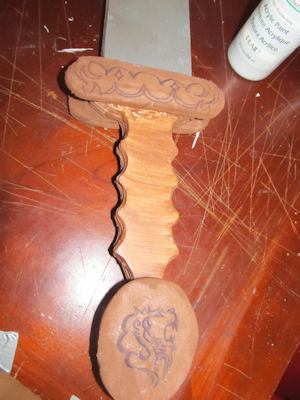 When you're done doodling on the foamular, it's time to finish this sword up by painting the hilt. We used a very simple brown acrylic paint and applied a thin layer to every imaginable part of the hilt. No one spot was left bare. When you're done doodling on the foamular, it's time to finish this sword up by painting the hilt. We used a very simple brown acrylic paint and applied a thin layer to every imaginable part of the hilt. No one spot was left bare.
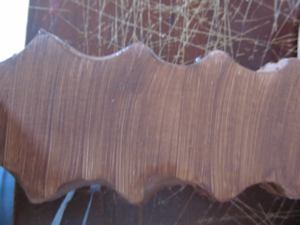
*Tip: if you paint the hilt from left to right, the lines created by the brush will mimic wood grain. (See picture.)
• Set the sword aside and allow to dry for 10-15 minutes. If it's a particularly hot or humid day, the dry time will just about double.
Congratulations! That's it! Enjoy your new Roman Gladius sword!
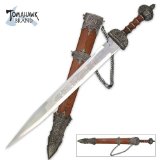 Roman Gladius Sword Roman Gladius Sword
This replica Roman gladius is an ideal piece for collectors, reenactors, or for costumes. This sword features a 440 stainless steel 22" pattern blade with a detailed knotwork design etched on the blade. The authentically designed handle offers a cast metal guard and pommel and faux wood grip. The metal scabbard offers a wood grain finish, hanging chain, and highly detailed cast metal furnishings. This historical sword measures 30" overall.
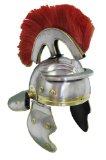 Roman Centurion officers Helmet with red plume Roman Centurion officers Helmet with red plume
Elmer's Acid-Free Foam Boards, 20 x 30 Inches, 3/16-Inch Thick, 2 Boards per Pack, Bright White (902015)

Do you like making projects and exploring a variety of hobbies?
Sign up for my free newsletter. I give you regular updates on hobbies and projects you can make. it is totally free and I don't share your email with anybody. |


