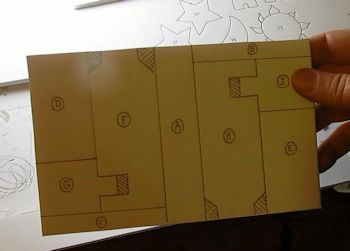
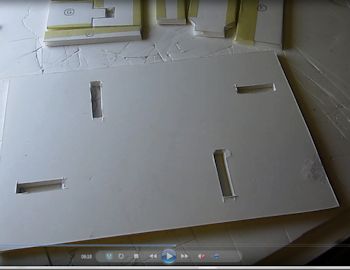
ok! Piece twenty-one. This is the piece that we didn't cut.
Now we are going to cut it. This is all of the mechanism that locks the box.
Notice the six little sections that are striped.
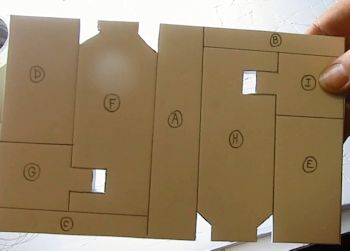
Cut those six sections right out and discard the little pieces.
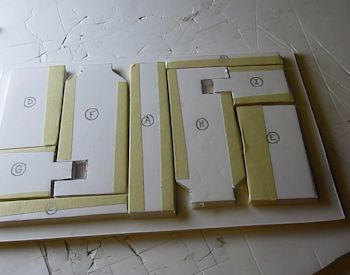
Now you can go ahead and cut those pieces so they are separated like this. But keep the whole assembly together like you see here. There are nine pieces lettered A through I.
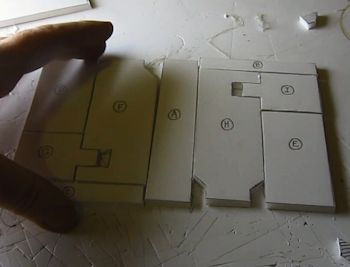
Now! Tape the various edges on these parts. We tape them because some of the parts slide. Raw foamboard edges would catch on each other. This way the tape slides against tape. Much better this way. Taping all the edges is easy. But if you want to minimze taping you tape the sliding sides of F, G, H and I. And the edges they slide against.
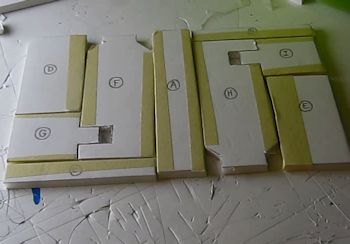
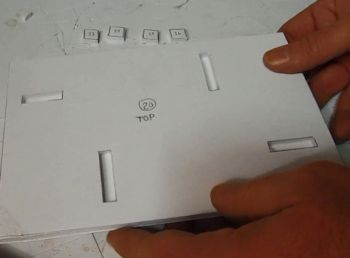
Ok, we are going to assemble the locking mechanism pieces to the underside of 20 so flip 20 over so it looks like this. Your slot pattern should be the same way as this picture.
Now place all those various pieces (21 A thru I) right onto the top of part 20 you just flipped over. Keep them all in their same configuration.
Now, go in order. Glue down pieces A, B, C, D and E.
Don't glue F, G, H and I. They are sliding parts.
And while you are gluing.
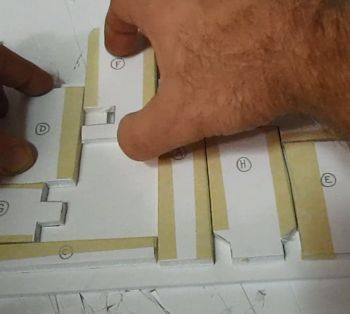
The big thing is that F, G, H and I slide. So... you want to be careful when gluing down the other pieces. Check for smooth sliding as you glue them and adjust as the glue sets. Here you can see I am sliding F and moving the glued part D to adjust the sliding action.
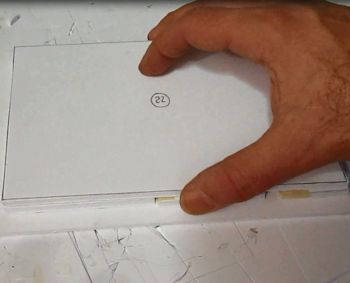
Now put a small dab of glue on top of parts A, D and E. Then rest part 22 right over the whole thing. This glues it down. Don't press down on 22. We don't want it to squeeze down on the moving parts. We just want this part to contain those moving parts.
Now flip part twenty over.
 Let's continue by making the top of the box. Add the sun, moon and stars. Let's continue by making the top of the box. Add the sun, moon and stars.
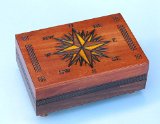 Secret Opening Compass Rose Cartography Box Secret Opening Compass Rose Cartography Box
- Handcrafted in Southern Poland's mysterious Tatra Mountains, the Secret Opening Compass Rose Cartography Box is a unique Polish box.
- The box is made of Linden wood, is reinforced with feather joints, and the base of the interior is lined with red velvet to protect your personal treasures.
- The top of the box is decorated with a compass rose design that has been burned into the wood by hand.
- This special box also features a hidden locking mechanism to keep unwanted visitors away.
- The exterior of the box measures 7 1/8 inches (18.1 cm) wide, 4 3/4 inches (12 cm) long, 3 inches (5.7 cm) tall and weighs 9.5 ounces (269.3 grams).

Do you like making projects and exploring a variety of hobbies?
Sign up for my free newsletter. I give you regular updates on hobbies and projects you can make. it is totally free and I don't share your email with anybody. |


