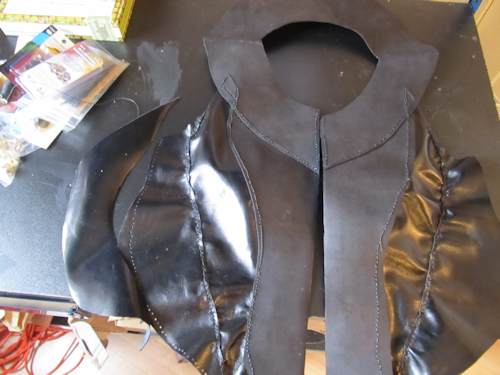
In the end for the front half of your vest, you should have one main collar piece in medium weight leather, two strips of medium weight leather lining up down the center of your body, and on either side of that, three strips of kidskin leather descending at an angle toward the sides of your torso.
(In the picture you can see most of the front. The third strip on the left side there is about to be attached. And on the right the third kidskin strip is not yet attached. )
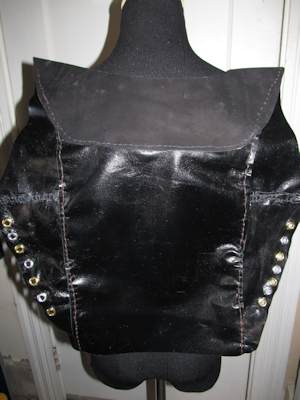
You're ready to move on to the back of the vest. The back is much easier than the front because the shape of the body is broader and flatter. Essentially all you need is a large rectangle of kidskin. Make sure the piece you cut is about as long as your back is and as wide as your waist/ribs cage (use a measuring tape if necessary). This is going to act as the main back panel of the vest. On either side of this main panel, you'll need two symmetrical strips of leather. These pieces will wrap from the flanks of your back under your arms so cut them out in a way that allows completion of the "arm holes" you were working toward in the front. This is crucial because these are the piece that will eventually have eyelets in them and become adhered to the front of the vest via leather cording laced through all the eyelets (like a shoe would be laced).
When you're confident in your three back panel pieces, repeat the process of puncturing them with the hole puncher and stitching them together just like the front.
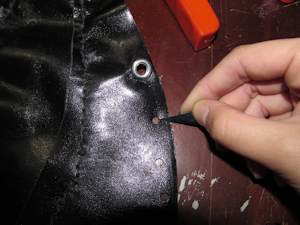 By the time this is done, you'll have a vest with open sides and a slit down the entirety of the front (where your clasps, buckles, or buttons will go). The next thing to do is insert the eyelets into your side flaps on the front and back (see picture). By the time this is done, you'll have a vest with open sides and a slit down the entirety of the front (where your clasps, buckles, or buttons will go). The next thing to do is insert the eyelets into your side flaps on the front and back (see picture).
 This process is very easy and instructions on how to use eyelets should come in the package. For this part, I used my mannequin to get an idea of where the best places to puncture my side panels would be. (See pictures) This process is very easy and instructions on how to use eyelets should come in the package. For this part, I used my mannequin to get an idea of where the best places to puncture my side panels would be. (See pictures)
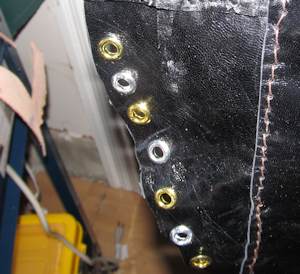
Once I was confident in my visualization, I began to punch seven roughly parallel holes into each of the four side panels. For this part I used the largest hole punch setting because the eyelets are pretty big. The best way I found to get them to fit was by slicing the holes open about an eighth of an inch wider with a utility knife, this way the holes expand enough for the eyelet to force through. Once the eyelets are all in place, you're ready to take your leather cording and lace up each side, tying off the ends in a bow.
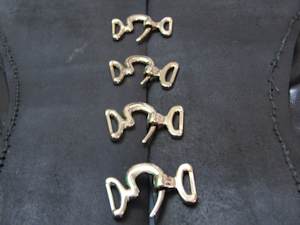 Now, you're doing great and the only thing you have left to do is attach your clasps, hooks, buckles, etc. I used these very nice hook-like clasps you can see in the picture. To attach them, I merely lock stitched them very, very thoroughly to my medium-weight leather panels in the front, spacing them out evenly and making sure they would actually function (open and close). [see picture] Now, you're doing great and the only thing you have left to do is attach your clasps, hooks, buckles, etc. I used these very nice hook-like clasps you can see in the picture. To attach them, I merely lock stitched them very, very thoroughly to my medium-weight leather panels in the front, spacing them out evenly and making sure they would actually function (open and close). [see picture]
And, with that, you're done. You've completed your very own leather rogue vest! Well done
Let's Take a look at some of the tools

Leather Side Piece Veg Tan Split Medium Weight 36 X 36 Inches, 9 Square Feet
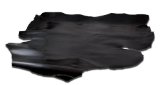
Springfield Leather Company Kidskin, Black

SE Leather Hole Punch Tool, Heavy Duty 2.0mm - 4.5mm
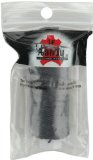
Leather Factory Waxed Nylon Thread 25 Yard Spool-Black
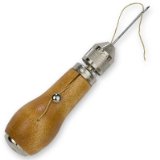
Speedy Stitcher Sewing Awl 120

Do you like making projects and exploring a variety of hobbies?
Sign up for my free newsletter. I give you regular updates on hobbies and projects you can make. it is totally free and I don't share your email with anybody. |


