Hi, Thanks for visiting my website. My name is Will and if you have questions
or would like to
contribute projects or ideas you can contact me
Working with miniature 3d Printed Parts - tips, tools and ideas
3d printed parts and objects are really coming into prominence. It is now very easy to get all kinds of things that have been 3d printed. And you don't need a printer. I will show you how to cheaply and easily get parts printed up.
I also have a video for this tutorial at the bottom of the page.
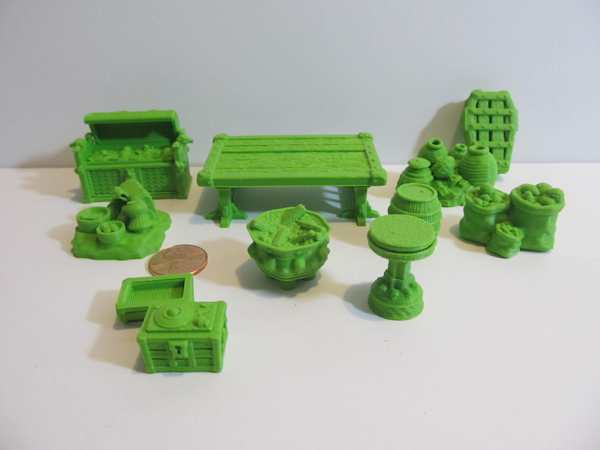
I received a series of miniature parts from a company called Hobgoblin3d. They make a variety of table top gaming pieces in the 28 mm scale. I really like them because they are very fantasy oriented and their miniatures look great. In this series we will take a look at them and we will look at the whole process of making and using 3d miniatures.
The thing about these hobgoblin3d miniatures is that you don't buy them. You buy the plans for them in the form of a STL file. And you print that on a 3d printer. I will explain more about this process. And you don't need a 3d printer.
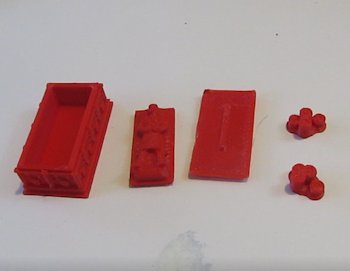
(The hobgoblin3d printed miniature parts. Notice the penny as a size comparison.)
Would you consider a donation of $1 to support my work? Paypal makes it very easy and safe. Click here to donate $1 - Every little bit helps Will to keep making great tutorials and projects. Thanks!
How to Get a 3d Part Printed up
The Process of getting your own 3d printed parts without having a 3d printer.
The price of 3d printers has come down dramatically over the past several years. You can now get a basic one for about two hundred dollars. Yes, two hundred! There are a lot of different ones from different companies and they can get expensive too. Consequently there are a lot of printers out there and you can avail yourself of them without buying one.
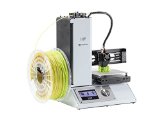
Note: If you are considering buying a 3d printer amazon has them. I have a page for them right here: 3d printers.
Step 1: Get a file called an "stl" file. This stands for stereolithography file. It is the information about an object. It tells a 3d printer everything it needs to print up an object in 3d.
I went to a website called pinshape.com. They have a wide variety of 3d stl files you can purchase.
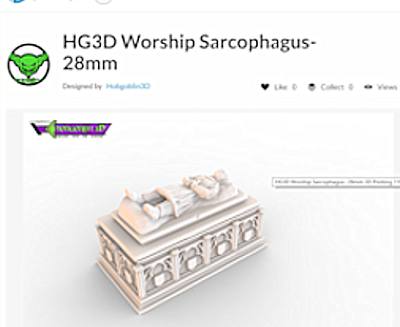
Step 2: Browse through the various objects they have and purchase the file you want made. I purchased something called a sarcophagus made by Hobgoblin3D. I used paypal and it cost me $3.50. Then I downloaded an stl file. There is a second file (pdf) that gives you some information about the sarcophogus.
Step 3: Get somebody to print it up for you. I went to a website called 3dhubs.com. They have a stable of people all over the country that have 3d printers for hire. You can search for a person or service by location if you prefer. I chose somebody in my home town and sent them a job request including my stl file to be printed. I got a quote to print one up for $4.05. Not bad at all. I selected to pick it up myself. Seeing as it is in my home town. They also have a shipping options for a fee. This shipping cost may vary. I am not sure.
Total Cost: $7.55 and that includes getting the stl file for the sarcophagus and getting one copy printed up. Note that having purchased the stl I can have as many printed up as I want. There is often, of course, a copyright disclaimer. You generally cannot print them up and sell them! You can print as many as you want and use them for personal use.
Alternatively you can have your item printed up online and shipped to you by a company called shapeways. I did this option too! Although it cost me more. I used paypal to pay for it and it cost a total, with shipping, of $20.88. And they have a whole series of printing options including a variety of plastics, colors and even metals.
Free Resource for 3d Models: Thingiverse is a place where you get browse through hundreds of thousands of free 3d models.
Let's look at a 3D printed Part
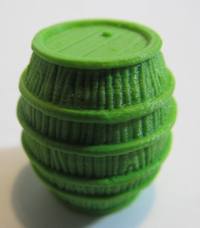
This Hobgoblin3D barrel is 3d printed. And if you purchase the stl file you can print up a whole lot of them very cheaply. If your dungeon has lots of barrels then this makes a lot of sense.
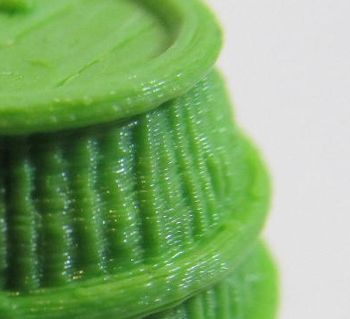
And here is a closeup of it. If you are not familiar with 3d printing this picture shows you what it is all about. A 3d printer lays down a series of layers of plastic, one right on top of the other. In this picture you can clearly see the layers.
This layering effect is almost unnoticeable. And paint will somewhat cover it up. And this is also affected by the printer. Printers can be set to print at different resolutions. Thus you can do a faster print with a more prominent layering or print it at a better resolution.
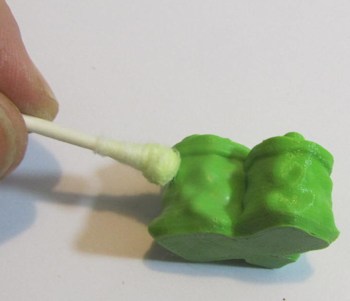
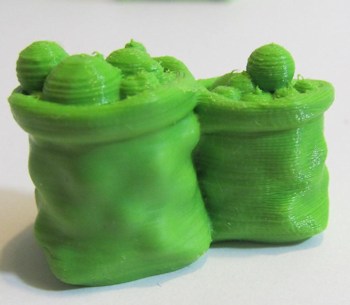
But let me show you something. You can use acetone to remove this effect. I used a q-tip and acetone to firmly wash one of the potato sacks in this pair. I only worked on one so you can see the difference.
This next picture shows how much that sack has been smoothed. It almost looks like the picture is out of focus. But it isn't. That sack on the left is simply smoothed out. You can compare it to the sack on the right where the printing ridges can be see. And you can also see the printing ridges in all the veggies in both sacks.
This picture looks like it might be out of focus! But it isn't! The sack on the left has been smoothed out with acetone.
So, acetone works very well if you want to smooth out 3d printed miniatures. And you can also exercise some control of this when printing them up or when working with someone who will print them up.
Manipulating and cutting the Parts
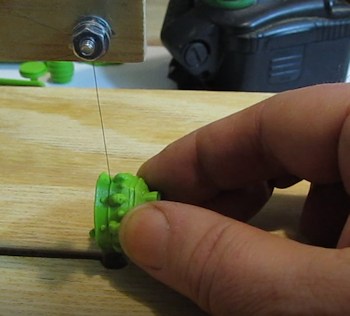
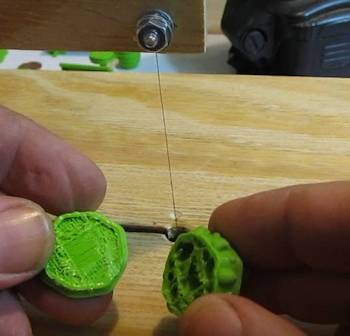
They are plastic which means they are pretty easy to manipulate. You can cut them with a jewelers saw or other type of saw. I have a home made hot wire foam cutter and I gave it a try and sure enough it cuts through the plastic.
But, my hot wire foam cutter is custom made with a power supply which means I can adjust the heat of the wire as needed. So, I am not sure if a normal cutter will work on these parts.
I cut open this cauldron so I could put an LED in it. More about how I did this is coming in this tutorial. But first let's take a look at painting the parts.
Gluing together the Parts
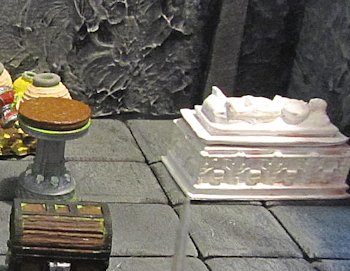
One of the parts that I had printed is the Sarcophagus. You can see it in the picture above. It is an assembli of several parts.
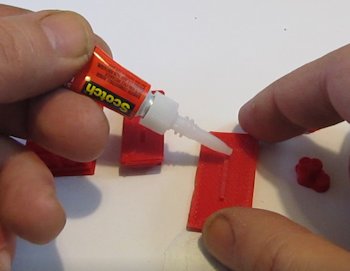
To glue them together you can use superglue.
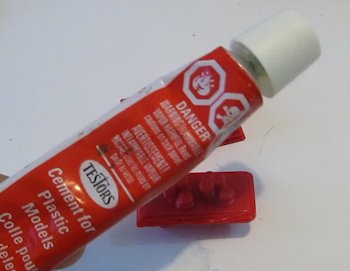
Or plastic Model cement. Be sure to always test the fit of parts before gluing.
XTC-3D® is a protective coating for smoothing and finishing 3D printed parts. Two liquids are mixed together and brushed onto any 3D print. Coating self-levels and wets out uniformly without leaving brush strokes. Working time is 10 minutes and cure time is about 4 hours (depending on mass and temperature). XTC-3D® cures to a hard, impact resistant coating that can be sanded, primed and painted. Adding colors and metal effects is easy. Inexpensive to Use: 1 oz covers 100+ square inches. 90% Time & Labor Savings: XTC-3D® fills in 3D print striations and creates a smooth, high gloss finish. The need to post finish is almost eliminated. Coat any 3D Print Surface - XTC-3D® can be applied to both SLA and SLS prints. It works with PLA, ABS, Laywoo, Powder Printed Parts and other rigid media. It also can be used to coat EPS, EPDM and urethane foam as well as wood, plaster, fabric, cardboard and paper. XTC-3D® does not contain VOC's, phthalates or phosphates.