
Home

I have a youtube channel with over 1000 Project Videos!


Wills Pinterest !


Hi, Thanks for visiting my website. My name is Will and if you have questions
or would like to
contribute projects or ideas you can contact me 
How to Make a Paper Mache Skull
�
Looking to make some Halloween decorations? Well here's a good Halloween project that's fun for the whole family! In this project we make a paper mache skull. For this tutorial I used foam board as a base, but you can try using a balloon. Remember the most important thing is to do whatever works for you. In the end, this makes for a great Halloween project and decoration for your home.
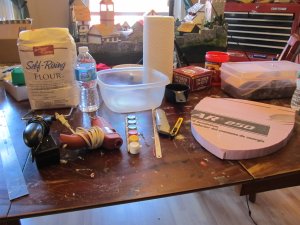
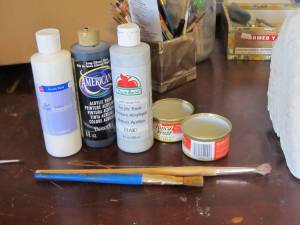
Let's begin with the materials you are going to need for this project.
- Flour
- Water
- Paper towels for newspaper
- foam board
- Tools for Sculpting (a knife, scissors, a file etc.)
- A hot glue gun
- Measuring cup
- Paint and brushes
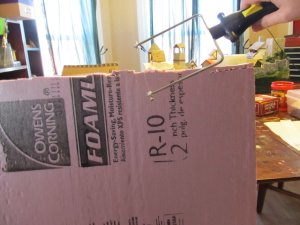
First,
cut 3 square pieces of foam board with whatever cutting tools you decide to
use. You can cut the square pieces any size depending on the size you want
your skull. For this example I cut each piece 10x10in to make sure there is
enough material for the sculpting part of the tutorial. This way if you need
to fix the shape of the skull at some point, you have enough to work with.
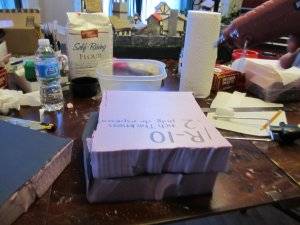
Next,
using you hot glue gun put the three pieces of foam board together as even
as possible. It's ok if it's not perfect. You are going to be reshaping this
later anyway.
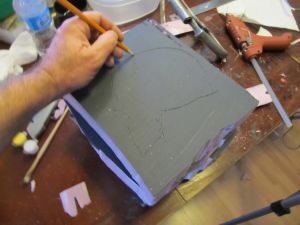
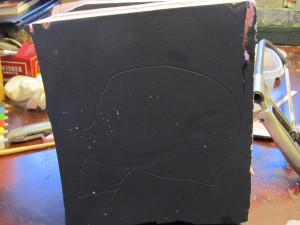
Now
trace the outline of your skull so you have something to follow as you shape
your foam board.
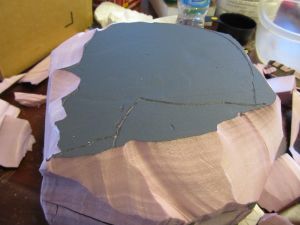
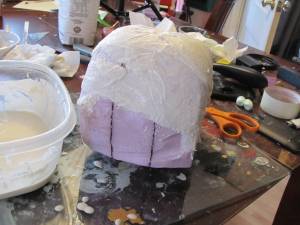
Here's the point where you sculpt your foam board. First start with
the shape of the skull. As you cut around the outline you can round off the
edges in order to make a more skull like shape.
Now using a knife carve out the features of your skull such as eyes,
nose, a mouth, etc.
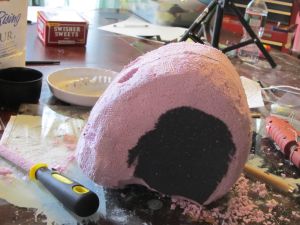
Also
if you want to shape the skull further before you paper mache now would be
the point to do it. At this point I angled off the face and further rounded
some of the edges. Once again this does not have to be perfect. Any rough
points can be fixed up with the paper mache.
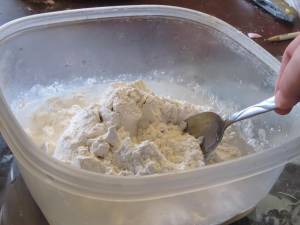
Now
mix up your paper mache with equal parts water and flour. In this project I
used 2 cups of water and flour.
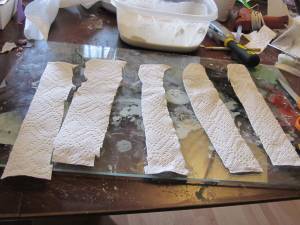
Next,
cut your paper towels into thin strips. Remember to make a solid amount of
strips for the project as you do not want to have to cut anymore as you are
doing the paper mache. Roughly 20 strips should be sufficient.
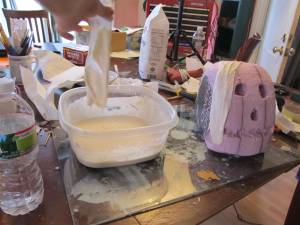
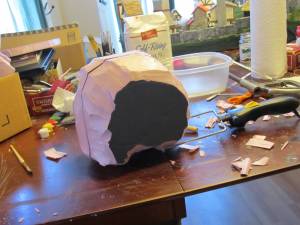
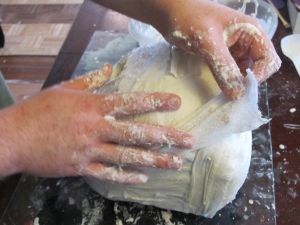
Dip your paper towel strips in the mixture you made earlier and apply
2 layers or as many as needed to get the skull as smooth as possible.
Remember to get rid of excess paper mache mixture on your strips as it will get
messy:
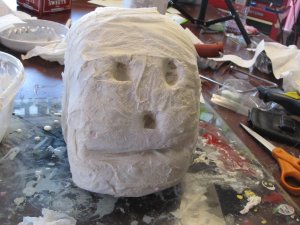
You can use the second layer in order to smooth out any rough parts in
the skull. If need be you can add other layers until the skull is the way
you want it. Note: If the holes for your eyes, nose, or mouth are too small,
because of the paper mache you can carve the features out a little more
since you are going to paint this later on.
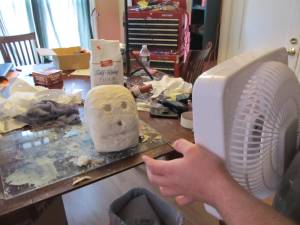
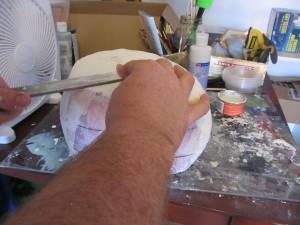
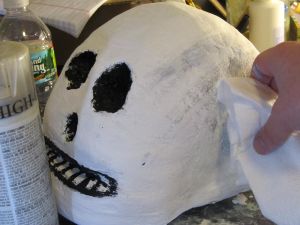
Let
your skull dry off and then start the painting process. For faster drying
you can use a fan.
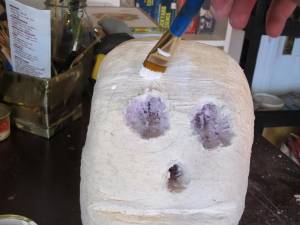
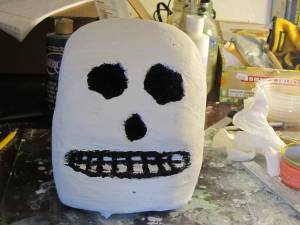
Add several layers of white paint. You want the color to be solid since
this is the base color of your skull. At this point if you used paper towels
or anything like that you can smooth out the small indents by applying
several layers of paint, letting them dry, and lightly filing them. This way
the paint will sort of fill the holes.
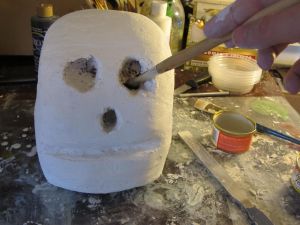
Now it's time to paint the facial features black. At this point you can
also be creative by painting things such as cracks on the skull or anything
else you can imagine.
Now
as an optional step you can choose to add certain details to make the skull
look old and kind of weathered. I used grey paint and a technique called
washing. All you do is create random lines of grey paint and before it dries
use a damp paper towel to blur and spread it around.
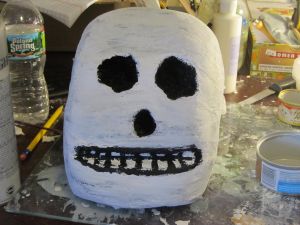
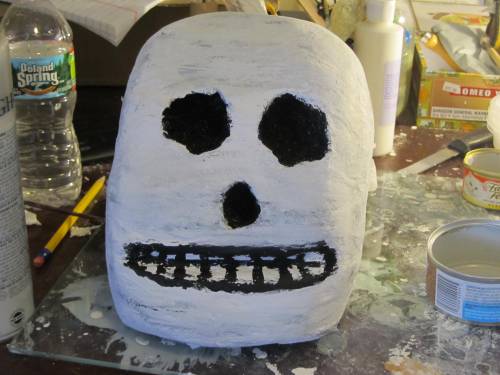
The
end result should look something like this. Now your project is done and you
can enjoy your own home made Halloween decoration!
GET MORE HALLOWEEN STUFF ON AMAZON

Grinning Skull

Halloween Fake Skull with Fangs Prop
How to Make Masks!: Easy New Way to Make a Mask for Masquerade, Halloween and Dress-Up Fun, With Just Two Layers of Fast-Setting Paper Mache

Do you like making projects and exploring a variety of hobbies?
Sign up for my free newsletter. I give you regular updates on
hobbies and projects you can make. it is totally free and I don't share
your email with anybody.
