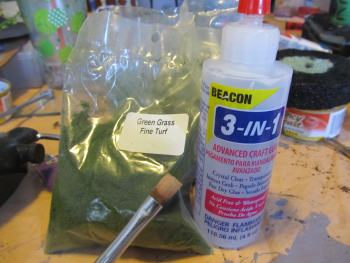
I use turf terrain for a lot of the aging of the temple. You can apply beads or lines of glue or you can even brush the glue on in large patches the apply or sprinkle on the terrain turf.
This type of turf is a very common material that is used in diorama making and train set making. It comes in a wide variety of colors and textures and is simply great! A company called Woodland Scenics makes it.
Fine Turf Bag, Green Grass/18 cu. in. This is the stuff, it is available on amazon.com in a lot of different colors and textures. This is the stuff, it is available on amazon.com in a lot of different colors and textures.
Quick Side Note: I have a whole lot of stuff on how to make dioramas and in particular fantasy dioramas using this terrain turf. You can check all that out right here: How to make Dioramas
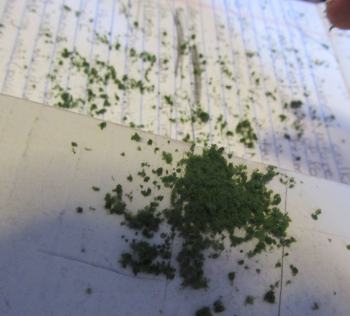
Here is some sprinkled texture. You can just apply lots of glue with a paint brush then sprinkle on the texture for random patterning. And, white glue works really well for this. You can mix the white glue 50/50 with water and it will brush on easily and evenly.
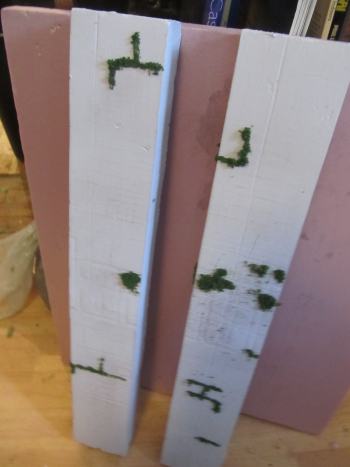
And here are some columns that will go against the wall in the temple They have some textures glue onto them. For this I used some coarser texture not the fine granular stuff. It's almost v like bushy. One thing to look at here is the way the moss or plants are kind of hugging along the brick lines in the columns. That is the way it would happen in real life.
Now Let's Take a look at the columns, the wiring and the lighting
The picture below shows the temple as I am making it. There are a couple of things that I will show you more about including the making of the columns, the making of the stained glass window and the lighting/wiring.
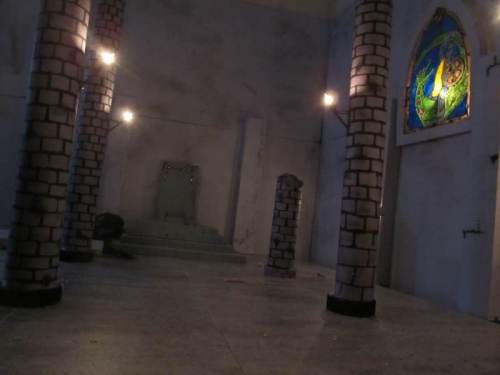
The temple has a series of spaces along one wall. And in those spaces I am placing four stained glass windows that tell a story. You can see in the picture above the first stained glass window is in place and back lit with a bulb.
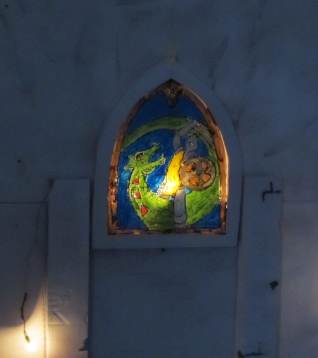
Here is a closer look at the stained glass window. I have a complete tutorial on how to make this right here: Make a stained glass window.
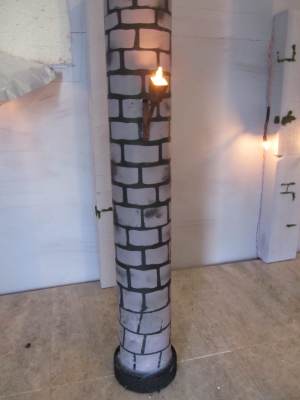
To add the lights to the wall and the columns I drilled holes in the columns and in the floor of the temple so I could run the wires down and underneath everything.
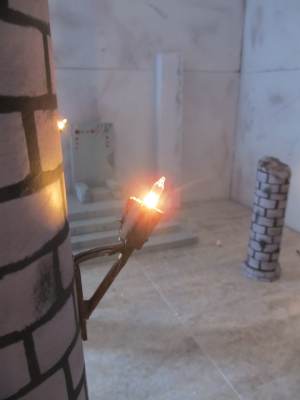
The torches are christmas tree lights that I wired in. I bought a string of them and cut the string to get individual lights. The torch holder is just some small pieces of balsa wood to make a torch shape.
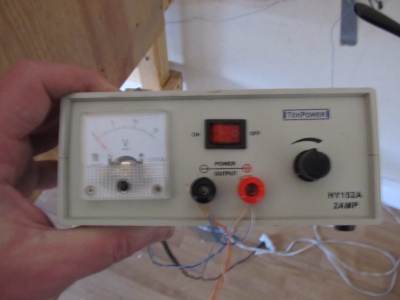
The christmas tree lights are good at 120 volts, typical house voltage but I am using a power supply to bring it down to 15 volts. This way it is easier, safer and I can vary the voltage to change the lighting. It acts much like a dimmer knob. I can make the temple darker or brighter as I need it for the animation.
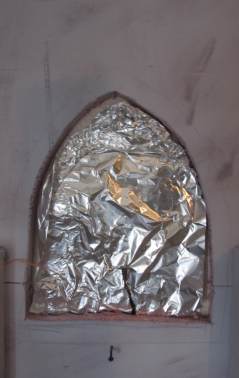
I cut out the foam wall behind the stained glass window and put aluminum foil in there to spread out the back lighting. Its a bit tricky to see but there is the christmas tree light right in there.
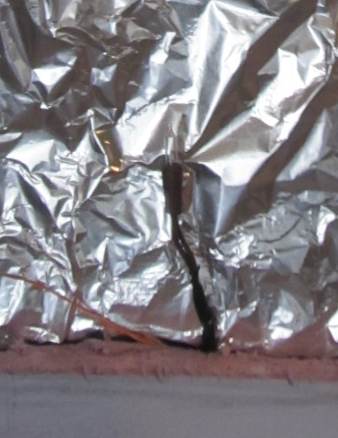
Here is a closeup so you can see that light. I will do the same thing with the remaining three windows.
 Let's continue on with this tutorial and see how I made and added some of the details like the treasure chest and the skeleton Let's continue on with this tutorial and see how I made and added some of the details like the treasure chest and the skeleton

Do you like making projects and exploring a variety of hobbies?
Sign up for my free newsletter. I give you regular updates on hobbies and projects you can make. it is totally free and I don't share your email with anybody.
|