![]()
I have a youtube channel with over 1000 Videos!
![]()
![]()
![]()
Trebuchets You can Make
- The Little Dragon Trebuchet
- Tennis Ball Trebuchet
- Ten Foot Trebuchet
(The Behemoth) - Popsicle Stick Trebuchet
- Office Supply Trebuchet
- The Bicycle Wheel Trebuchet
- The popsicle stick trebupult
- Free Trebuchet Plan
Trebuchet Research
- Trebuchet Videos
- Tips on Improving your Trebuchet
- Trebuchet Physics
- Trebuchet Blueprint
- The History of the Trebuchet
- The Trebuchet art, some good tips
- Egyptian Trebuchet
(200 years old)
Buy Trebuchets
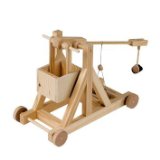
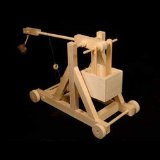
- Trebuchet Kits
- Siege Engines you can buy at amazon.com
- Unusual Siege Engine Kits
- Kits to make big Siege Engines
- Books/Medieval store
- Trebuchet and siege engine documentaries
More Trebuchets
- The Carpenter's Trebuchet
- PVC Trebuchet
- Ken's Trebuchet
- Koji's Trebuchet Improvements
- John H. Trebuchet
- Adil's Mini Trebuchet
- Gabe's Ferrari of Trebuchets
Similar Projects
Will's Other Subjects
- Blacksmithing
- Bonsai
- Classical Guitar
- Dioramas
- Fantasy Art School
- Goldfish
- Leathercrafting
- Military Dioramas
- Make Video Games
- Mead Making
- Miniatures
- Model Rockets
- Nature projects
- Origami
- Paper Making
- Paper Games
- Paper Projects
- RC Airplanes
- Science Projects
- Stained Glass
- Stamp Collecting
- Stop Motion Animation
- Sword Making
- Tatebanko
- Telescopes/Astronomy
- Terrariums
More Stuff
- Medieval Website
- Medieval Projects
- Medieval Castles
- Press/Media kit
- Contribute a tutorial to my Website
- Privacy Policy
- Contact

Hi, Thanks for visiting my website. My name is Will and if you have questions
or would like to
contribute projects or ideas you can contact me