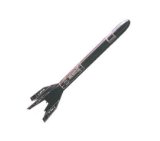 
Big Bertha Rocket Kit - Big Bertha is an Estes original! Big, burly, black and beautiful perfectly describes this classic. She's an all around Estes favorite that has truly withstood the test of time. Over the decades, Big Bertha has been most modelers' first big build. While standing on its massive fins, this big black rocket checks in at an impressive 2 feet (61 cm) tall. If you've never flown a Bertha, get one and launch it. Once you've flown it, you'll take it to every launch!
I have a video that shows my launch of this rocket and this assembly procedure
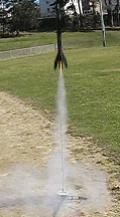
The Big Bertha gives you a slow, realistic liftoff. What a thrill it is to watch! Propelled by powerful standard Estes engines, this beauty travels to 500 feet (152 m) and comes back to earth with a decorated 18 inch (46 cm) parachute. Quality Estes body tubes, laser cut balsa fins, molded plastic nose cone and easy to apply self-stick decals make for an afternoon of building enjoyment. In one afternoon your Bertha is ready for an exciting time at the launch field!
Cutting, sanding and painting required. Building tools, finishing supplies, engines and launch supplies also needed - sold separately. Recommended for ages 10 and up with adult supervision for those under 12.
Specifications:
Length 24 in. (61 cm)
Diameter 1.64 in. (41.7 mm)
Weight 2.2 oz. (62 g)
Recommended Engines
B4-2
B4-4
B6-2
Max Altitude: 500 ft. (152 m)
Building the Rocket
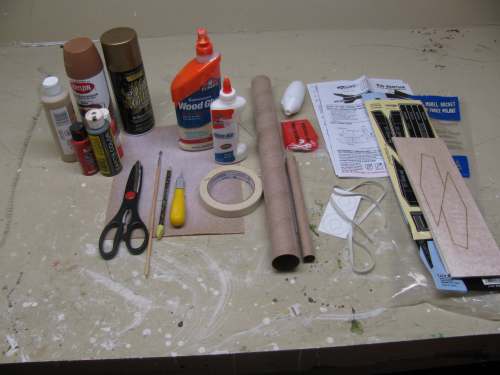
The picture above shows everything that comes with the kit and everything you need to make the rocket.
You should open the package and carefully inventory everything. This is to make sure nothing is missing and to familiarize yourself with the various parts.
Tools and materials you need:
- Scissors
- Glue (White or yellow)
- Hobby Knife with a sharp blade
- Sheet of sandpaper
- Masking Tape
- Pencil
- Paint (Spray paint is best but you can use a brush on acrylic)
The First thing you do is to assemble the engine mount. It takes a few measurements and you glue on three parts: the two white rings on the end and the metal engine hook. You also use a small amount of masking tape in this step. It is wrapped around the tube and engine hook.
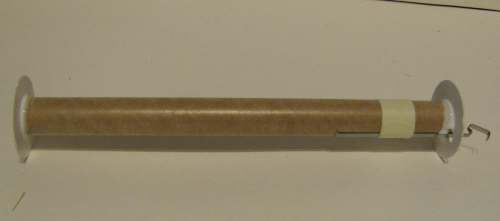
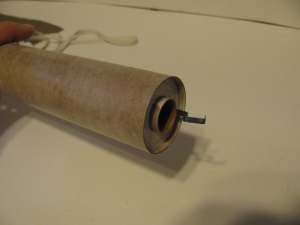
Once the glue on the engine mount has thoroughly dried you glue it into the rocket tube as shown. The instructions show you the measurements for this and where to put the glue.
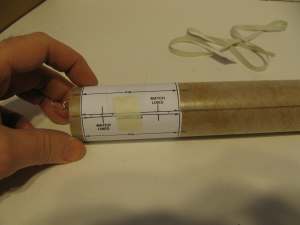
The cut out the marking guide and wrap it around the tube. Then you mark with a pencil where the fins and the launch lug go.
Now Let's do the fins
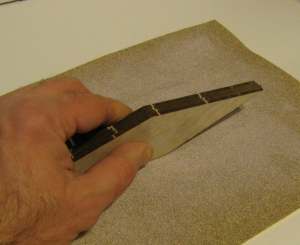
With your hobby knife cut out the four fins from the balsa wood sheets; stack them together and sand all the sides.
Sanding them together like this insures they are all the same size and shape which makes a difference on how well the rocket will fly.
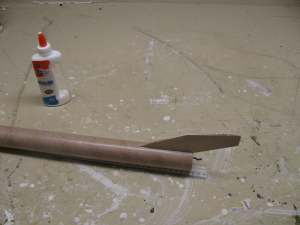
Carefully glue the fins onto the rocket body. This takes some effort and can be a bit tricky. take your time with it and get them as straight as possible. There is a template in the instructions that will help you line up the fins nice and straight.
It usually helps if you put a line of glue on the fin edge then set it aside for a minute or two so it gets tacky. Then you press it onto the tube and hold it in place for a few minutes.
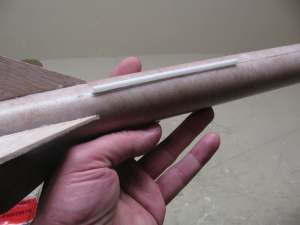
Once the fins are dry you can mount the launch lug onto the body of the rocket.
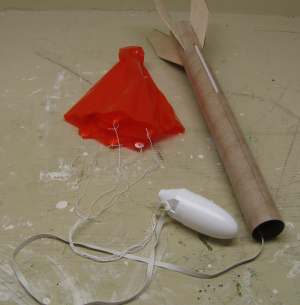
Finally you make the shock cord assembly, and assemble it together with the parachute and nose cone.You attach this into the nose cone.
Follow the instructions carefully on this and make sure the glue will hold it very tightly. This can separate during flight if it isn't all attached very strongly.
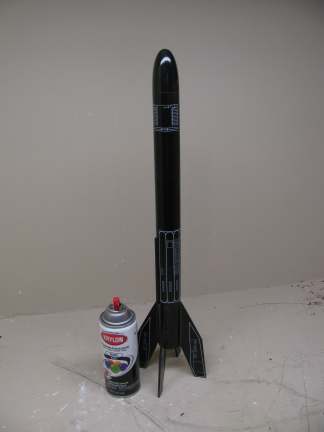
 Here is the completed rocket. It now needs paint and the stickers to be attached. It stands over two feet tall. Here is the completed rocket. It now needs paint and the stickers to be attached. It stands over two feet tall.
The Completed Rocket
|