|
||||||||||||
|
|
Make a Video Game Tutorial Part 4: Textures, What they are, how to get them, how to make them and get them in your game.
If all this is done you are ready to get them in your game.
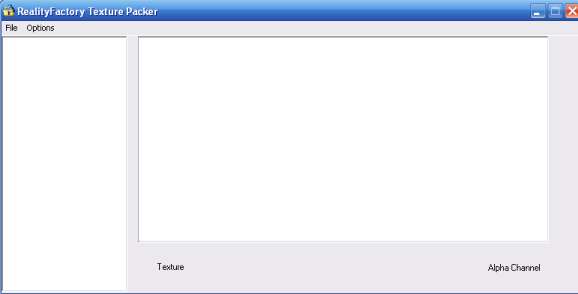
DO This First: Outside of the game software and using Windows Explorer navigate to your reality factory folder. In that folder you see a group of subfolders like this: Docs Create a new folder and call it "myimages" without the quotes! Now your reality factory has a new folder where you will store all the images you make. It should now look like this: Docs Reality Factory needs its graphics to be in a format called .txl or (texel) and it has a program that will take your bitmap files and turn them into .txl files. This program is called RF Texture Packer and it is really easy to use. USING RFTexturePacker TO IMPORT GRAPHICS INTO YOUR GAME RF Texture Packer is a program that converts .bmp files to .txl files (which are what your level needs to draw graphics in the game) Using Windows Explorer you need to hit the start button to bring up your program files. Then select Reality Factory | tools | RF Texture Packer and the Texture packer program comes right up. It looks like this:
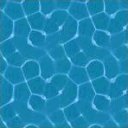
Now here is an image for you to get into your Reality Factory Game:
Right click on this water image and select "Save Picture As" then pull down the menu and select .bmp not jpeg. Save this image onto your computer somewhere you can easily find it like on your desktop
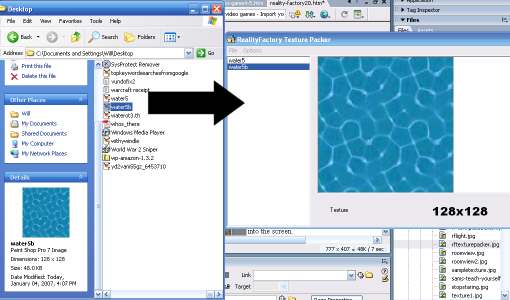
Now using windows Explorer navigate to where on your computer you saved this picture and drag it. Yup, it seems kind of odd but you are using windows explorer while you have a program open (Texture Packer) and you are dragging files right from explorer into Texture Packer. ) Find the file you want to move into RF Texture packer and single click then drag and drop it right over to the Texture Packer window.
This image shows texture pack and windows explorer both open on my desktop. I simply dragged the file over to the texturepack application and dropped it right in. When I then clicked on the file in tpack the picture popped right into the screen.
WIth this image highlighted in TPack save it into a reality the reality factory folder you created at the top of this page. It is called "myimages" . This will make it easy to find. Make sure you give the file a name and that it is saved as a .txl file. You can repeat this process with more textures and import as many as you like. Just put them all in the "myimages" folder. Okay so now the graphic or graphics you made are saved into the Reality Factory game. There is only one more thing you have to do in order to actually use them in your game. Now How do You work with this new Picture(s) in your Game? This is real easy. All you do is when you have the game design desktop open you simply pull down the Project Menu then select Level Options; Hit the browse button then go to your myimages folder and inside it click on the graphic you imported. And Voila you are done. Your graphic is now inside the texture tab and you can use it normally. But wait a minute! There is only one graphic and you want to import lots of them. This is easy, when you are using tpack you simply drag over as many images as you want. When you save it to the myimages folder all of these images are packed up into a single file. Then when you choose Project | level options and browse to that folder all of the images pop into the Reality Factory game editor. Review: When you have several images in your myimages folder and you want all of them to show up in the texture browser for game making you select Project | Level Options then with the Texture Library browse button you press browse, browse to the folder called myimages and single click on it so it is highlighted. This selects the whole folder. You hit the open button twice then hit the ok button and the textures are popped into your game under the Textures tab. If you brows to a specific image only that image will be popped into your workspace of RFEDit Pro. If you browse just to the folder then all its contents will pop in.
Okay, Let's Review In this chapter (4) of the tutorial you learned about graphics, textures and tiles. How to create them so they are seamless and what sizes and formats you should save them in. You have made some textures yourself and imported them right into your game. WOW. You might not realize it but you have accomplished quite a lot. This is a very important step in making video games. The next Big step in your learning how to make video game is to make and import models. But that is some serious stuff. You should review all of this texture part of the tutorial and make some more textures, import them and see how they look. Get good at this then we will do the next part of the tutorial (Models)
|
|||||||||||
Copyright©2001-2016 Kalif Publishing - Contact, copyright and Disclaimer - Let's Make Something T - Storm the Castle T Publishing
|
||||||||||||