|
||||||||||||
|
|
Applying different textures to your game room
This lesson focuses on highlighting and applying textures to individual surfaces in your game world. Now this works for everything you would create in your world -not just the walls. If you created a staircase, a table, a picture, a bannister, a trash can or anything at all you would apply textures to it.
But we want to apply individual textures to the different surfaces of the room. In the game these surfaces are called "faces".
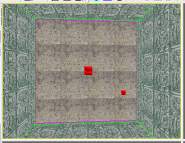
In this image I have selected the flat wall or "face" that is directly facing us. What happens is that whole face is outlined with the violet lines and the other faces in the room return to green. This means you can edit that face now. So, click on the textures tab then select a texture and double click it. The face you selected will turn to a new texture.
Now that surface has changed to the new texture. I chose cunieform.
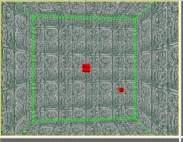
Go ahead and place textures on all the surfaces in the room. Experiment a bit with things to see what looks good. Try putting all the walls the same then try the walls all different. Don't forget to do the wall you can't see in my pictures. This is the wall closest to us. To look at all the walls just click/hold and drag your mouse in the 3d window and you can move around the room.
To get out of the face editing mode all you have to do is hit the pagedown button again and the game reverts to having the whole room selected. When you have gotten this room the way you like it go ahead and press the build button again and then play your new game.
|
|||||||||||
Copyright©2001-2016 Kalif Publishing - Contact, copyright and Disclaimer - Let's Make Something T - Storm the Castle T Publishing
|
||||||||||||


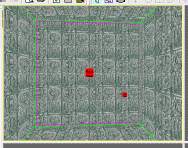
 Now that your room is selected all you have to do is hit the pagedown button on your keyboard. This digs deeper down into the selected object and allows you to select individual faces. The lines turn violet in color. Now you can select individual faces by clicking on them.