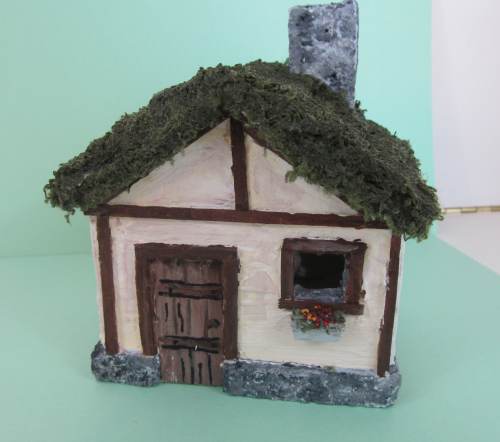
This picture shows the completed project.
Let's Get Started
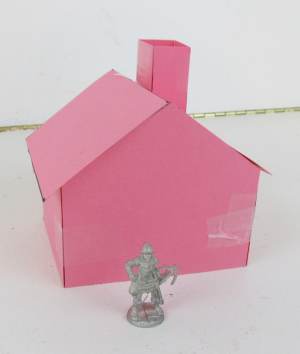
As is almost always the case you should do a mock up o f the building with cardboard, posterboard or card stock. This is important because you can judge the scale and get it to look just the way you want before building it.
Once your paper template is correct take it apart and trace all the pieces onto foam board or cardboard. Cut those pieces out and glue it all together so you have your building completed.
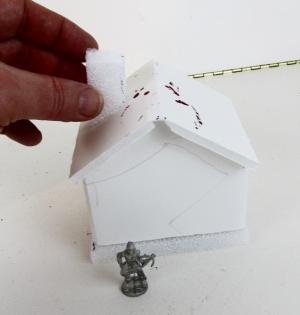
I have also added some foam to this building. A couple of pieces of foam glued together make the chimney and a piece of 1/2 inch foam for the base under the building.
This is just typical hobby foam that comes in sheets. You can buy these just about any hobby or craft shop.
Glue the chimney and foam base onto the building.
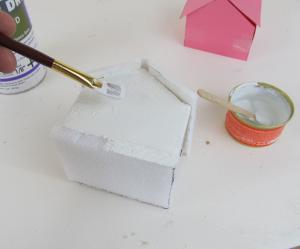
Now to get that great medieval building texture you mix up a small batch of grout and paint it on the whole surface of the diorama including the chimney and the foam base. You don't have to grout the roof though. We will be covering that with another material.
Couple of Notes: You can add acrylic paint to the grout which will give it a nice tint. Antique white really looks good. This will also save you a bit of painting later. Me? I just went ahead and used the plain grout and painted it later.
Also: You don't have to use grout. You can also use a product called celluclay. This is a fine art grade of paper mache that will look great.
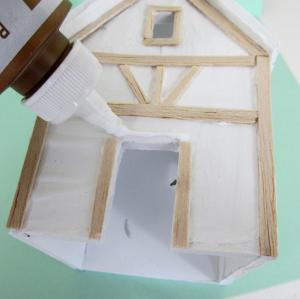
Once the grout has dried you can apply the various wooden beams using a white glue. The picture shown here is a of a different building in the series but you get the idea. If you are making the exact peasants house that I have in this tutorial you can see the other pics to get the layout scheme for the wooden beams. The very first picture in this tutorial is great for this.
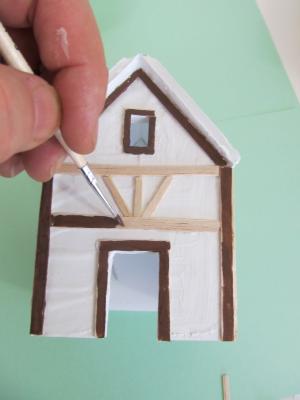
Once the glue has dried you can go ahead and paint the beams. You can also paint the walls of the building if you want to. You don't have to get real detailed at this point. You can finish up the detail work later on.
But you may want to finish the chimney because we are going to do the roofing next.
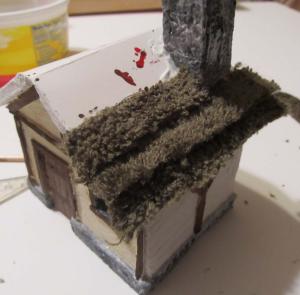
The roof thatching is the most exciting part of this little diorama building. It is just 3/4 inch thick strips of bath towel. Select a bath towel with a nice thick nap. Just glue it down to the roof in strips as shown starting from the bottom and working up toward the point of the roof. Do the same on the other side.
I used a green bath towel but brown or gold also look excellent. You can also paint right over the whole roof once you have it glue on. So, any color will do.
Overlap each layer about half way onto the layer below it.
Next apply a sealant to the roof. This will matte it down nicely and while you are doing this use your brush strokes as shown to make the thatching go all in the down direction. This way it looks like straw material that has been laid down. Use a clear sealant.
If you are not familiar with sealant you can get it in any hobby or craft store in the section where they sell acrylic paints in the tube. It also comes in a tube and you can see the tube of open sealant in the upper left corner of this picture.

Once the Sealant was starting to get hard, but not completeley, I used a hobby knife to really get a lot of detail out of the roof. I applied hundreds of fast cutting strokes to give it good definition and to bring out the layering effect.
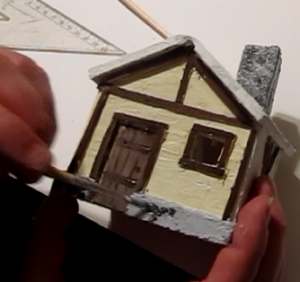
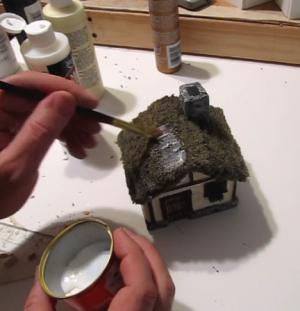
Quick note about doing the stonework.
In the picture you can see that the stonework of the chimney is done. It looks great. And in the picture I am working on the base stone work. You get this stone effect by first painting a complete coat of gray. Then you dabble on some black and dabble it around. Then you dabble on more gray and keep dabbling. It takes a little bit of practice but you will get it.
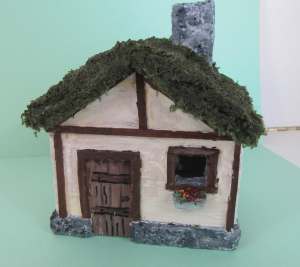
Ok, now you can go ahead and do all your final detail work like touching up the paint and adding little things. I carved a small balsa wood window box and glued it under the window then added terrain textures as flowers.
Once you are done you should seal it all with a sealant.
You can go back to the main Medieval Village Page here
Or Go to my Main Diorama Page here

Do you like making projects and exploring a variety of hobbies?
Sign up for my free newsletter. I give you regular updates on hobbies and projects you can make. it is totally free and I don't share your email with anybody. |