|
||||||||||
|
|
How to make a video game Part Two - Placing objects in your game - We start with columns
In this lesson we are going to learn and practice some new video game making techniques. Adding columns to your video game is quite easy. Columns are prefabricated objects that you can select and pop right into the room. You just have to resize them and add texture. Placing objects in your game is a fundamental skill. When you have mastered placing columns in your game you will be able to place all kinds of other objects in your game. There are many many prefabricated objects already built like staircases, furniture, plants and all kinds of other things you can easily place right in your game. Create a big room - Follow this process to quickly make a big room. We want it to be at least four times the size of the default room. Start a new Project Hit enter to accept the default cube. This is the hollow brush that comes up automatically. Press the camera button
To do this you go to select mode
Now use the skills you have learned to Place some nice textures in the room and some nice lighting.
Here is a quick review for textures in your video game: Go to select mode Click on one of the edges of your hollow square Hit the Page Down button and your square turns purple. this means you are going to edit. In the Textured View Pane single click on the floor of the room. (Remember you will have to pan around in the textured view pane to get to all the various walls, the ceiling and the floor. To do this you press the camera button, then right or left click and drag to move your view around) return to select mode and hit page down to continue editing. In textured view Pane single click on the floor of the room. The lines around the floor should turn purple and the other lines for the room should turn green. this means you can modify the texture of jus the floor.
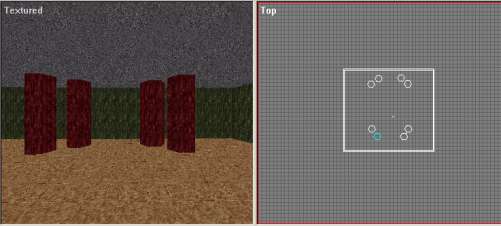
Repeat this process for all the surfaces of your room. Vary the surfaces and make it look appealing. Here is a view of the room I completed:
Switch back and forth between Camera mode and select mode Camera mode allows you to move around in the room so you can see the next surface and select mode allows you to select a surface and quickly apply a texture to it.
Now let's add some columns. Press the pagedown button to get out of surface editing mode. Press the Template button Now select Tools | New Brush | Cylinder - Accept all the default setting for the cylinder and press OK This pops a new object right into your room. It loos like this:
Now move the column to a nice spot by selecting Move/rotate and clicking and dragging it.
Now that you have your colum the size you want and it is placed well Press Enter to accept it as an entity. You hear the familiar swoosh and your column is created. Go to select mode Press the template mode button then hit pagedown, now add textures to the column.You can apply one texture to all the sides or you can hit the pagedown button and select various sides and apply different textures to them. When you are done applying textures to the column you are going to duplicate this column. It is real easy. Go to select mode Now Press and Hold down the Shift Key and click and drag the column to a new spot. This doesn't move the column it creates a duplicate column with all the same properties. This makes a copy with the size and all the textures in place. I have done this several times and my room now has eight columns in it.
This copy and drag skill is very handy. It will save you a lot of time in your game making. You don't have to constantly apply new textures and resize items that are the same. You just have to copy and drag them. You can do this with complete rooms too. Make a room, apply the textures then click and drag it! Voila you have two rooms. You have come a long way in your quest to make a video game. Until I post the next section practice the skills you have learned. Go back to the first section and do some review. How to make a video game main If you are really serious about making video games you are going to need a good program to help you create and manipulate art. For example: The textures you have been using are all the standard textures that come with the game. But you can actually make and manipulate your own textures. I will be showing you how but you will need a paint program. This is the program I use and I recommend it highly. It does all the things the expensive programs do but at a very reasonable price. You can also use it for all your other picture and painting needs. It has great tools to manipulate images and photos with.
|
|||||||||
Copyright©2001-2016 Kalif Publishing - Contact, copyright and Disclaimer - Let's Make Something T - Storm the Castle T Publishing
|
||||||||||


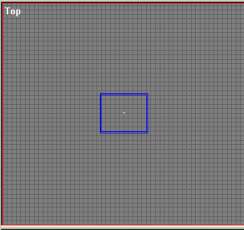 You
haven't made the room any smaller. You have only zoomed away from it.
Now you can easily resize this room. Make it nice and large so we can
insert some images. in it.
You
haven't made the room any smaller. You have only zoomed away from it.
Now you can easily resize this room. Make it nice and large so we can
insert some images. in it. 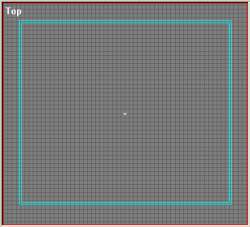 This
is the same room. It is now larger. We have dragged it to a nice size.
This
is the same room. It is now larger. We have dragged it to a nice size.
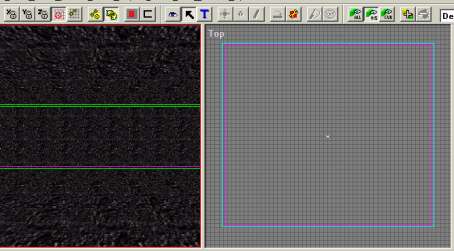 This
screen shows the outline of the floor in purple. Remember to select the
surfaces you are modifyiing in the Texture view on the left. This makes
it easy to understand what surface you are working on.
This
screen shows the outline of the floor in purple. Remember to select the
surfaces you are modifyiing in the Texture view on the left. This makes
it easy to understand what surface you are working on.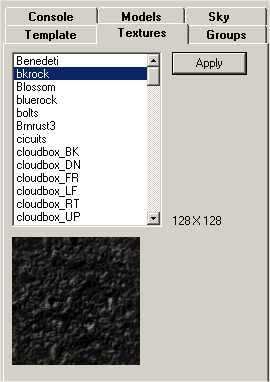 Click
on the Textures tab in the Control Panel on the right of the screen. Browse
through the various textures and select one that you want for the floor.
Simply click apply and it is applied to the floor.
Click
on the Textures tab in the Control Panel on the right of the screen. Browse
through the various textures and select one that you want for the floor.
Simply click apply and it is applied to the floor. 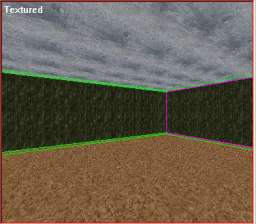 It
is pretty straight forward. I made the floor a basic dirt color, the ceiling
is a grey and the walls are a kind of forest green. You will get real
good at this placement of textures. Heres the process again.
It
is pretty straight forward. I made the floor a basic dirt color, the ceiling
is a grey and the walls are a kind of forest green. You will get real
good at this placement of textures. Heres the process again. 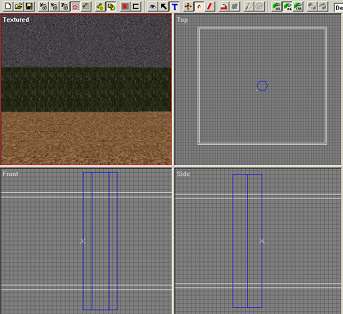 We
now have a new object in our room - A column. We just have to do with
it the same thing we did with the room. Resize it then apply some textures.While
Still in Template mode select the scale brush and in side view (The pane
in the lower right) click and drag the top and bottom of the column until
it matches up nicely with the room dimensions.
We
now have a new object in our room - A column. We just have to do with
it the same thing we did with the room. Resize it then apply some textures.While
Still in Template mode select the scale brush and in side view (The pane
in the lower right) click and drag the top and bottom of the column until
it matches up nicely with the room dimensions. 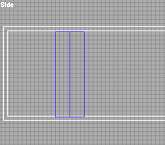 This
image shows your column nicely lined up with the Room. This is the side
view.
This
image shows your column nicely lined up with the Room. This is the side
view. 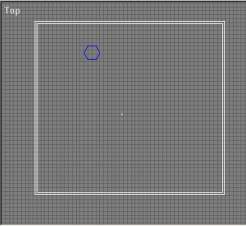 I
have put it here because I want to put a second column. This will make
a nice balance to the room. Remember that you are now a "Designer"
so you have to think about the design of your rooms. It won't look good
if you just place objects in your room for fun. It has to be designed
the same way an architect would design things.
I
have put it here because I want to put a second column. This will make
a nice balance to the room. Remember that you are now a "Designer"
so you have to think about the design of your rooms. It won't look good
if you just place objects in your room for fun. It has to be designed
the same way an architect would design things.