|
|||||||||||
|
|
Milkshape Tutorial - Lesson 17 Animating a Model
Our First Animation The Process of animating a model is not hard to understand and you will grasp the concepts quickly. You already have most of the skills needed to do it as far as selecting and moving parts of your model. Now you just need a few more bits of information to put it all together. That's what we are going to cover now. Here is what we are going to do in this sectionThis is the model we will animate. The basic framework for the animation comes with Milkshape so that is easy. We will focus on getting it to move. Here is a video of it in action. It is a 3.66 Meg avi file Waving Arms Animation
If you are having trouble with this animation you can also see it on Youtube Here (much faster) Making 3d Animations in Milkshape3D animations used to be a very time consuming thing. An artist would have to draw every individual frame of an animation. If it was needed for a model to walk a lot of work went into drawing many different pictures that had to be assembled together. With animation programs you just have to define the beginning and ending point of the animation and the program figures out all the middle steps. About AnimationMilkshape does most of the work for you when it comes to your animation. But you are going to see, as you make models that there is a bit of distortion that occurs. Milkshape will move your animation in specific ways and as your models get more complex you will see that the move distorted things in ways that you don't want. This means that you would go back into the model and adjust the screen mesh and the faces. Something like this comes with experience and with a little bit of practice you will be able to see and do this well. For now we are just going to learn the basics of animating a model. From there you will have the skills to improve yourself. Frames and KeyframesWe talked a bit about how you will define the beginning and ending points of an animation. These points are called "keyframes" and milkshape will figure out all the points in between these two points. It does this by building its own frames. These are just normal frames. You define the keyframes and milkshape puts the frames in between. If your model were to move its arm up into the air you would define the hand in the down position and then in the total up position. These are the two keyframes. Milkshape would figure out all the frames in between. Each frame in an animation from beginning keyframe to ending keyframe is a position, and a time interval. You will define how long it takes to move from frame to frame. Joints, Bones, and SkinWe are finally getting to the joints and bones of the skeleton. We discussed these in the beginning of this tutorial but until now we have never used them. We just focused on the look of your model which is the skin. When animating a model you have to work with the joints and bones. These are what move and the skin will move with them. And this is where you can see that experience and practice will come in. As your joints and bones move the skin will distort in way that you don't like. You would have to go back and tweak the look of your skins to get it more appealing. The Hierarchy of Joints and Bones - There is a distinct thing about bones and joint that you should know. A skeleton is built step by step and each step is the child of the step before it. Take a look at this: Open Up a modelPull down the file menu and open up the model called: valve_skeleton. It is in the root Milkshape folder and you may have to browse up one level to find it. It looks like this:
Now let's select a joint. In the Control Panel select the "Models" tab Now press the "Select" button Then down below under select options press the "joint" button. Now left click on the joint at the wrist of the model. After selection it looks like this:
Notice how the hand turned green but the forearm didn't. This is because selecting a joint only activates the children of that joint. Now select the joint at the elbow and see what happens.
Now the forearm, wrist and hand are all green and all selected. These are the children of this joint. This is important because these are all the parts that will move! If you tell the elbow joint to move all its children joints will move too. Seems straight forward but if you select a joint in the torso of the model you can see lots of children will move! Experiment with this and try clicking on different joints to see what happens. With a humanoid model you can pretty much guess what will happen but when you are creating things and creatures this is something you have to pay close attention to. Just remember that there are children and parents of joints. The Animation slider tools
Press the "Anim" button in the lower right of the workspace and the animation toolbarl comes alive.
This image shows 4 hash marks. These hash marks are frames in your animation. If you move the slider it will move through the frames of your animation. Right now you have no animation so nothing happens. The slider is currently on the first hash mark, or frame. You will define this first frame making it a keyframe. Then you would define a new position of the model and define this new position as a keyframe further down, say at hash mark 10. Then you would tell milkshape to fill in all the steps in between. There is an easy reference for these frames. On the right of the animation tool bar the two little boxes tell you what frame you are looking at and how many frames there are in the animation. This image shows I am looking at frame 1 and there are 30 frames in this animation. Move the slider and see how it changes. You can also input numbers into these boxes to change them.
The buttons here are pretty easy to understand they allow you to move forward and backward easily. As you create animations you can experiment with these buttons. It will make animating a bit easier and faster.
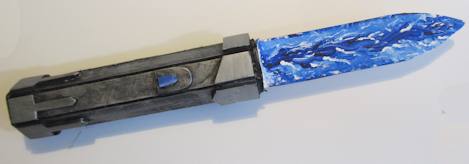
Make A Star Wars Light Dagger
Yup! A light "Dagger". Easy to make and the light blade actually works. Just need a couple of rubber bands. I give you the template. You can be chaneling the force in no time! Make a Star Wars Light Dagger
|
||||||||||
Copyright©2001-2016 Kalif Publishing - Contact, copyright and Disclaimer - Let's Make Something T - Storm the Castle T Publishing
|
|||||||||||