 |
|||||||||||
|
|
Milkshape Tutorial - Lesson 5: Shaping our Object
Okay, you have a pretty good understanding of how to create a simple object and how to move around and look at it from different view points. Let's actually start to manipulate this object and shape it into what we want. First let's make this sword a more appropriate thickness. Remember, our box is darn thick and it looks more like a door than a sword. .
Our newly created object is red which means it is selected. When you press the scale button everything you do will apply to this object. Underneath the tool box a new set of items popped up. Press the round button for Origin, then in the box above the letter "z" enter .05. Then hit the Scale button. Your sheet model is transformed into one half of a sword blade - kinda! . . About X, Y, and Z These are the three dimensions of any model. Looking at the front view pane X is the side to side width. Y is the height and Z is the Depth of the model. When we modified X we changed it to .05 of its original size. or 1/20th
Lets take a look. Change the Z back to 1.0 and change the Y to .5 (point five) This will be half, Hit the Scale button and see how the height of your model was cut in half? You had to change the Z back to 1 because when you press the scale button you dont want the Z to be reduced again to another .05 of what it was! Now change the Y height back to what it was by entering 2.0 in the Y box and hitting the scale button. Scale is a relative term and it applies to whatever the model currently is. If you put 1.0 in the Y box it would scale it to exactly the size it currently is, not the size it used to be! So because you had cut it in half now you want to double it to get it back to the original size. After you got it back to its original size enter 1.0 in the Y box and hit scale so everything is back to default and it doesn't cause an unwanted mistake later in the build. Important Note: Your Box is not a box! We talked a little bit about how making models for video games is all about triangles. Everything is based on triangles. And you probably have been visualizing your box as a red square with an X in the middle of it. Actually, it isn't. It is a series of red triangles that make up a box! And these triangles are called "Faces". Try to think in those terms. It is how real model makers think and it will make it much easier for you. Ignoring The unseen surfaces Now, I said that this is only one side of our model because we want it to be perfectly symmetrical. And what this means is that one whole side will not be seen. This is the side that will be welded to the other half. We can tell Milkshape to ignore these inner sides and this is a great benefit because it will make the model easier to build, a smaller megabyte size and much faster when it runs in a game. No sense in drawing and texturing surfaces we are not going to see.
. . . .
Fun and easy little project and I have already received a bunch of pictures from people who have made these! How to make a medieval scroll
|
||||||||||
Copyright©2001-2016 Kalif Publishing - Contact, copyright and Disclaimer - Let's Make Something T - Storm the Castle T Publishing
|
|||||||||||


 In the toolboxes on the left select the button called "Scale". You might have a good idea what this does from our Reality Factory or Genesis 3d Tutorials . It allows you to change the scale or size of your selected object.
 Pull down the Menu item "Window" and check the "Show Viewport Caption" item.
 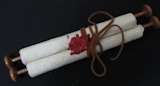 How to make a Medieval Scroll!