Hi, Thanks for visiting my website. My name is Will and if you have questions
or would like to
contribute projects or ideas you can contact me
How to Make a Miniature Army
This is a tutorial that takes you through all the steps on how to make a miniature army. I take you through all the steps from starting with nothing at all to finishing off the whole army. And I use a Miniature Lizard Warrior in this example. You could, of course, create any type of figure you want and I have also created a small army of dwarves. I will show youa picture of these dwarves.
This is an overview tutorial so I don't show you exactly how to do every step of the way. I just give you an overview of all the steps that are taken when going from concept to completed army of miniatures. I do however have tutorials on all these steps and I will give you links to these tutorials so you can learn more if you want to. You can also go to my main miniatures page to browse through all these tutorials.
I created this army of lizard warriors for my massive fantasy wall diorama. The theme for that diorama is an underground lair with an army of lizards! You can check out that project here: The Wall Diorama
Video Tutorial
There are three major steps in the process of creating a series of miniatures.
The first major step is to create your master miniature that all the duplicates will be modeled after.
Second Major step is to make the rubber mold around this master minature
Third Major step is to make then paint all your copies.
First part : Making the Master Miniature
Start with some sketches. You don't have be an artist. This will be a big help when it comes to sculpting the miniature.
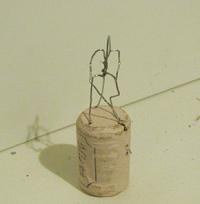
Create the wire armature fo rthe miniature. Base it on the shape and body type of the miniature you will create - for example you can see that this is pretty humanoid but the legs are shaped like lizard legs and it has a tail.
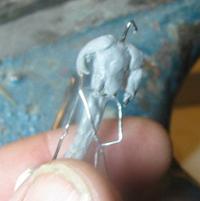
Begin the sculpting by adding your modeling material to the wire frame. In the first stage of sculpting you just want to flesh out the major shape of the body and the musculature.
I have a very extensive series of tutorials that shows you how to sculpt miniatures That tutorial starts here. I show you sculpting, materials and clays you need, tools and more.
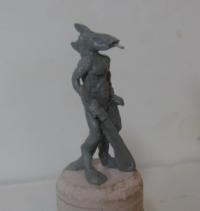
As you finish the main shapes of the figure you move on to do the details until it is complete.
Part 2 : Now we Make the Mold
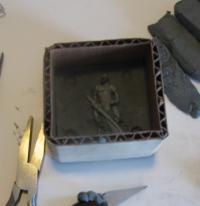
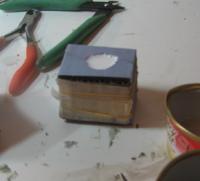
Make a small square box and fill it half full with a soft clay then embed your miniature half way into it.
This is called a two-part rubber mold and I have a complete tutorial that shows you all the steps and exactly what you need to do including the materials and rubbers. That tutorial is here
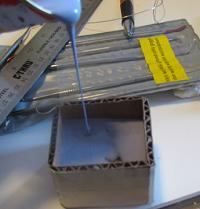
Mix your two part rubber and pour it right into the cardboard box. This creates the first half of your rubber mold.
Once the rubber has cured you take apart the box and remove the clay. You now have the first half of the mold.
Just as you see it here on the table with the rubber mold half flat on the table and the lizard facing up you rebuild the box around this and pour rubber in again to form the second half of the mold.
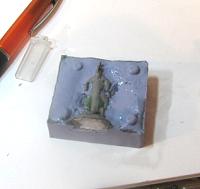
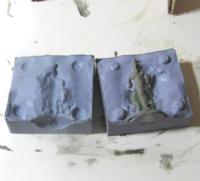
Once that second half of the mold is cured you can remove the whole thing from the cardboard box then remove the miniature. The picture here shows the completed mold. You can see a little bit of the embedded miniature.
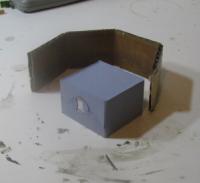
Here is that open mold. You can see the miniature inside. Remove that mini because you next will put the mold back together and cast your duplicates.
Part 3: Casting your duplicate miniatures:
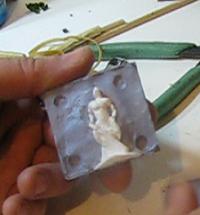
Put the two halves of the mold together and wrap them with a rubber band to hold them together. You mix your two part plastic then pour it in the mold. And in about 15 minutes your miniature will be ready.
This part is easy and I have more explanation of this including the plastics you need as part of my casting in a two part mold tutorial. The section about casting the plastic duplicates starts here.
Take apart the mold and remove your miniature! Now you can put that mold back together and make another. and another until you have a whole army or as many as you want.
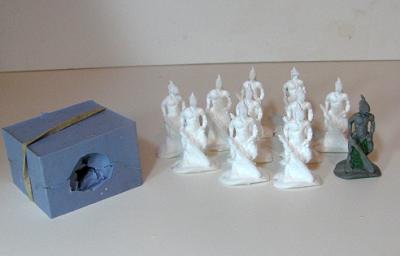
The picture below shows the mold, the original, and the ten cast miniatures. Now just paint them up and you are ready!
RESOURCES AND MATERIALS
This is the stuff that you mix together and pour. It forms the rubber mold. I use this material in this tutorial on how to cast a miniature
This is the plastic you cast into the rubber mold.
This company also sells a complete kit that gives you the rubber mix, the plastic mix and other things.
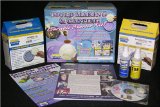
Moldmaking & Casting Pourable Starter Kit - Mold rubber can be used to capture exact detail from any model. This starter kit will allow you to make a rubber mold of a small, simple 2 or 3 dimensional model using silicone rubber. Then pour our fast cast plastic to make one or more reproductions of the original. If you are an absolute beginner to casting then you might want to consider getting this kit. It has everything you need to get started including the casting materials and mold making materials. I have this kit and I use it for some of my tutorials. It actually will save you money because it gives you reasonable quantities of the varous needed things. You would pay more if you try to buy things separately. It also comes with a DVD that shows you exactly how to do everything.