Hi, Thanks for visiting my website. My name is Will and if you have questions
or would like to
contribute projects or ideas you can contact me
How to Forge a Sword
This is a complete series of tutorial on how to make a sword. The sword we make is nothing fancy but it is a serviceable sword.
In this tutorial we will be making a plain sword that is not too long and edged on both sides. Just a utilitarian kind of sword and nothing fancy. The objective here is to learn how to actually make one!
Along with all the materials in these webpages I have also added a series of videos on the whole process. The first video is near the bottom of this page.
If you have never done much blacksmithing you might want to start out a little bit easier. I have a project on how to forge a knife. That is a great place to start because most of the techniques and skills are the same, just on a smaller and easier scale.
And, it does take quite a bit of work to make a sword because the blade is so long. A knife, while also taking time, isn't nearly as labor intensive.
Will has a youtube channel with over 800 videos on projects you can make. Check it out right here
My blacksmithing videos are right here. I have knifemaking, swordmaking and basic blacksmithing tutorials.
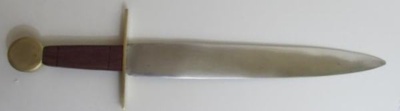
Here is the finished sword that I make in this tutorial. This way you can get a look at what we are working toward.
What steel for your sword?
This can be a bit of a tricky question and there are several different answers. The short explanation is to use whatever steel is available. But if you have a choice I would go with O1 or 5160. They each have their strengths and weaknesses but will suffice to make a good sword. I am assuming you are a beginner or you just dabble in blacksmithing.
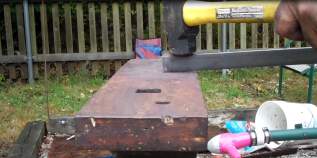
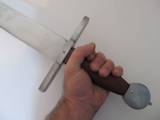
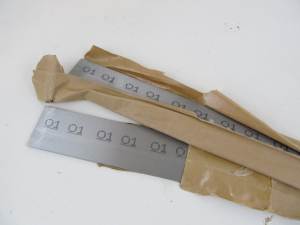
Here are two pieces of O1 steel. The exact one that I use for this tutorial is the one on the bottom. It is eighteen inches long, two inches wide, and three sixteenths of an inch thick.
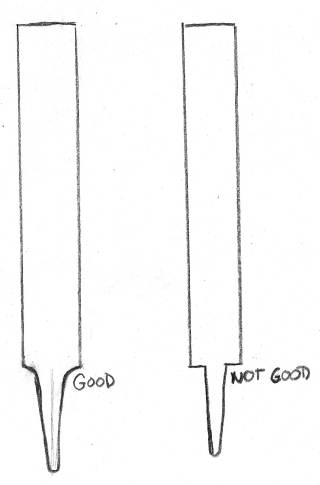
The first thing we are going to do is create the tang (handle) of the sword. The picture at left gives you a good idea of what we are shooting for. Now, in the beginning of the project we don't want to get the final shape because there is a lot more work to be done. We just want to do the rough blacksmithing and get it close to the final product.
The picture shows one important concept when hammering out the tang. You don't want to have sharp angles on it. This makes it real easy for stress fractures to form in that angle. And stress fractures can cause the blade to break right off the handle. Yikes! So, get those corners rounded.
The sword on the left shows rounded corners. You don't have to get them that rounded. The rounded corners are a bit exaggerated in the picture so you can see and understand the concept.
So, how do we form this tang shape?
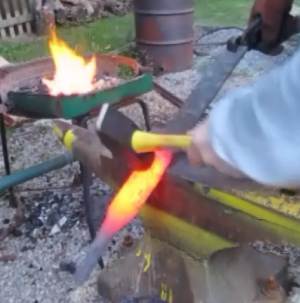
This picture shows the hammering technique to use. This is called Edge hammering. You place the sword on the anvil and strike with the hammer just as shown. This causes both the top and bottom to compress evenly.
This picture shows the tang almost done. From here we can now move on to other parts of the sword.
Drawing out the Blade of the Sword
Ok, now that the tang is about where we want it is time to start working on the size of the blade.
We started out with a piece of steel that was 18 inches long which makes for a pretty short sword and you could even argue that it is only a very long knife!
So we want to make the blade longer. And because it is 3/16 inch thick it is way too thick for a sword which is great. We will take some of that thickness and hammer it into length. We do this with a hammering technique called "drawing out".
You do this in three or four heats. You can't heat the whole blade. Just start on one end of the blade and heat it. Can be the end near the tang or the tip end. Just start on one end.
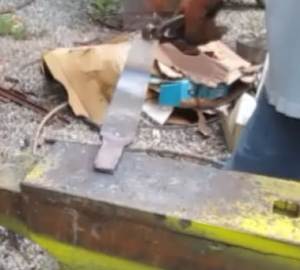
Heat it up then place it on the edge of the anvil as shown in the picture. Hit it strongly with a hammer all the way across the blade. It will take three blows in the case of this sword. Once the three blows are made you then move the sword up about a half inch and hit it three times again. You continue doing this through the whole red hot section of the blade.
What does this do?
It causes the metal to spread only in one direction (length). The sword will spread very little in its width. And this is perfect. It makes the sword longer without making it wider.
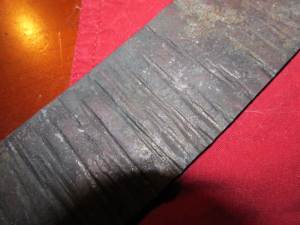
The picture here shows the ridges that are created.
Well, we don't want them to stay so at some point you will have to hammer them out.
But, a good idea is that while you are working on a section of the blade you draw it out, then you flip it over quick and hammer these ridges down right away. Then you put it back in the forge to heat the next section.
You probably won't get it perfectly flat but you will do a lot of the smoothing out right at this point. And you are doing it as you progress. This will save you a lot of time and work later.
Ok, creating the tang and drawing out the blade of the sword is a few hours of work! Soon we will continue on to the next part of the tutorial where we shape the blade and the point.
Here is the video that shows this part of the process of sword making
----------------------------
---------------------------
How to Make a Real Sword - I take you through the whole process of making a sword. And this one is a good sized sword! Really beefy and feels good in the hands. How to Make a sword
Virtually every task beginning and intermediate blacksmiths must master is presented in this excellent book. Over 400 detailed drawings help increase comprehension levels. This is a reference manual that will be found lying open on the workbench more often than found on the bookshelf and is highly recommended to anyone swinging a hammer to shape hot metal. This is an excellent introduction to this glorious craft and an excellent resource for advancing your knowledge, skills, and vision for blacksmithing.
Looking for instructions in bladesmithing that'll put you on the cutting edge of the custom blade market? Then this definitive guide to forging world-class blades is for you. Written by a master bladesmith, this book tells you how to set up your forge, select your materials, fashion grips and hilts, grind edges and much more
Do you like making projects and exploring a variety of hobbies?
Sign up for my free newsletter. I give you regular updates on hobbies and projects you can make. it is totally free and I don't share your email with anybody.


 Ok, crank up the forge and let's get started.