Blacksmithing banner

Home

Home

Youtube graphic
I have a youtube channel with over 1000 Videos!

Become a Patron


Blacksmithing

Blacksmithing Lessons

Forge Stuff

Blacksmithing Projects

Resources and More Stuff

My other Subjects and websites


Will
Hi, Thanks for visiting my website. My name is Will and if you have questions
or would like to
contribute projects or ideas you can contact me Will

How to Forge a Sword Part 5: Make the Handle

In this part of the tutorial I show you the three major parts of the handle of a sword and I show you how to make and install them. If you need to start at the beginning of this series of tutorials it is right here: Part 1

And there are a lot of different kinds of handles you can make. I show you a plain wood handle and a wire wrapped handle. From here you can improvise all kinds of different handles to make anything that you like.

I also have this tutorial in a video right here:

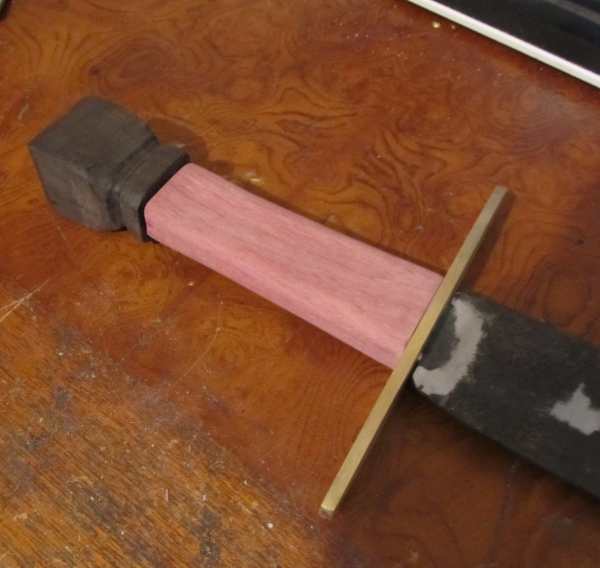
Here is one of the handle variations. This is a wooden handle and the wood is purpleheart. The pommel is also wood and I may change this. I am considering making one out of brass.

One handle type


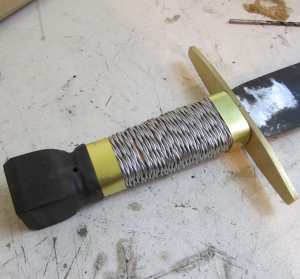
Wound wire handle

Here is another standard type of handle. It is wire wrapped. I will also show you how to do this.


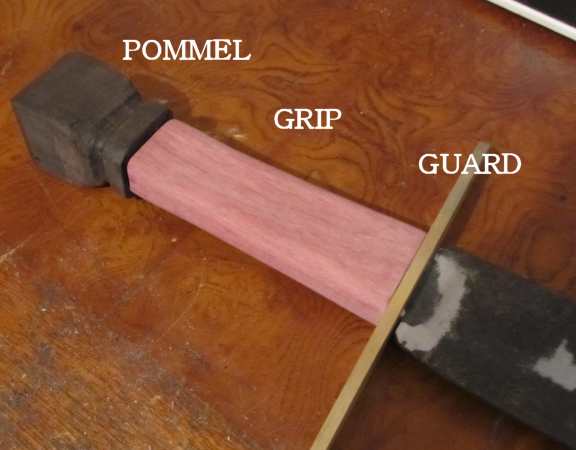
Let's take a look at the main parts of a sword handle. There are three, the Pommel, the Grip, and the Guard.

Parts of the sword handle


In the picture above The pommel is made of Ebony wood, the grip is made of Purpleheart and the guard is made of Brass. The brass guard is pretty standard. Brass is often used as the guard. The wooden pommel is a bit atypical because it doesn't weigh much. More often a metal is used for the pommel. It helps to balance the weight of the sword.

How to Make the Guard

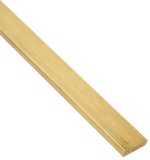
Brass stock

I use a piece of brass that is six inches long, One inch wide and 3/16 inch thick. This is called bar stock and it is easy to get. Here is the exact piece that I ordered on amazon.com: Brass Bar Stock


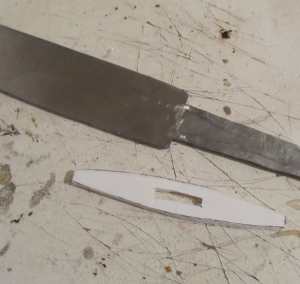
A template for the guard

Before I started working the brass I made a template out of foam board. This way I can get the exact size and shape that I am looking for. You can use foamboard, cardboard or anything similar. It is very easy to tinker with it and change it this way.


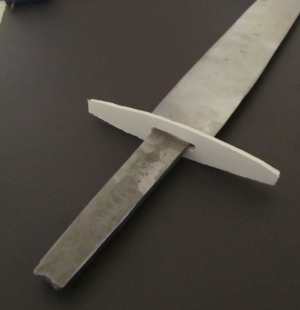
Here the template is placed on the sword. It looks pretty good. That is the shape and size I am going with. The slot is a little big so I will make sure to correct that in the brass version.

Fitting the template to the sword

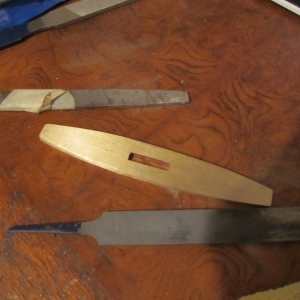
The brass guard

Now we have to make that pattern out of the brass bar. I shaped the whole thing on the belt sander. Brass is easy to work so you can use a variety of tools on it.

To get the slot I first drilled three holes then worked them with files.

As you are creating the guard you can fit it to the sword along the way to make sure it is moving in the right direction.


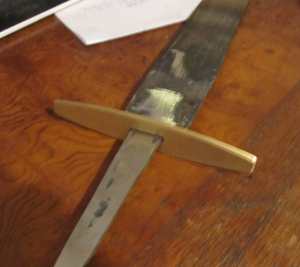
Fit the guard

Here I have fit the guard to the sword. It looks great. One very important this is to be sure the guard is flat and square against the base fo the blade. It has to fit nice and flat. You can file at the guard or grind the base of the blade to achieve this.


Quick Tips

The guard is an individual thing and is custom fit and sized to the size and shape of the sword. Mine is just about six inches in length. Your will be different. Make it so it looks good. And the piece of brass that I bought was twelve inches long. This afforded me another six inches if I ruined this first one or wanted a different shape.

Brass is very easy to work with. It grinds and files very nicely so you will have no problem with this part. And it grabs steel very well and holds it which makes it effective in real sword play.

When cutting out the slot you should make it smaller than you need and check to see if it fits the sword, then file away some more. Continue to do this until you get a nice fit.


NextOkay, let's continue with the tutorial and make the wood grip


The complee bladesmith

The Complete Bladesmith

Looking for instructions in bladesmithing that'll put you on the cutting edge of the custom blade market? Then this definitive guide to forging world-class blades is for you. Written by a master bladesmith, this book tells you how to set up your forge, select your materials, fashion grips and hilts, grind edges and much more!


Techniques of medieval armous reproduction

Techniques Of Medieval Armour Reproduction: The 14th Century (Medieval & Renaissance)

Few historical icons can match the evocative power of the medieval suit of armour, and this epic new book is a complete course in the tools and techniques of the modern armourer's art. Through more than 1,000 detailed photos and clear instruction, Brian Price presents a working handbook for aspiring and active armourers who want to develop their skills in the production of medieval armour in the style of the 14th century. The book is divided into four sections: a sweeping history of armour and its production from its medieval roots to its modern revival; a practical introduction to all the tools and supplies necessary to equip a modern workshop; a thorough review of key techniques; and a series of actual courses in constructing armoured defenses for the head, body, arm, hand and leg. Taking the reader through the construction of an authentic medieval harness from conception to completion, Techniques of Medieval Armour Reproduction is a vital addition to the libraries of serious craftsmen, historians, collectors and researchers.


Sign up for my newsletter!

Do you like making projects and exploring a variety of hobbies?

Sign up for my free newsletter. I give you regular updates on hobbies and projects you can make. it is totally free and I don't share your email with anybody.