Tools and materials:
- 1 A10 Box (Other small size boxes can be used. Just modify the template parts as needed to fit).
- Glue or hot glue
- A knife or tool to cut cardboard
- The three page template - You can download it right here:
Using the template as a guide measure and cut out the various pieces that make up the puzzle box. There are 33 parts.
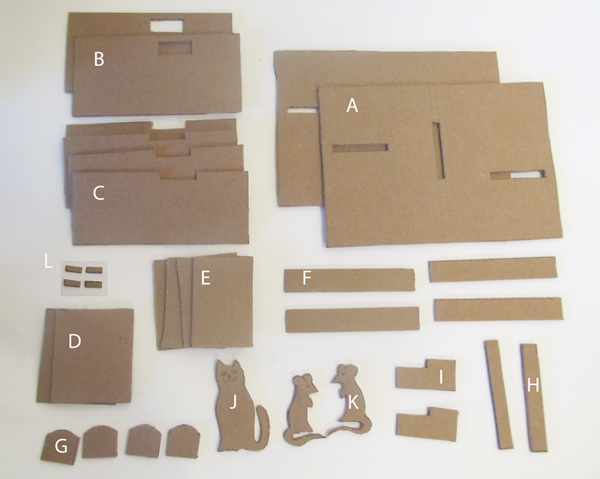
Most of the parts are doubled up to provide strength to the project.
On the template each piece is lettered (A thru K). Here is how to glue them into stacks:
- Glue 2 A's together
- Do not glue the B's together
- Glue 2 C's together
- Again glue two more C's together
- Glue the two D's together
- Glue the two E's together
- Again Glue two more E's together
- Glue two F's together
- Again glue two F's together
- Glue two G's together
- Again glue two G's together
- Do not glue the H's together
- Glue the two I's together
- J and K � (Cat and mice) need no gluing
- Glue 2 L's together
- Again glue 2 L's together
Step 1:Cut the four flaps off the top of the box
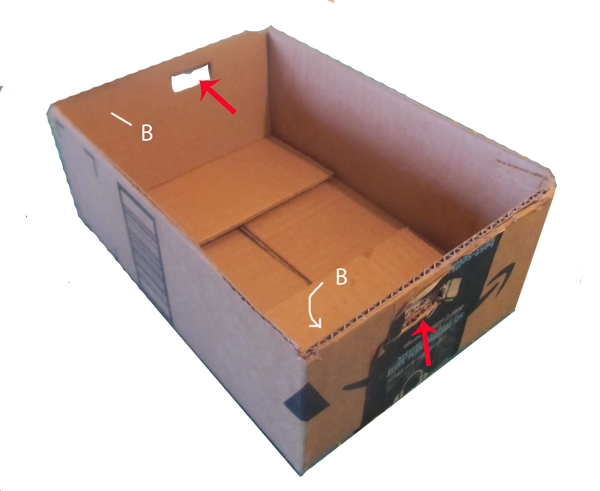
Step 2: Glue a part �B� in each end of the box.
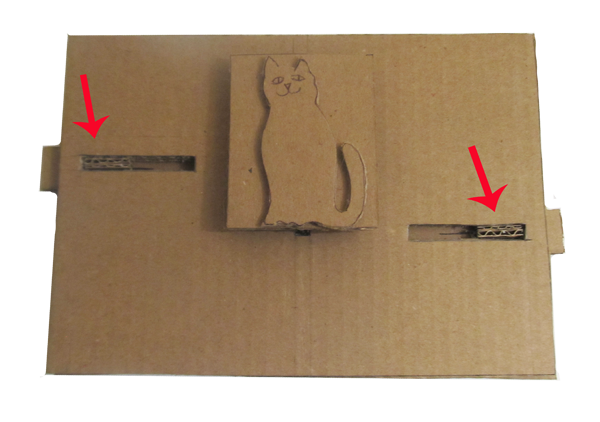
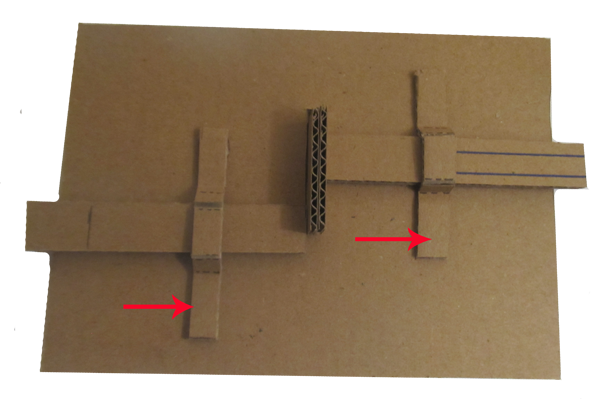
Step 3: Cut out the corresponding hole in the ends of the box. These holes match the rectangular holes in part B. This is shown by the red arrows.
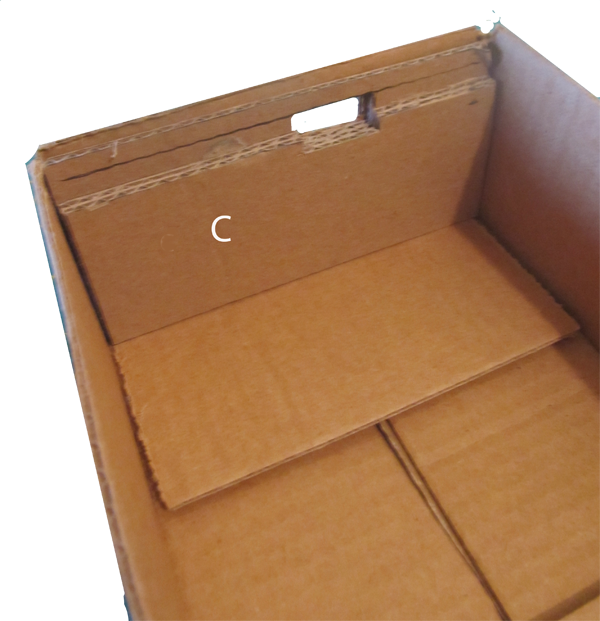
Step 4: Glue into each side of the box a double stacked part C.
The box is prepared and ready. Now we can make the top cover.
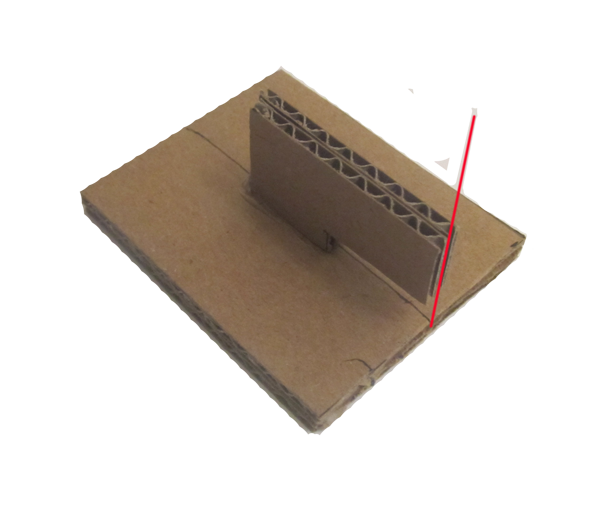
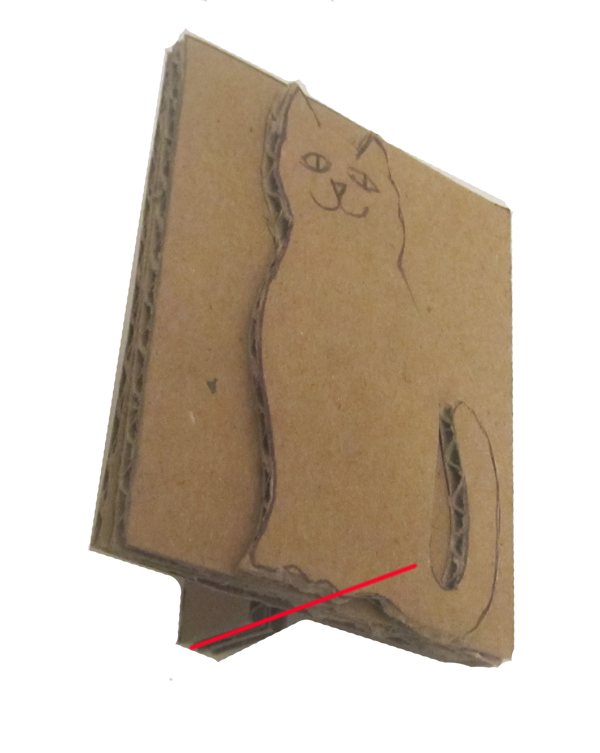
Now glue you double stack �I� to the double stack �D� as shown. The red line shows how the two pieces line up.
Flip it over and glue the cat to it. Notice that the red line is where the feet of the cat goes.
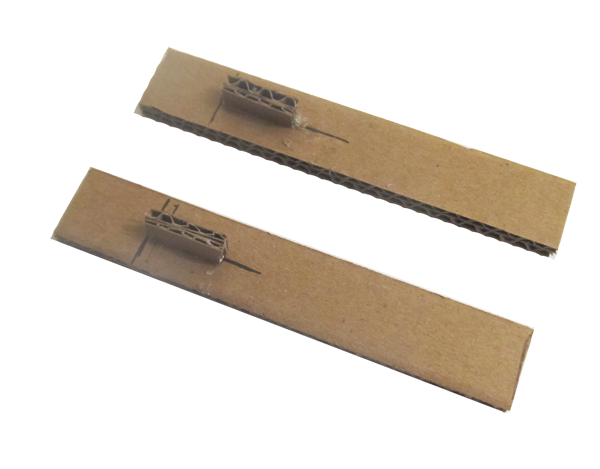
Glue a double stacked part L to a double stacked part F. It is 7/8� from the end and centered.
Do this twice.
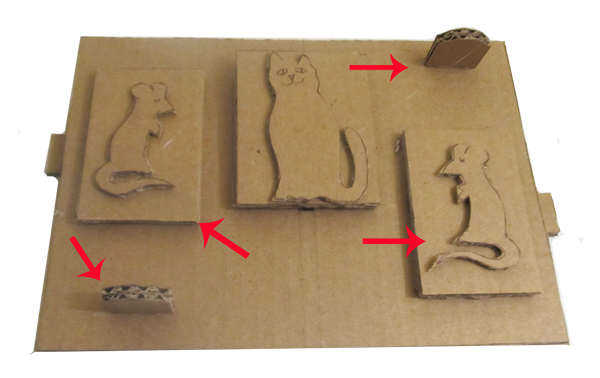
Insert those parts into the top cover from underneath. Align them so the tabs stick all the way out both left and right.
Cut and bend the two slider holders into this shape.
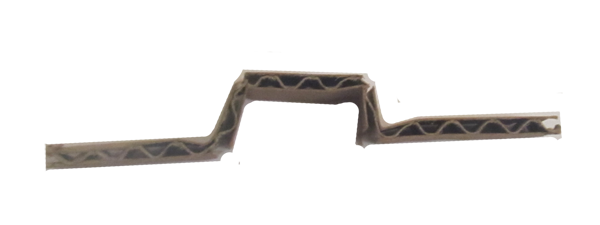
And glue them over the sliders. They should contain and hold the sliders snugly but still allow them to easily slide back and forth.
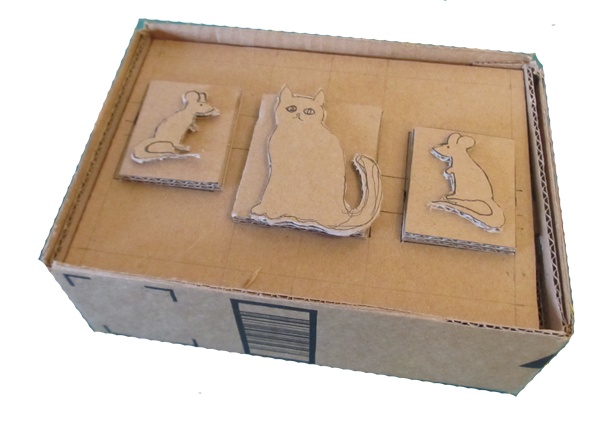
The picture shows the cat inserted in the piece. To test the sliding motion remove the cat.
Finish the project by gluing the mice on. When doing this center them on the slider tab with the sliders all the way out left and right. And glue the mice so they cover and hide the slots.
And that's it! The puzzle box is complete. Install the lid in the box and remember the clue �When the cat is away the mice will play�.
|


