Getting everything in the frame
The single most important rule is that the set be large enough to get everything in the frame of the picture. Seeing a little bit of the outside world ruins the whole effect! So, this is something you have to plan out with your storyboard. I conquer this by making a quick mock up of the set and taking some pictures to see if it all fits well.
This picture is a great example of what you don't want when shooting the animation. See how you can see the tops of the walls and beyond? And you can see the wood under the floor at the front edge of the scene.
In this example I just move the camera a little bit closer to the set and it is all fixed.
But, what I want to point out is that I first put together a simple set using four sheets of foamboard. One piece for the floor and three pieces each being a wall. Once I had this mock up done I took some pictures and looked at the various camera angles, even took some pictures to see if it would all fit well and look right.
Once I was happy with the mock up I could go on to build the actual set.
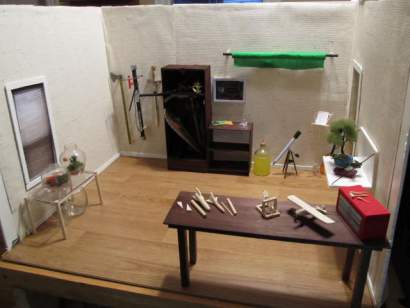
The Foreground of the picture
The foreground is something to think about when building your set. In the picture above of room two I have a brown table in the foreground. The camera sees this in the foreground while things are happening in the background. This can be a great way to make the set interesting looking. Be sure to just do some test pictures to make sure it all looks right.
Building for Function
You can go ahead and build your set so it looks good and is camera frame but you will probably have trouble when it comes to actually doing the animation on the set. You have to spend hours inside that set moving your figure or figures around and taking picture after picture. This means a couple of things.
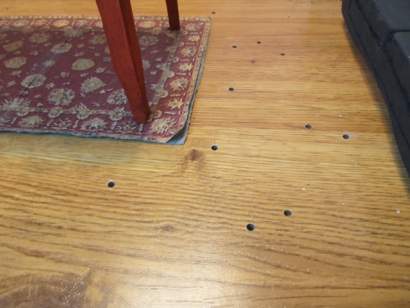
First off, I put holes in the set so I could bolt the figure down. This is a standard practice of animators. The figure I use has nuts in the bottom of his feet and I put a bolt up through the floor and into his feet. This way he stays perfectly in place while I animate him.
And this brings up an important point. How do you get the bolts up through the bottom and move them to new locations as the figure moves around the set?
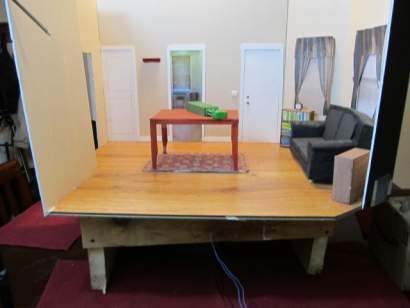
You do this by elevating the set up on a platform like the one shown here in the picture. This is just four pieces of wood. Now I can reach under there and put the bolt up and into the figures foot.
Making it all work
When building your set you have to really think about a couple of things. First off you should think about where you will put the camera and tripod and secondly you have to think about where the lighting will go. Remember these things! You might have to modify your set so it all fits.
And finally you have to think about the fact that you are working in that set for hours and you need enough room to move around freely in there. You need room!
Getting the Scale right
There is one more thing I want to point out about set building. You have to be really aware of the scale of things. I used a miniature figure that is 1/6 scale. And to get the scale of the room right I measured actual rooms then made my sets 1/6 the size. This way they looked correct! Even the windows and doors are 1/6 scale.
So, I recommend you get your miniature first, understand the scale then build everything to that scale. Even place the miniature in there as you are building to check that everything looks right.
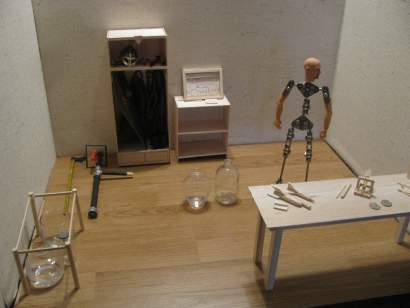
This picture shows the set while it is being built. I am building the pieces of furniture out of balsa wood and constantly checking it with the figure to make sure it all looks right.
A little bit about bolting the figure down to the set
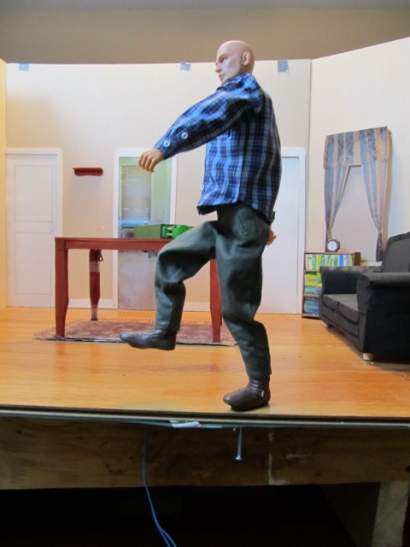
This picture shows a standard way to do animation. You drill holes in the set and bolt down the figure one foot at a time. See how now he can lift a leg and still stand? Once that foot comes down you bolt it and unbolt the current foot. This way he can progress along the floor smoothly.
The armature inside this figure comes with the nuts in the bottom of the feet and the bolts - it's ready to go.
Okay! Thanks for reading this tutorial and if you make a stop motion animation be sure to let me know about it! I have more tutorials on my website and if you haven't already checked out the animation that goes along with this tutorial you can watch it on my youtube channel right here: DragonSlayer 7 Part D - The Adventure Begins

Do you like making projects and exploring a variety of hobbies?
Sign up for my free newsletter. I give you regular updates on hobbies and projects you can make. it is totally free and I don't share your email with anybody.
|