Stop Motion Animation Banner

Home

Home

Youtube graphic
I have a youtube channel with over 700 Videos!


..

Easy Animation Projects

The Tutorials on how to make a stop motion animation

Advanced Topics

DragonSlayer Animations
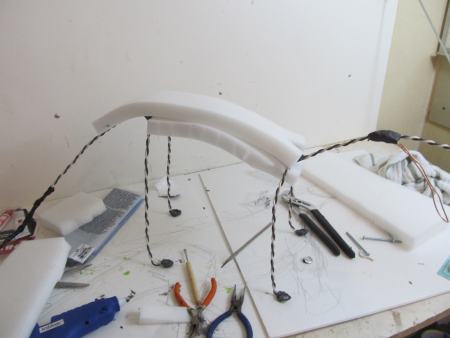
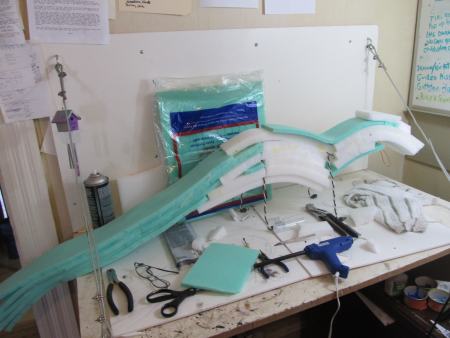
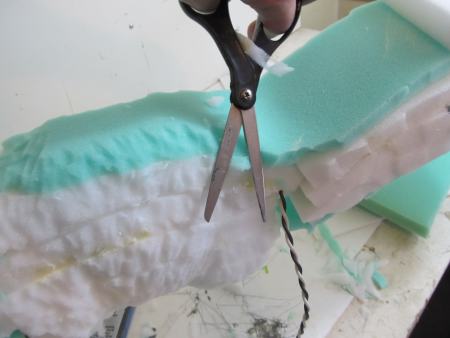
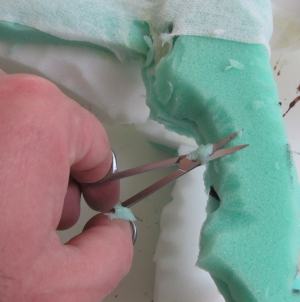
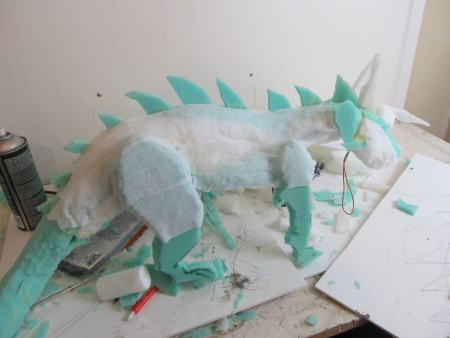
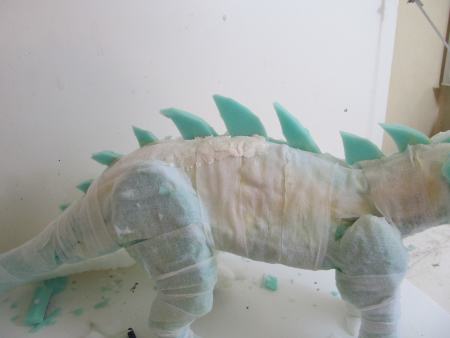
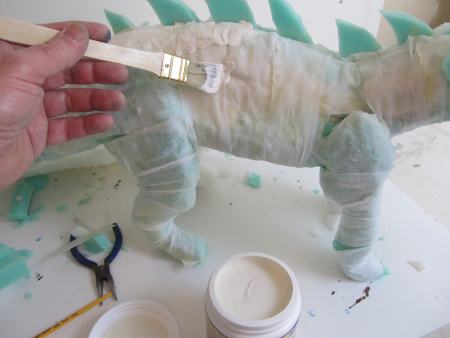
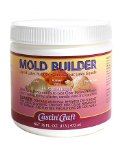
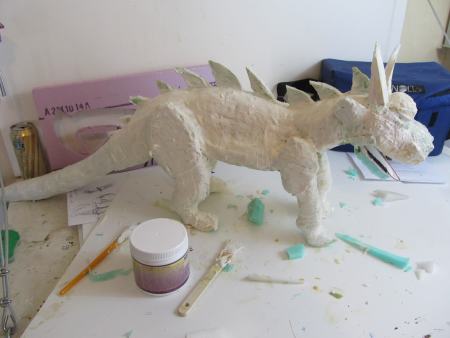
MORE STUFF

Optical Projects

Will's Other Subjects

More Stuff


Will
Hi, Thanks for visiting my website. My name is Will and if you have questions
or would like to
contribute projects or ideas you can contact me Will

Creating a Foam Puppet for Animation (Dragon) Continued

This is page 2 of the tutorial on how to make a stop motion puppet out of foam. Part 1 is here

In this part of the tutorial I show you how to build up the foam and sculpt it into shape.


Start foam on the armature

Now we can start to add sheets and pieces of foam to flesh out the body of the dragon.

There are a lot of different ways to attach it all together and for the most part what I do is to use a hot glue gun to attach the foam to the wire armature then I use a spray adhesive to attach the foam sheets together.

Gluing foam

Continue to fill out the size and shape of the figure. I did the head, torso and tail first. The four legs and the lower jaw are something that I added later. This will depend on the character you are building.

Cutting the foam

Now use some tools to sculpt the shape of the figure. I used large scissors to do the rough work. Then I switched to fingernail scissors to do the detail work. Fingernail scissors are the type that have a curved blade. They work really well for trimming details.

Trim with scissors

Here are a pair of fingernail scissors in action. They work really well for sculpting out the shape and the details. In this picture I have started on the legs of the dragon.

An important thing to think about is that you can add foam at any time. Just glue it on with any kind of glue. You can add pieces to form the shape of the muscles.

Adding he gauze

Once the shape is where you want it you put a skin on it. This step isn't mandatory but it will make a better looking figure. This is just like adding a skin over the flesh and bones of the figure. I used thin gauze bandage for this which works well. You can also use very thin foam. To attach the gauze I first sprayed on glue then applied the gauze. Do it in a way that makes sense with the musculature of the dragon.

The gauze is complete

This picture shows the gauze is completed, covering the skin of the dragon. Now its time to actually finish the skin with rubber.

Paint on the skin

I brushed a layer of latex rubber onto the gauze, covering the whole dragon. One coat is probably not sufficient for this so let it dry then apply more coats. For this dragon I applied three separate coats over the course of two days.

NextOkay, Let's finish off this dragon

Mold Builder

This is the exact product that I used for this tutorial. It is called Mold Builder:
Environmental Tech Mold Builder Liquid Rubber 16 oz.

Latex Rubber

You can also use this woodland scenics latex rubber. It is almost the same thing and works just as well:
Woodland Scenics Latex Rubber, 16oz

Coat with latex rubber

And here is the dragon with a completed coat of latex rubber. Now we let it dry and finish it all up.

NextLet's continue on with the tutorial and finish up this dragon


Sign up for my newsletter!

Do you like making projects and exploring a variety of hobbies?

Sign up for my free newsletter. I give you regular updates on hobbies and projects you can make. it is totally free and I don't share your email with anybody.