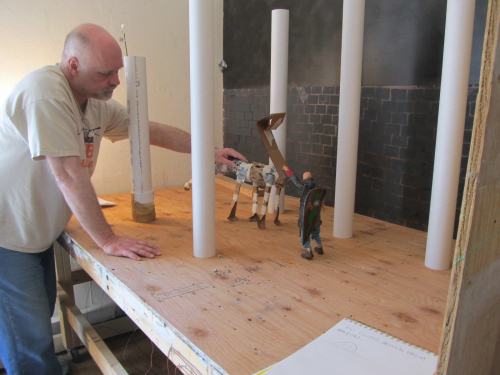
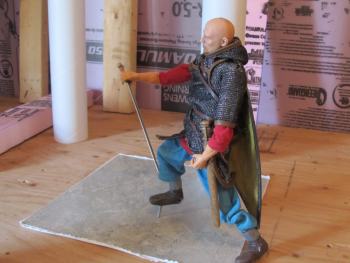
Here is a picture showing me tinkering around with an early stage of the temple. I have a cardboard dragon and I am checking the scale of things . How does it all fit together? The temple, the columns etc. I actually started doing this before I made the dragon so it would fit. There is a lesson in this in that you should do sketches and tests of things early on before you start building.
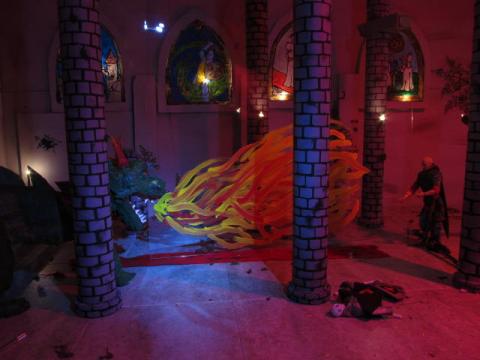
And here is a look at the finished temple. I took this picture during the animation process. the lighting is terrific. I used a couple of small lights and a red light.

Just as an aside note here is the completed dragon. You can see the tutorial on how to make something like this right here. I take you through all the steps of making a foam puppet for animation.
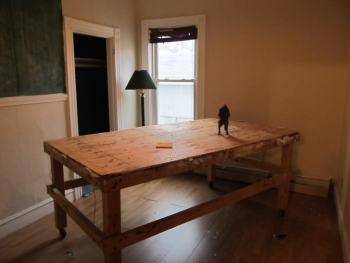
Ok, let's start working on the temple. For this project I built a table out of plywood and 2x4's. It is also on wheels so I could roll it around the room and work on it comfortably. If you are working on a large set like this you should consider the fact that you will have to work all the way around it. So it has to be open or on wheels.
The figure on the table is our dragonslayer.
And the surface of the table is 1/4 inch plywood which is sturdy but not too thick. We will have to drill a lot of holes in that as our characters move around in the temple.
Here is an important point about how I made this temple table. I temporararily mounted sheets of foam on the wall just where the table meets the corner of the room. This way I can roll the table away and work on the walls. Then when it comes time to shoot the animation I roll the table right into the corner and voila the walls are in place.
You can see in the picture here that the table is about six inches away from the wall on the right. Just need to roll the table up against it and we have a room.
Okay, Let's Build the Temple Animation Set
There are two basic things that I am going to show you when it comes to building a set. First off you build the set! LOL. That's pretty obvious. But the second thing is a little more subtle. It is about aging the set. You might want to consider this when building an animation set. How old is it? In the case of this temple it is very old so I am going to do a few different things to make it look and feel older (possibly hundreds of years old).
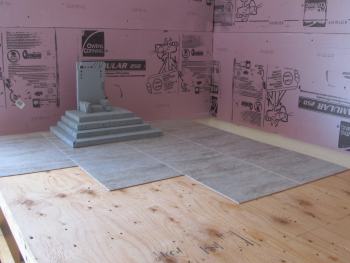
The first thing is the floor of the temple. There are a lot of ways to do this and I settled on floor tiles I bought from the Home Depot. They are easy to use and look pretty good for a temple floor. I chose a marble pattern. Marble temple floor is good.
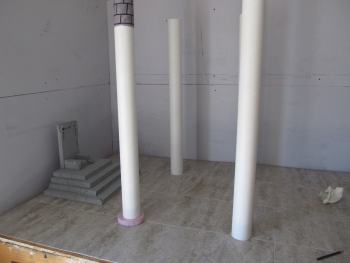
The tile floor is in place and now I am starting to add the various large structures in the temple including several columns and the throne.
The columns are simply cardboard shipping tubes that I bought at an office supply store.
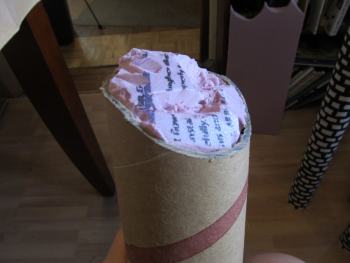
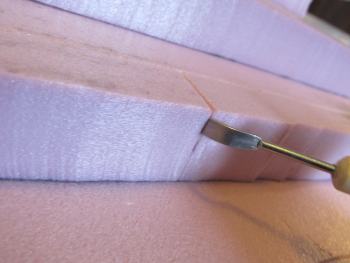
Now let's take a look at some aging. Makes sense that over the centuries maybe one of the columns has broken so I cut one of the tubes at an angle then carved some foam and put it right inside. This will look great.

And here is the painted and ready broken column. The base is a painted disc of foam.
Now let's make the Throne
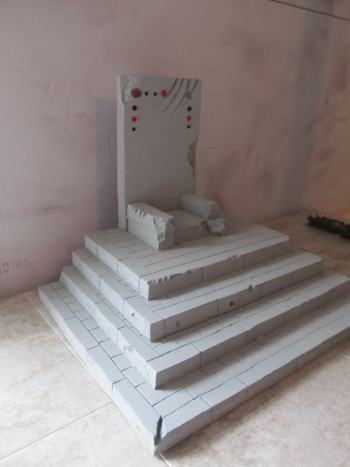
Here is the throne. One important thing to see in this is that it is aged and has sustained some damage over time. Most notably is the dragon claw marks in the upper right. The claw marks has also dislodged one of the jewels.

The throne is just built out of sheets of foam. Most crafts foams will work. I used one inch thick foamular which is readily bought in large sheets at home improvement stores.
The thing about foam is that it is so easy to work yet you can make just about anything. tools, knives, sandpaper and even hot wire foam cutters work well with foam. You can get really creative.
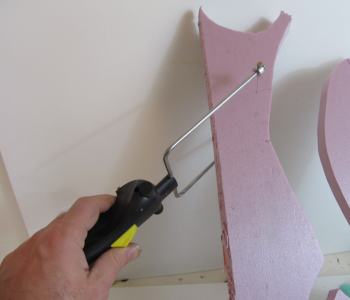
Here is the hot wire foam cutter in action. I love this thing.
 Let's continue on with the tutorial and do some more temple building and more aging Let's continue on with the tutorial and do some more temple building and more aging
RESOURCES AND MORE

This is the exact foam cutter that I use for this project and for many other projects: Woodland Scenics Hot Wire Foam Cutter

Do you like making projects and exploring a variety of hobbies?
Sign up for my free newsletter. I give you regular updates on hobbies and projects you can make. it is totally free and I don't share your email with anybody.
|