|
||||||||||
|
|
Part Two - Creating Multiple rooms in your game and stitching them together
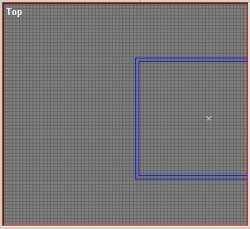
Let's start fresh with a new Project. Pull down File | New or do Ctrl + N You have a brand new Cube now Hit enter to accept it Press the camera button Right click your mouse and drag down inside the Top view pane. This pulls you away from the scene. Now left click and drag your box over to the right of the screen. This makes room for you to place your next room. It should look like this:
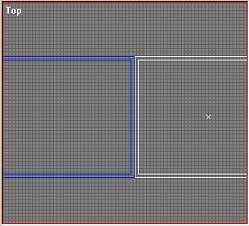
Now we are going to place our second room in the game. Press the Template button Pull down the menu Tools | New Brush | Cube and accept the default values This places a new box right on top of your first box. Press the Move/rotate button and click and drag your new box away from the first box. Place it so it rests right along side the first box. Remember to avoid any space so the game doesn't leak. It will look like this:
Hit Enter to accept your new room. You are now ready to cut out the doorway between the two rooms. To do this we use something called a cut brush. Go to template mode and select the cube brush. This is important: Select the parameters for this brush as "solid" and "cut brush" - Click ok Now press enter and your cut brush appears. It is right on top of the last cube you made so select Move/Rotate
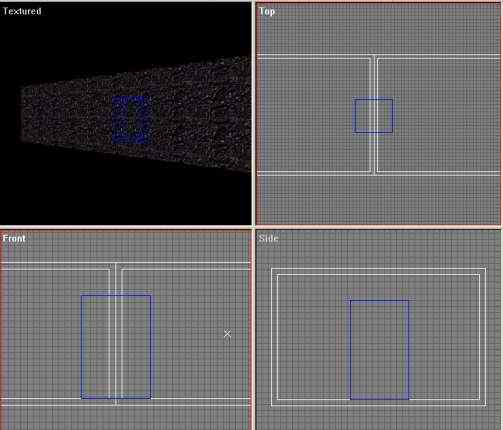
Kind of a big doorway isn't it. It is the same size as our rooms so let's resize it. Press the Scale/Resize button Visualize this cube as a doorway and reposition it where you want your
door to be cut out of the walls. To reposition it use the Move/rotate
button Keep moving and scaling this new cube until you get it where you want it. You should end up with something that looks like this:
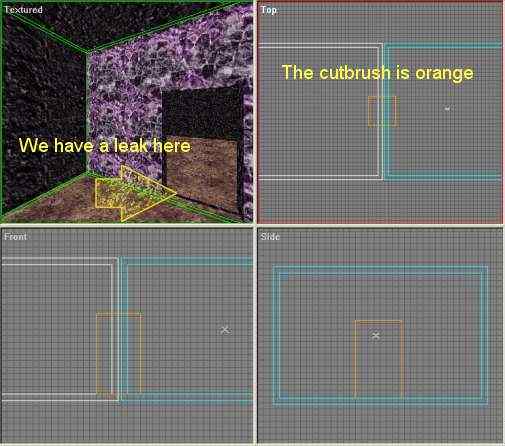
Remember not to place it in a way that will cause a leak in the level. Now all you have to do is in template mode hit enter and the cut brush will turn an orange color. This means it has cut away the door. To verify you have made the cut you can move around in the view screen by pressing the View button then right or left click and hold the mouse in the view panel and move your view around. I have applied some quick textures to the rooms so you can see my doorway. I put the same texture on both floors to add a nice continuity between the rooms. I have also intentionally placed a space between the two doors to show you a leak between my two rooms (this is pointed out with the yellow arrow). Just select one of the rooms and with the Move/rotate button click and hold the room moving it closer to the other room.
Experiment with cut brushes. Cut a window, resize the cuts. Remember that the mode is important so you have to switch modes between Template, Move and view mode. Resize your solid cubes before cutting because once they are cut you cannot resize them. Do more cuts and remember to check for leaks. You have got some basics down now. You can actually start to make some complex levels. I recommend you practice the skills you have learned. It takes time to understand how to switch between the modes and how to manipulate the various objects. Practice what you have learned and stitch together more rooms of various sizes. Make sure you practice applying textures and lights. Return to this section and practice your textures
|
|||||||||
Copyright©2001-2016 Kalif Publishing - Contact, copyright and Disclaimer - Let's Make Something T - Storm the Castle T Publishing
|
||||||||||