Hi, Thanks for visiting my website. My name is Will and if you have questions
or would like to
contribute projects or ideas you can contact me
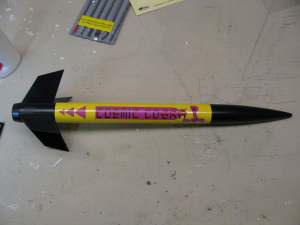
The Estes Cosmic Cobra Rocket
.
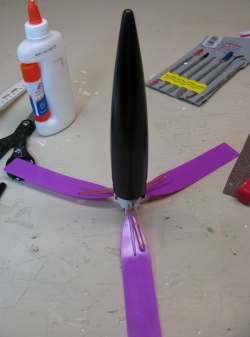
The Cosmic Cobra Model rocket by Estes is a bit of an unusual rocket in that it has a unique nose cone recovery system. It has a helicopter like recovery. The nose cone, unlike most rockets, separates from the body of the tube and comes down on its own by means of the spinning helicopter like blades.
The rocket itself is extremely easy to build, being mostly plastic, and you can complete it in less than half an hour. It is also a larger than average sized rocket so it doesn't generally fly real high which makes it easy to recover both the rocket and the nose cone
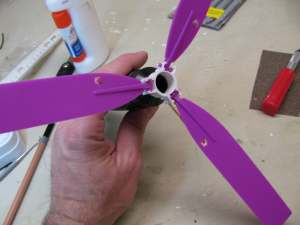
This picture shows the Helicopter nose cone. This spins as it descends.
This tutorial comes complete with a youtube video showing the launch and the complete assembly of this model rocket.
How to Assemble this Rocket
This is an easy assembly and it will only take you about half an hour. There is no painting required for this rocket which makes it even easier.
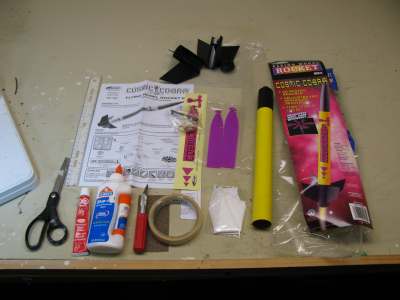
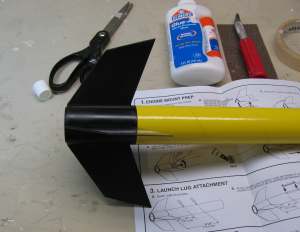
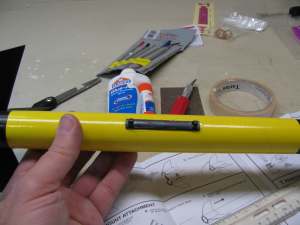
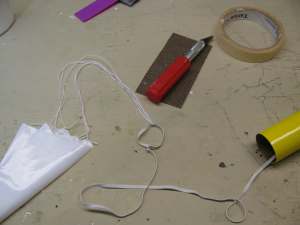
Open the package and inspect all the materials according to the parts list. You should have everything listed. I also have here in the picture what tool and materials you need. You need plastic cement, white glue, scissors, a hobby knife and some sandpaper.
Use the Plastic cement and glue the two halves of the fin assembly together.
Now glue the fin assembly into the rocket tube. Apply the glue to the inside of the tube then assemble. Do not put the glue on the fin assembly - it will just be scraped off as you insert the assembly into the tube.
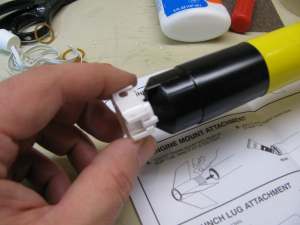
Next mount the launch lug onto the tube of the rocket. You measure four inches from the fin assembly and this is where the launch lug starts. The assembly instructions that come with this rocket show you exactly how to do it. Make sure it is glued down nice and strong.
Now glue the blade ring to the nose cone of the rocket. There is a notch in the blade ring that lines up with a notch in the nose cone.
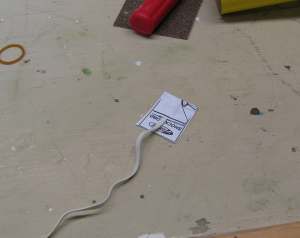
Cut out the little template for the shock cord. This is on the assembly instructions sheet. And glue it to the shock cord.
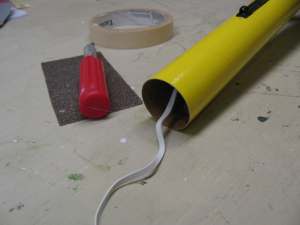
Next glue the shock cord assembly into the body of the rocket. Set it about one inch deep into the body. Do not glue it right to the edge.
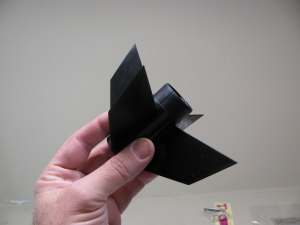
Now assemble the helicopter blades onto the nose cone assembly. This can be a bit tricky and there is a right way and a wrong way to do this. Follow the instructions carefully when doing this stage. You can't really ruin anything in this step. If you do it wrong you can disassemble it and reassemble it.
Now assemble the Parachute by tying it to the shock cord assembly. You can now fold it up and after inserting a few pieces of recovery wadding into the body of the rocket you can roll up the parachute and insert it right into the tube. Pay careful attention to how you roll the parachute. The instruction sheet shows you the best way to do it. It will make a difference in how the parachute deploys after launch.
Insert the nose cone helicopter blade assembly into the body of the rocket. Put the engine mount onto the other end of the rocket and install the decal. This rocket is ready for an engine and launching.