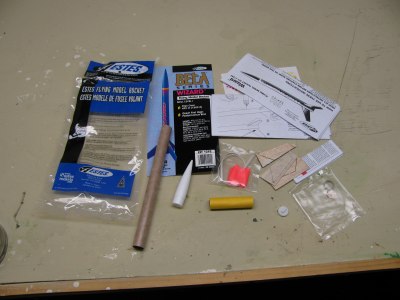
Open Up the Package and Inspect all the parts. Make sure you have everything by the parts list included.
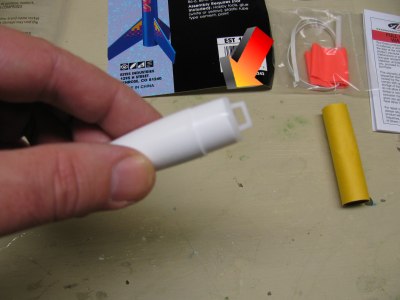
Glue the nose cone together. This is two parts and you should use a model cement glue. This is because the parts are plastic and the model cement glue works the best.
This is the only place you will need cement glue.
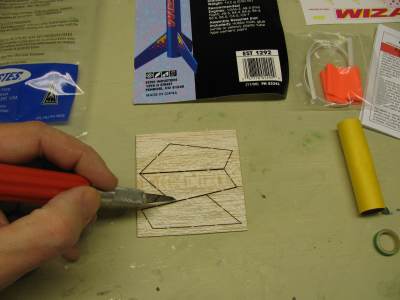
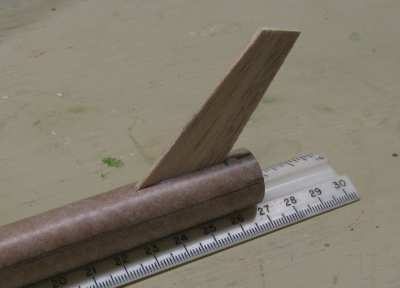
Carefully, using an xacto knife, cut out the fins. Take your time with this, it is very easy to cut the fins wrong. Then you will have to glue them!
The fins are already pre cut but still attached within the sheet of balsa wood.
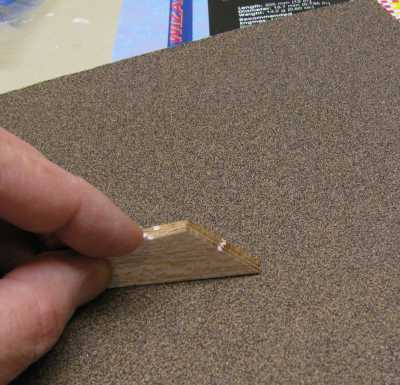
Now stack the three fins together and sand all the edges down as shown in the picture below. It is important to do this for two reasons.
First you will get all the rough edges off the fins which makes them aerodynamic and allows you to glue them firmly to the body of the rocket. And second it insures they are all the same size! This will make for straight and accurate flight.
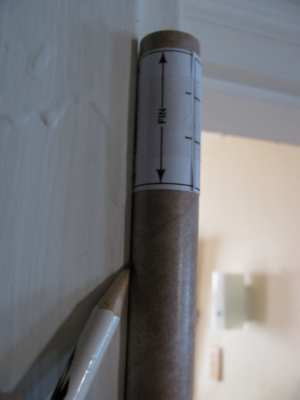
Cut out the little body tube marking guide and tape it to the tube of your rocket as shown. This guide helps you mark the fins in and the lauch lug in
the right place. Mark three lines where your fins will go. Then place the rocket tube in a doorway frame and mark a line where the launch lug will be.
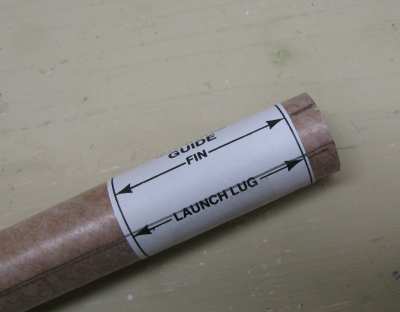
In the picture here the rocket tube is correctly marked for the fins and the launch lug.
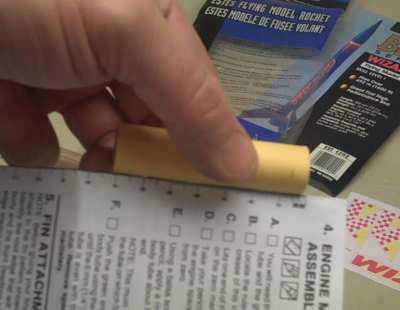
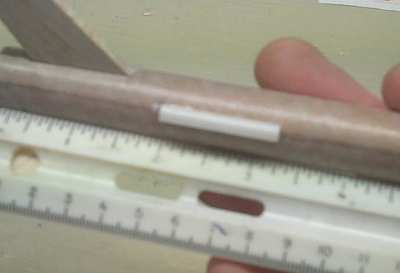
Make a mark on the yellow engine spacer tube that is 6mm from the end (1/4"). You can use the convenient ruler on the fold of the instruction manual.

On the rocket tube, on the same end that the fins will go, make a mark at the 2 inch line. You will be applying glue to the inside of the tube right around this two inch line.
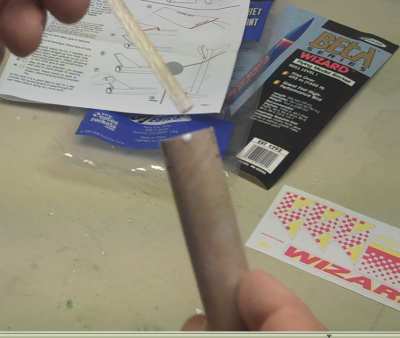
Get yourself a scrap of wood or even a pencil (I use left over scraps from when I cut the fins out) mark it at 2 inches then apply glue to the tip of the scrap.
Now use this as a way to apply glue to the inside of the tube at approximately the two inch mark. Apply a liberal amount all around the inside of the tube at two inches.
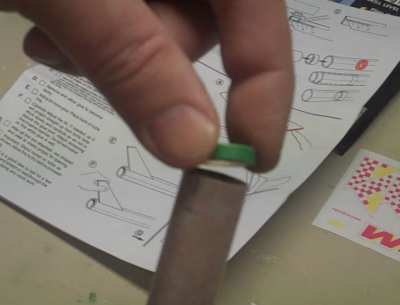
Insert the green ring (engine block ring) into the tube.
Then use your yellow spacer tube to push the engine block tube down to the two inch line. You have a mark on your yellow spacer tube, push it in up to that mark.
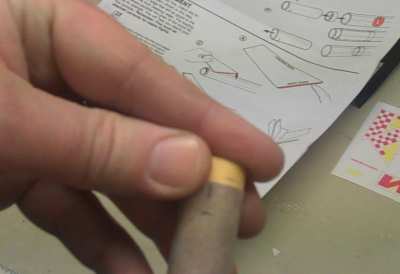
This will push the green ring down to the right position. Once you have pushed it in to the correct depth remove the yellow spacer tube quickly so as the glue doesn't
take hold of it and make it stick. This yellow tube is just a template for doing this process, it is no longer needed for the rocket.
Now attach your fins. Take your time with this and if this is your first rocket you may want to attach one fin then let it completely dry for at
least half an hour before you do the second fin, and the same thing before you attach the third fin.
The best way to attach the fins. Lets look at one fin. The best thing you can do is apply glue to the correct edge of the fin then stick it
to the right place on the rocket body. Then remove it! And let both pieces sit for five minutes.
This allows the glue to get tacky. Then you apply a second coat of glue to the edge of the fin and wait another five minutes to let it get tacky again.
Then apply the fin right to the spot you had earlier applied it to. With the stickiness of the fin and tube it will stick real well and you can hold it for a minute
or two then place it down and let it dry. Repeat this process for each fin.
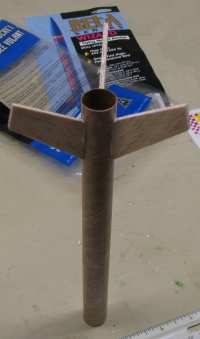
Once all the fins are completely dry you should apply another layer of glue to them on each side of the fin where the fin meets the tube. This will make the fins super strong.
The fins have been glued and now you can just let the rocket sit like this and dry completely.
Next you should glue the launch lug to the rocket tube. It starts two inches from the end of the rocket. And it goes right on the launch lug line you had
drawn when you put the rocket tube in a doorjamb. Once it dries put a second coat of glue on it.
 Continue on with the assembly of this rocket Continue on with the assembly of this rocket
|