| 
Assemble the Launch Pad: It's a pretty easy thing to do and a nice place to start. It gets you warmed up for you rocket building.
Now Build Your rocket or rockets
There are lots of different rockets you can build and how you build it will depend on the kit you buy. But for the most part there are two basic types of rockets. The first type is the traditional balsa wood and cardboard tube rocket. And the second style is the plastic rocket.
Note: The estes Tandem-X kit comes with both these types of rockets and I have a complete tutorial for each type here: The crossfire balsa wood rocket assembly instructions , the Amazon Plastic Rocket assembly instructions
The Balsa wood and cardboard tube rockets generally take a little bit more work to make and the plastic rockets often are snap together. If this has you worried don't ! Each rocket will come with complete instructions. But you will need a few materials and tools for making them. The balsa wood rocket will need an xacto knife and some wood or white glue and the plastic rocket will need some plastic cement or plastic glue.
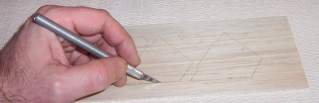
The above illustration shows the fins for the balsa wood rocket. They are stamlped and pre-cut but you will need a sharp knife to cut the small tabs and remove them from the sheet of wood.

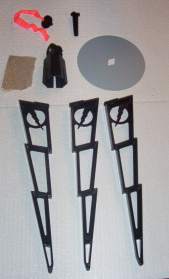
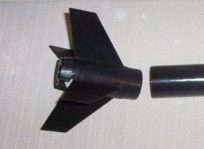
The picture above shows the almost completed rocket. The fins have been glued on and the parachute and nose cone assembly is in place. It is almost ready for painting and stickers.
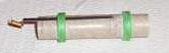
The most difficult part of the balsa wood assembly is the engine mount. This takes a little bit of care and a little bit of work but it comes with complete instructions. This engine mount gets inserted into the rocket and the engine will go into it.
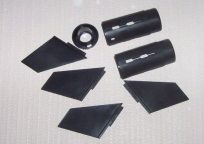
The Plastic Model Rocket is much easier to build and this picture shows the engine mount and the fins.
The fins and engine mount are glued together and ready to put mount to the rocket tube.
It's not that hard and it is a lot of fun to build your rockets. Each one should take you between one and two hours to build and they always come with complete step-by-step instructions. Okay, let's take a look at launching your rockets and what you do.
Introduction to model rocketry Part 3: Launching rockets
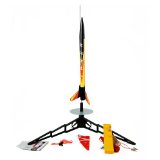
Estes 1491 Taser Launch Set
The Taser is a stunning rocket that's capable of subduing anything out there that's dangerous! The Taser Launch Set from Estes is an exciting, radically designed high altitude rocket launch set from the E2X (Easy to Assemble) series. The rocket kit features a brightly colored one piece body tube, molded plastic fin set and bullet shaped nose cone. Simply glue a few rocket pieces together, apply the colorful self-stick decals and in less than an hour you'll be ready for the launch pad! The Taser rocket is 16.5 inches (41.9 cm) tall. With its custom three-fin design, it climbs to an outta sight altitude of over 1,000 feet (305 m). A bright-colored 12 inch (30 cm) preassembled parachute returns this rocket back to the launch site. You'll be ready in minutes for another extreme launch experience! This launch set comes complete with the Taser rocket, Estes controller and launch pad. Glue, engines and 4 AA batteries required (for your controller) - sold separately. Recommended for ages 10 and up with adult supervision for those under 12. |