There are a lot of amazing types and shapes of polearms that you can make and If you are looking for ideas on the different shapes of polearms I have a page that has explanations and pictures of the various polearms like the Glaive, Bardiche, Halberd and more. I cover just about every pole weapon ever made. Medieval Polearms
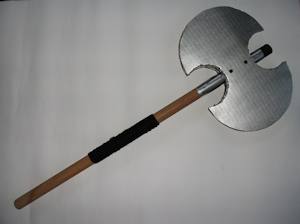
Here are the two different shapes I make:
I have made this project with a six foot long shovel handle that I picked up at the hardware store. This length makes it a polearm. You can make it long like this or you can shorten the handle to somewhere between 2 and 3 feet so it can be used as a single handed weapon.
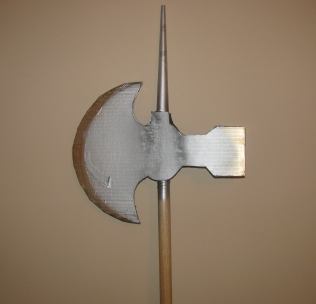
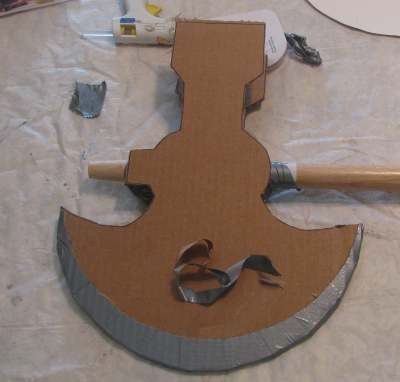
This first picture is of the Poleaxe. It has three distinct parts to it. The first is of course the axe. This was for slicing and hacking. The second is the point at the top. This was for piercing. The third is lesser known but it is the hammer. This could deliver very severe percussive blows.
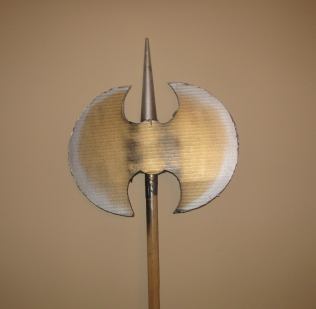
Can you make a Poleaxe like this one? You sure can and here is a picture send in by a web visitor (Ella) She used this tutorial to make this great looking poleaxe.
For This Project you will need:
- Some kind of a pole like from a broom or shovel. It can be anywhere from two to six feet in length
- Duct tape
- A cardboard box or a pair of boxes. You need to get two flat pieces without any creases that are each 12 inches by 18 inches in size. This is so you can make the axe heads about the size of mine. You can of course make yours smaller.
- 1 empty cereal box to make the cone that is the spike on the top. Optional
- hobby knife for cutting the cardboard/ scissors
- Paint: any kind you want. I used spray paint gold, black and silver
- Glue gun, this is optional but the best way to glue it all
First design your polearm head on a piece of paper or poster board. you can put the handle up against it to get a sense for how it looks.

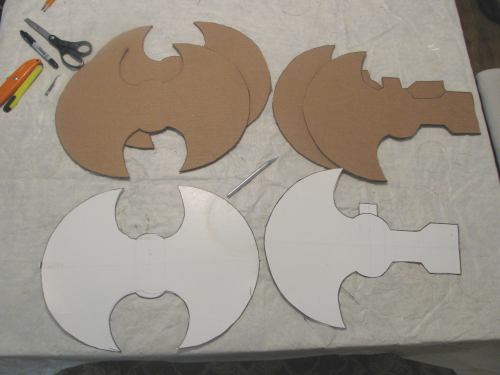
Once you are happy with the design you can tape this paper template down to your cardboard, trace around it onto the cardboard and then cut the cardboard shape out. Do this twice. You need two sides of the axe. I am doing two axes so I have made two copies of each pole head.
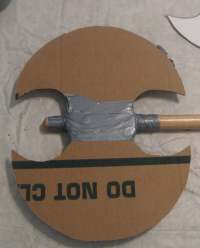
Put one cardboard axe head under the pole then duct tape it in place. Tape it really securely. I didn't just tape it down. The tape goes around the back too. I wrapped it several different ways including an X pattern around the pole and cardboard.
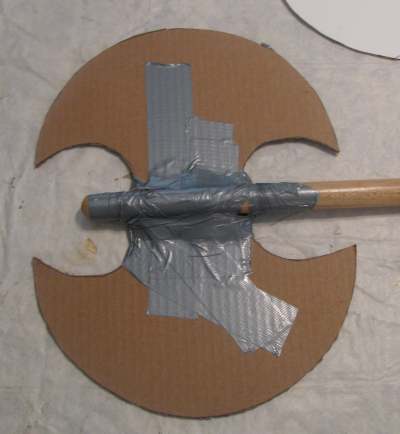
Make it nice and tight so it won't slip when you are using it.
The small picture shows how the duct tape has been wrapped around to the other side.
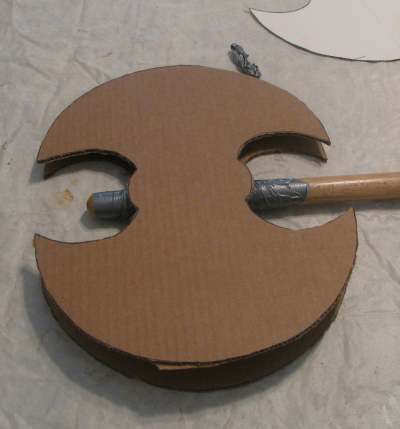
Now place the second sheet of cardboard axe head over the whole thing.
And either hot glue the bladed edges of the axe together or duct tape them. Just tape or glue the edges that would be sharpened on a regular axe. Thats from point to point on both axe blades. The next picture shows what I mean by just taping the edges of the blade.
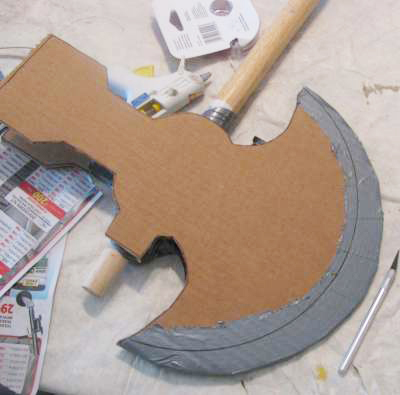
The tape is a bit ragged so if you want that sharp edge to look sharp draw a line on it like in the picture shown then use a hobby knife to carefully cut away the excess. Pull away the excess and you have a nice looking edge as shown in the picture below.
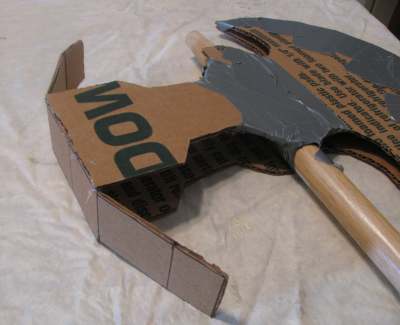
If you are making percussion hammer on your axe you want it to have a nice box shape. Don't tape the edges of it together like you do on the axe blade. Cut yourself a strip of cardboard and tape it as shown in the pic below to give you a nice hammer head shape on the polearm. In the picture part of it has been glued in. I just need to glue those flaps into place.
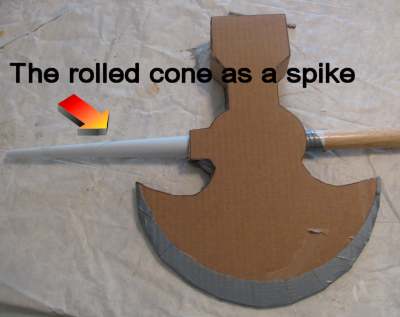
The axe is just about done. Roll a cone out of your cereal box cardboard or a stiff card stock and glue it to the top of the axe. You are ready to paint it!
The colors I used are silver, gold and black - all spray paint. But you can use regular brush on hobby paints too!
Hero's Edge Foam 32 Battle Axe

Medieval Warrior Handmade Viking Pole Axe Collection
- Medieval Warrior Handmade Viking Decorative Pole Axe.
- 38 Inches Overall length of Axe
- 9.5 Inches Mirror Polish Carbon Steel Blade
- 11.5 Inches Widest Point of Axe
- 34 Inches Smooth Wooden Handle
|


