Hi, Thanks for visiting my website. My name is Will and if you have questions
or would like to
contribute projects or ideas you can contact me
Part 2 - The hatching chick and the brood box
This is a continuation of my tutorial on how to incubate chickens in a home made incubator. It is now three weeks later and you can watch the chick hatch. I also give you some great advice on caring for them as new born chicks. It is pretty easy to do and you don't have to get nervous about any of this. I will show you the basic things you need to know.
20 Days from when you placed the eggs in the incubator
On the evening of the twentieth day I started to hear some chirping coming out of the incubator. Upon inspection I didn't see anything going on! Hmmm... is this normal? Yes it totally is normal. The chickens inside the eggs are waking up and starting to proclaim themselves. This behavior of chirping inside the egg and tapping is called pipping or piping. Don't touch the eggs, and don't try to help them in any way. Just let them be!!
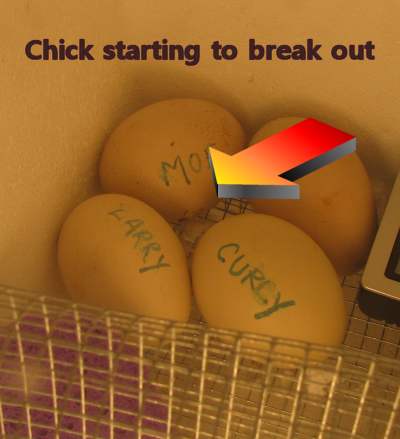
21 Days from the start
Ok, Out of the four eggs I placed in this incubator only one has started to break out of it's egg. You can get low hatch rates like this depending on a lot of factors including wide swings in temperature or the fact that the eggs simply weren't fertilized.
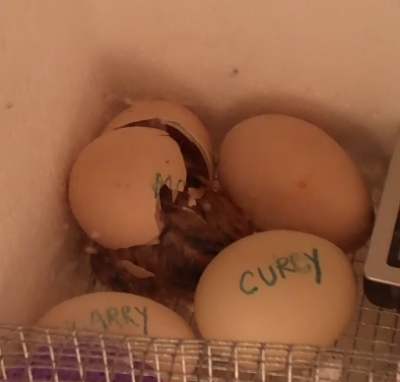
About one to two hours later the chick had finally broken out of its shell and it spent some time laying around exhausted and it spent some time chirping. First opportunity I got I removed the no longer needed egg shell.
Quite alright to leave that chick in there for 24 hours while the others hatch. They should all hatch within 24 hours of each other. If not then your other eggs are not going to hatch and you can umm.... take care of them.
About helping the baby chicks
A lot of people have this question and generally the advice is not to help them in any way. It is important that they be strong enough to break out or else they are probably not strong enough to survive. I do know a person who has helped the chicks on occasion (very gently) to great success.
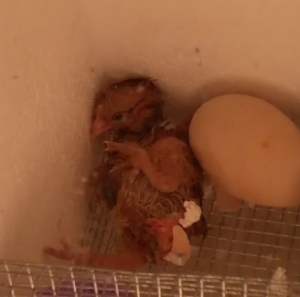
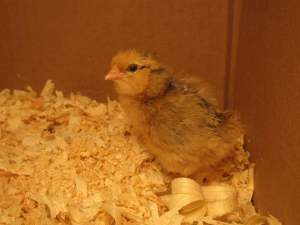
The exhausted chick
Just leave it be. In a couple of hours it will show improvement and within 24 hours it will be acting like you expect a chick to act!!
Now you are going to need a brooding box for those baby chicks. This is the box that they spend their first few weeks in and there are five items:
The actual box (sizeable enough for all the chicks that hatch.
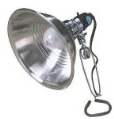
Some kind of lamp with a reflector on it (preferably with a reflector)
Wood chips or newspaper scraps to line the box with
A source of water (more about this in a minute)
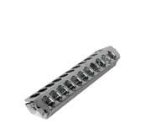
A source of food - Recommend you get actual chick food from a grain store and that it also be medicated.
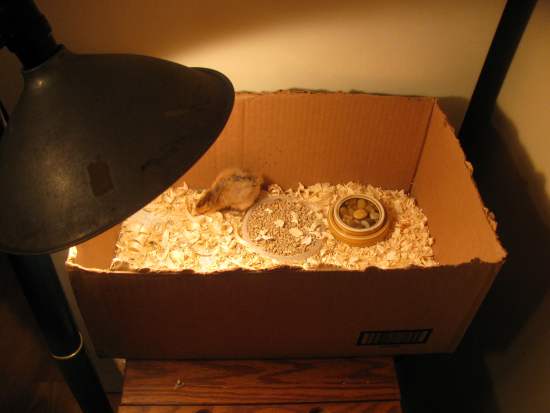
This picture shows my brooding box. Notice the reflective bulb hanging. And it is on one side. This allows the chicks to move away from it if they get too hot. You should raise and lower this bulb according to the chicks needs.
The temperature inside parts of this box is rather important. You want the area under the lamp to be somewhere between 90 and 100 degrees fahrenheit. The box will get cooler as you move away from the lamp. And you can put a thermometer on the bedding under the lamp to check this temp. The chicks need nice warmth for good health and they will situate themselves where the temperature is comfortable.
If they are staying away from the lamp and huddling in the opposite corner then the bulb is too bright and hot. So, either put a smaller wattage bulb or raise it up higher. If they spend a lot of time huddling under it and squawking a lot they might be chilled and you may have to increase the heat by lowering it or increasing the wattage. I used a 75 watt bulb in this box.
About the water -
Water is very important from day one and you do have to take certain measures. You don't want a simple open container that the baby chicks can fall into and drown. You can get an official waterer that is cheap or you can use some kind of shallow container and fill it with pebbles then water. The chicks can get at the water but can't fall in.
Reducing the temperature of the broodbox over time
I have done a lot of reading on this and you should reduce the temperature by about 5 degrees every week. So, after one week the temp should be between 85 and 95. Then the following week 80-85 etc. This continues until about 5-8 weeks when they have developed their feathers.
About Chick food - I recommend you find a local grain store or poultry supply store and get yourself some medicated chick food. This will be specially formulated for their health and the added medication will prevent a disease called Coccidiosis which can kill the whole brood.
You can use a flat plate or flat surface but you must clean it often and replace the food because the baby chicks will poop in it.
Take a few simple steps of care and before you know it you will have healthy happy chicks like Moe here!
I have a video that shows Moe hatching here:
Want to make improvements to your styrofoam incubator? Kellyn has done just that. And she sent us pics and information to help. This includes things like adding a fan to make the temperature more even. See that all right here: Improving the Styrofoam Incubator
Do you like making projects and exploring a variety of hobbies?
Sign up for my free newsletter. I give you regular updates on hobbies and projects you can make. it is totally free and I don't share your email with anybody.


 About the water -
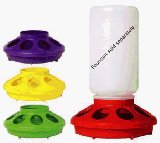
 Take a few simple steps of care and before you know it you will have healthy happy chicks like Moe here!
 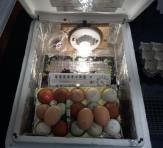 Want to make improvements to your styrofoam incubator? Kellyn has done just that. And she sent us pics and information to help. This includes things like adding a fan to make the temperature more even. See that all right here: