Hi, Thanks for visiting my website. My name is Will and if you have questions
or would like to
contribute projects or ideas you can contact me
How to Make a Marionette Theatre
A marionette theatre is something straight out of the past when storytelling was vibrant and alive. Well, there are a lot of forms of entertainment now including movies and television but there is still a place for this old and enchanting type of entertainment. I built this so I could give a marionettte show at a children's birthday party.
And I have a video on how to do this at the bottom of this page.
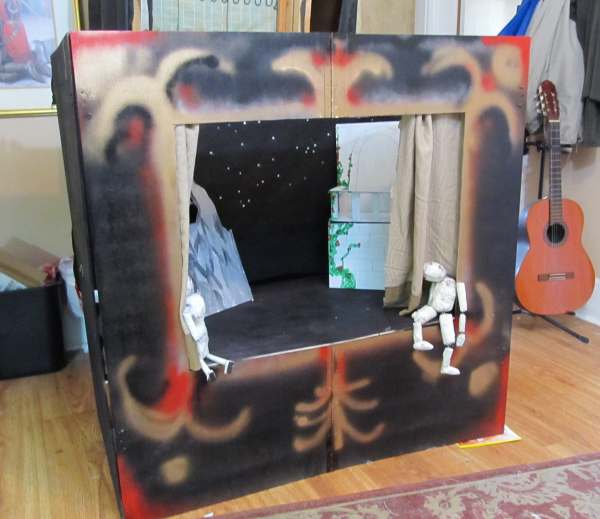
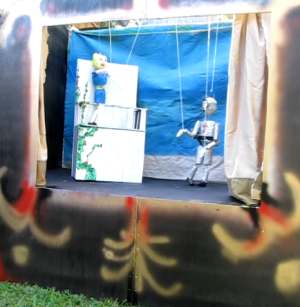
Here is a picture of the completed marionette theatre. One of the most important things about this is that it folds up very easily so it is very portable. You can throw it in the trunk of the car and take it anywhere. That foldability is of course optional and if you wanted to make this even easier you could leave out the hinges.
Materials: I used five sheets of 1/4 inch plywood. each sheet is 2 feet by 4 feet in size. I chose these sizes because you can purchase them like this and fit them in the back seat of the car easily.
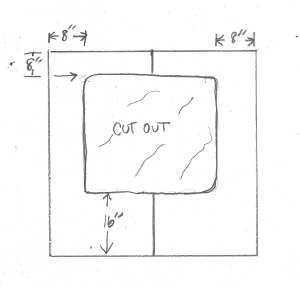
First thing you can do is to cut out the hole that will be the front opening of the theatre.
If you are using sheets of plywood 2feet by 4 feet then place two of them side by side as shown in the drawing on the left.
The picture shows how to cut them. 16 inches from the bottom and eight inches in from each side and the top.
Now you can go ahead and put hinges on these two. Hinge them right together.
Now you can add two more sheets by hinging them to the sides of your previously made front section. The important thing to consider is that the whole thing will fold up as shown in the picture. This way it all goes flat and you can easily carry it around and transport it.
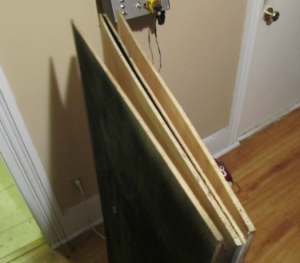
This picture shows the theatre folded flat.
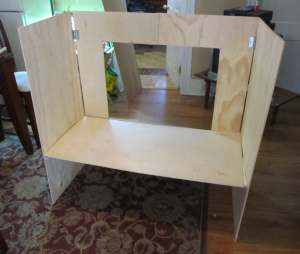
And this picture shows it opened up. The picture also shows the performance platform (the stage). That is simply another piece of 1/4 inch plywood that is 2 feet by 4 feet and it is just laid in there. This way you can easily take it out or put it in.
You support the stage by screwing in a few pieces of small wood. I put four of them, one on each side and two in the front. Now you can just rest the stage right on these.
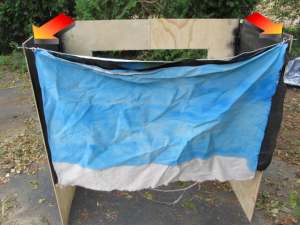
Ok, now let's make the backdrop. I just painted some sheets of painters drop cloth. You can use canvas or any kind of cloth. I painted various scenes for the different acts of the play. And I simply put some eyehooks on the theatre so I could connect the backdrop to it.
Note that I have three backdrops for three different scenes and ran a wire through all of them and hooked up that wire to the eyehooks on the theatre. This way as I changed scenes I just flipped the canvas in front to the back.
Here is a closeup so you can see how I hooked the backdrop to the theatre.
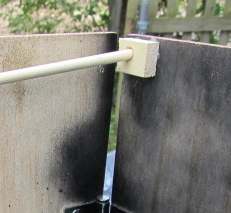
All that remains is to make and attach the curtains. I used a wooden dowel and glued little blocks to the side of the theatre. I drilled holes a hole in each block so I could stick the dowel in it. You, of course, have to make the curtains so you can take them out easily to fold up and transport the theatre.
Here is a closeup of the curtain rod mount.
Paint it. Have fun with the colors. A lot of red and black is good!
The only thing that remains is to make some marionettes and put on a show!
Making and Manipulating Marionettes is a superb guide to a craft and performance art that has fascinated audiences for over 2,000 years. Handsomely illustrated throughout, it presents precise instructions for the making of marionettes, both for plays and for acts in the variety tradition. All aspects of marionette design, construction, and control are covered, and there are rare insights into specialized designs and stringing techniques. Contents include an introduction to the marionette tradition and the principles and practicalities of marionette design; advice on materials and methods for carving, modeling, and casting puppet parts; detailed explanations for marionette control, stringing, and manipulation; step-by-step instructions for the construction and jointing of human and animal marionettes; and professional secrets for achieving a wide range of special effects.
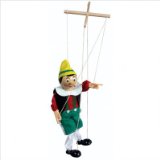
Welcome to the world of "Original Wooden Marionettes". Our Marionettes are all carefully designed and crafted by hand with careful attention to detail. Our Marionettes always take "center stage"! They can make a magical decoration in any child's room, yet they are sturdy enough for real child's play. For hours of enjoyment and dramatic play, we think that you will find that they are quite simple to use. All of our Marionettes stand approximately 15" tall excluding the strings. Your Marionette is from a large family, all awaiting to be part of your family. Designed for ages 5 years and older.
Do you like making projects and exploring a variety of hobbies?
Sign up for my free newsletter. I give you regular updates on hobbies and projects you can make. it is totally free and I don't share your email with anybody.


 First thing you can do is to cut out the hole that will be the front opening of the theatre.
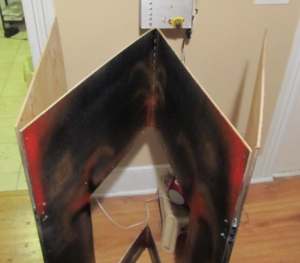
 And this picture shows it opened up. The picture also shows the performance platform (the stage). That is simply another piece of 1/4 inch plywood that is 2 feet by 4 feet and it is just laid in there. This way you can easily take it out or put it in.
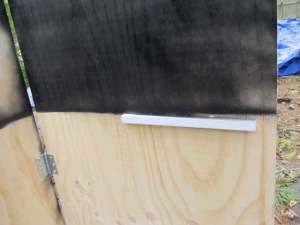
 Ok, now let's make the backdrop. I just painted some sheets of painters drop cloth. You can use canvas or any kind of cloth. I painted various scenes for the different acts of the play. And I simply put some eyehooks on the theatre so I could connect the backdrop to it.
  Here is a closeup so you can see how I hooked the backdrop to the theatre.
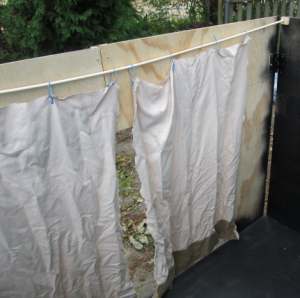
 Here is a closeup of the curtain rod mount.
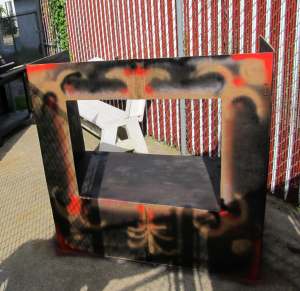
 The only thing that remains is to make some marionettes and put on a show!