Here are the full instructions with pictures on how to make this volcano. I also have a video that shows the whole process. It's on this page.

I also have the Mentos and diet coke volcano which shoots a blast a foot or more into the air. This one is spectacular, easy to make but requires adult supervision. The Mentos Volcano
Here is what you need for this project:
- 1 sheet of posterboard
- 1 solid piece of sturdy cardboard or wood (This is to sit the volcano on and it can be posterboard or a piece of corrugated box).
- 1 bottle -almost any size is ok from 20oz soda bottle to a snapple bottle
- Paints and other things to decorate it any way you like
- Some Masking tape, but cellophane tape will work too
- a few sheets of newspaper
Volcano erupting Materials:
- water
- 4 or 5 drops of detergent
- Two Tablespoons of Baking Soda to the water
- Vinegar
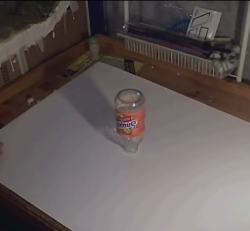
Take your bottle and place it upside down on the posterboard and draw a circle around the mouth.
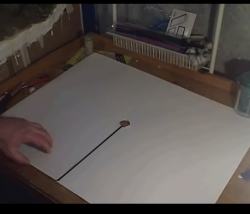
Now cut the posterboard just like in the picture at left. It ends up with a slot from one side and the circle cut out.
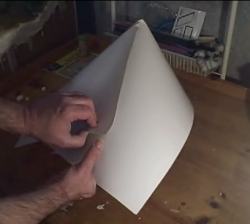
Now grab both ends of the slit and fold one end right over the other to form a cone. Put some tape on it so it stays a cone shape. This is the cone of your volcano.
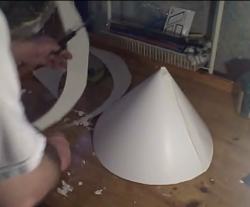
Trim it with scissors so it is a nice cone shape and the right size for your bottle. Trim it in small increments, taking a little bit off at a time so you don't over trim it.
Now trim the top of the cone so it fits nice and snug over the bottle.
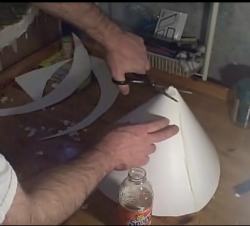
Tape the mouth of the bottle to the cone of the volcano. The bottle should sit flat on the table as does the cone. This is the basic shape of the volcano and it looks great. Remember, take your time and trim it in little strips at a time until it has a nice shape. This way you don't over cut it and have to start over.
Note: In this tutorial I paint the volcano using water based paints. If you want to use crayons or pencils you should at this point, once you have the shape of the cone right, take all the tape off the volcano and lay the cone out flat - this way you can use crayons or pencils to decorate it like a volcano.
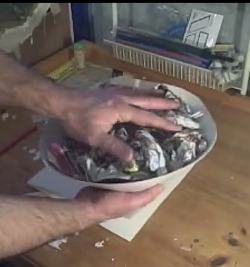
Flip the cone over and fill it with crumpled up balls of newspaper. The bottle is still there right in the middle under my hand. This newspaper will add strength and solidity to the form.
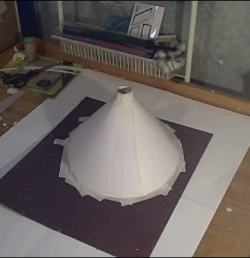
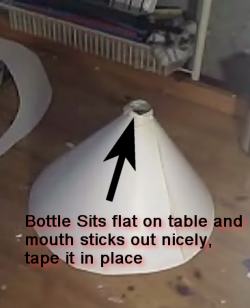
Place the cone down on your board and tape it firmly in place. Notice how it sits nicely and see how the bottle sticks out the top? This volcano looks great and you can use just about any kind of a strong flat surface to tape it down to. A piece of wood is good, or some strong corrugated cardboard. Even a couple of sheets of posterboard taped together would be ok.
Now you are ready to add some decorations and make it look real!
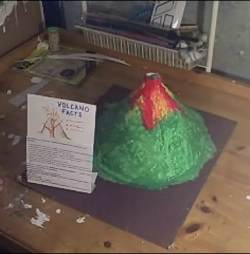
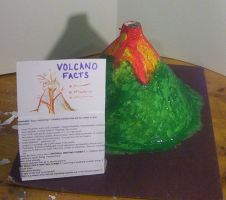
Here is completed volcano, all painted up and ready to go! Remember that you should paint red, yellow and orange at the top to simulate the flowing magma. And add a fun fact sheet to your volcano to show how they work. I have a fact sheet with a picture that you can print up here
HERE IS THE VOLCANO FACT SHEET you can print up and use for your volcano. Paste it to the other side of the volcano diagram. (Right Click and Save as) Microsoft word document
Now for the Ingredients for Making this Volcano Erupt
- Take the bottle out of the volcano and fill it almost full with water
- put 4 or 5 drops of detergent right into the water
- Add Two Tablespoons of Baking Soda to the water
- Put the Volcano over the bottle so it is in place and ready to go
- Pour some vinegar right into the volcano bottle and watch it Erupt!!
Amazon.com has some great volcano making stuff too!
Curiosity Kids Lava Rock Volcano
- Build your own volcano, add lava rocks and color, and squeeze it to erupt!
- Recommended for Ages 6+
- Perfect for science fairs or home crafting projects!
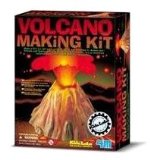 
Volcano Making Kit - Make your own volcano and watch as it erupts with bubbling, fizzing "lava". Kit includes fast drying plaster, volcano mold, paint, paint brush and stir stick. Requires baking soda and vinegar for eruption (not included).
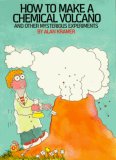
 How to Make a Chemical Volcano: And Other Mysterious Experiments How to Make a Chemical Volcano: And Other Mysterious Experiments
In recent years, the fascination among kids with chemistry sets has seemingly dwindled. And after all the terrorist bombings worldwide, many parents are probably reluctant to have their kids messing around in the basement with the test-tubes and chemicals that used to be de-rigeur in adolescent development. But here's a delightful book of simple chemistry experiments that any kid can do with household compounds like baking soda, vinegar, and whatnot -- perfectly safe, and highly educational as well (and the volcano seems like it would be very cool). And, I was pleased to find out that it was written by a 13-year-old! Recommended. 
|


