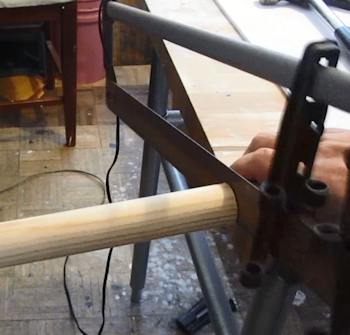
Cut your dowel or broomstick to the size you want. I am using 1 1/4 inch thick dowel that I bought at the Home Depot. I cut it to about five feet in length.
Now we are going to start the carving of the head of the staff. We will use two pieces of foam to make two halves of the staff head.
Lay your crystal and staff down like this and trace around the crystal and the staff with some room to spare around the crystal.
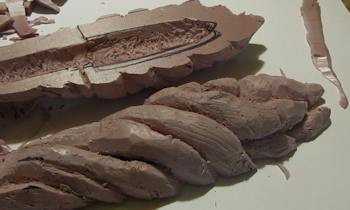
You want to carve two pieces of foam just like you see here. They match together. There is a channel for your wooden staff and a nice compartment for your crystal.
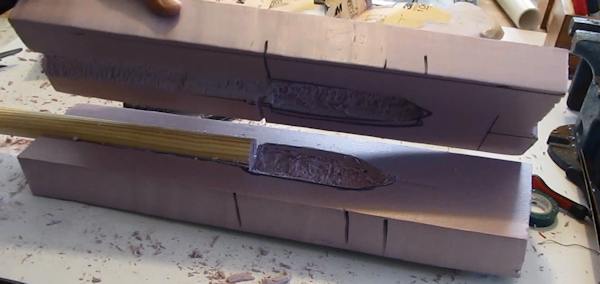
Now you can put those two halves together and tape them in a few spots so they hold together. And we can start carving the head of the staff.
Now roughly sketch out the shape of the staff head. For now it can be a rough drawing. And be sure to include the actual wooden staff part. We will do the carving in stages. Do some rough drawing, do some carving, more drawing, more carving etc.
When doing the drawing and the carving you should refer to pictures of the actual staff. And take a good look at the pictures of my staff. This will help you get the shape pretty nice.
It shouldn't be an exact copy of the movie staff. Make your own staff that is generally like the movie staff!
Start by doing some rough cutting and shaping. I used a hot wire foam cutter for this. But you can use any tools including knives, xacto, and even rasps and rough sandpaper.
Our goal here isn't to carve the shape! Our goal is to move it toward our final shape. Yup! Bit of a concept to understand but just trim it down some and look at it.
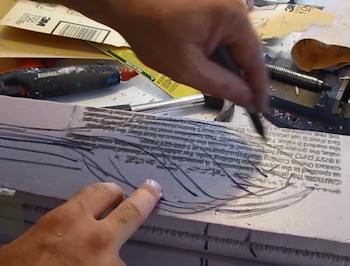
In this picture you can see I did an initial rough cut. Then I drew more lines on the foam. These lines are roughly what the roots of the staff are. Those roots wrap around the staff kind of like barber pole stripes. So, do some cutting, draw some lines, do more cutting and keep repeating this process.
Now it is starting to take shape. I call this the pine cone stage because it is starting to look like a pine cone!
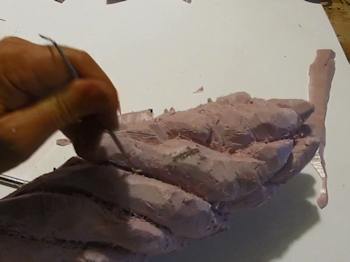
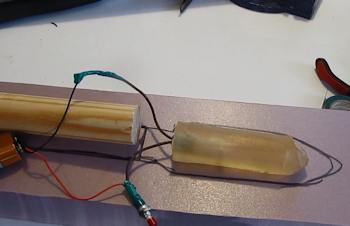
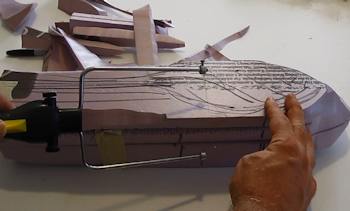
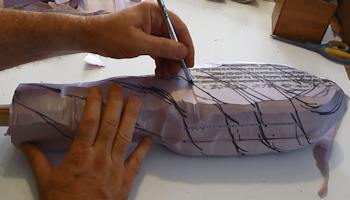
At some point during the carving there will be places that break through to the cavity you made for the crystal. Clean these up. You want the break through and you want the glowing crystal to be seen. These breaks are between the various roots that you carve.
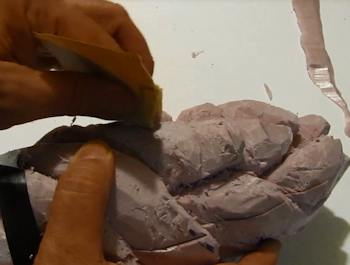
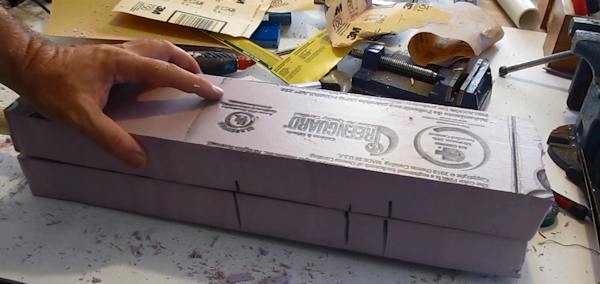
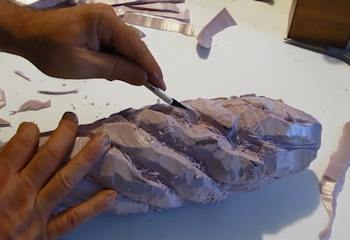
Once you have the shape close to how you want your staff you can do a lot of the final work with sand paper. Grit between 100 to 220 is good for this.
It looks pretty good. Let's move on to the next steps!
 Continue Continue
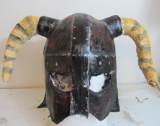
Make the Skyrim Iron Helmet
Nice tutorial on how to make the Iron helmet out of cereal box cardboard and paper mache. Good looking helmet and strong. How to make the Skyrim Iron Helmet

Do you like making projects and exploring a variety of hobbies?
Sign up for my free newsletter. I give you regular updates on hobbies and projects you can make. it is totally free and I don't share your email with anybody. |


