Once the Plaster of Paris has dried carefully and slowly remove it from the mold. Depending on how thick your casting is you can easily crack or split the piece. That is ok. YOu can glue it back together very easily and the crack will not show. One way to minimize this is to give it plenty of extra time to dry before you remove it from the mold.

Now you can work on the roof. You can cut it to the size you need for the building. You can also sand it and file it.
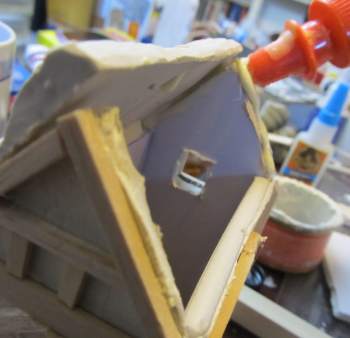
Apply some glue to the building and affix the roof right to it. Depending on whether you used Hydrocal or Plaster of Paris you may want to experiment with glues. Some work well and others don't work so well.
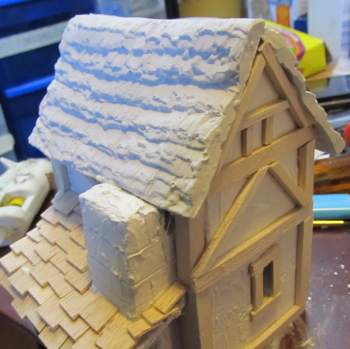
The roof is in place. Now we can finish it up.
Now you can finish up the structure of the roof by patching it with a little bit of plaster of paris. Just spread it in, particular at the apex of the house where the two roof sections meet.
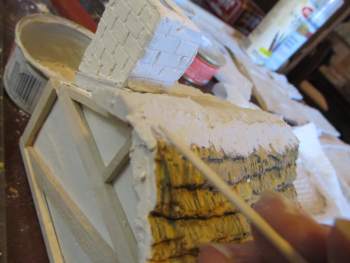
Now a couple of tips on how I painted the roof to make it look like a thatched roof.
I first painted the whole thing with a wheat kind of color. I actually used a color called camel. Thats the yellowish color. Then I used a very wet paint brush to brush in a little bit of black. By using it very wet the black will tend to sink into the lower sections giving us that separated shingle look.
I then used a soft pencil to draw in a variety of lines. This gave it even more resolution and gives us that bundled straw look,
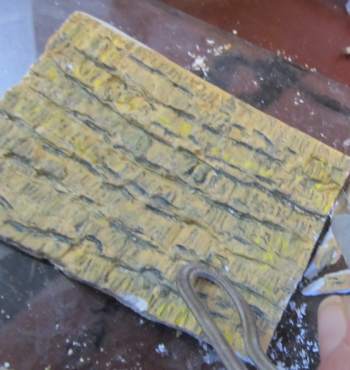
Finally I touched it up a little bit with bright yellow. That's kind of like highlighting.
Now Let's do a couple more roof styles
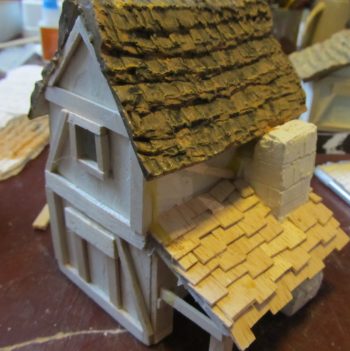
This is the wooden shingle thatched roof style. I love this look.
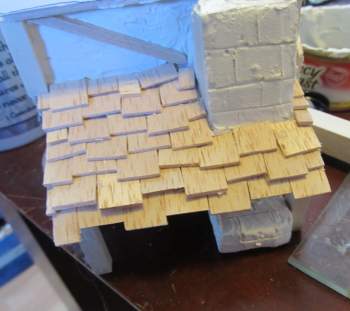
Here is a wooden thatched roof style. This looks terrific and this particular structure is a roof overhanging the blacksmith area. These shingles are perfect for this.
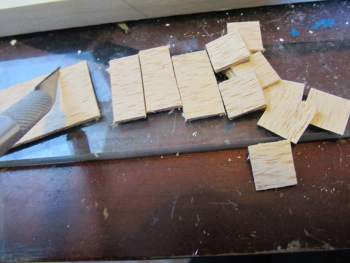
I just cut a variety of pieces from strips of balsa wood. Vary them up, in both widh and height.
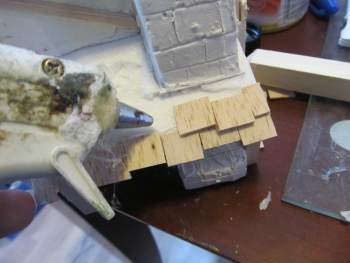
Apply the tiny shingles in rows like this. And vary them up. That gives the best look. A hot glue gun is terrific for this so you dont' have to worry about them slipping while they dry.
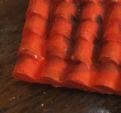
 Okay, We have one more type of roof to make the clay shingle roof. This style is my favorite Okay, We have one more type of roof to make the clay shingle roof. This style is my favorite
Diorama, Landscape and Modelling Books
Will's Book on Diorama Making
 How to Make Fantasy and Medieval Dioramas How to Make Fantasy and Medieval Dioramas
This books shows you how to make fantasy and medieval dioramas using many commonly available tools and materials. There are over 100 pictures and illustrations showing you how to make great dioramas in fantasy and medieval styles. Chapters include basics, water effects, terrain tips and special effects like electricity and small motors. Tutorials include how to use foam, plaster of paris and paper mache to make great looking dioramas.
Looking for a book to help you make better dioramas? Here is a selection of books available on Amazon.com Roll over picture or link for more information.
Terrain Modelling (Modelling Masterclass) - This title helps modellers who wish to display the results of their efforts to the best advantage in a diorama. This book provides detailed information on how to create many different types of terrain; the paints, glues, tools and materials that will be of help to the modeller; and how these can be obtained both in Europe and the USA. Illustrated with some 200 photographs and written by a master of diorama modelling with a lifetime's experience, this book provides the essential and invaluable guide to the materials and techniques needed to create top quality terrain for anywhere from Ancient Rome to the Western Front.
  The Scenery Manual - The Scenery Manual is the complete Woodland Scenics guide to creating life-like terrain, landscaping and scenic details for your model railroad, military diorama or architectural model. For the beginner or for the advanced hobbyist this book describes the products, the tools, and the foolproof methods used in creating natural settings in scale. No detail has been overlooked. Contains all the proven advise and inside tips for achieving craftsman quality results the very first time. But most important The Scenery Manual offers the confidence necessary to begin any miniature modeling project and finish it with pride. The Scenery Manual - The Scenery Manual is the complete Woodland Scenics guide to creating life-like terrain, landscaping and scenic details for your model railroad, military diorama or architectural model. For the beginner or for the advanced hobbyist this book describes the products, the tools, and the foolproof methods used in creating natural settings in scale. No detail has been overlooked. Contains all the proven advise and inside tips for achieving craftsman quality results the very first time. But most important The Scenery Manual offers the confidence necessary to begin any miniature modeling project and finish it with pride.

Do you like making projects and exploring a variety of hobbies?
Sign up for my free newsletter. I give you regular updates on hobbies and projects you can make. it is totally free and I don't share your email with anybody.
|