I also have a video that shows this whole building process and you can see that video here.
This tutorial is actually a sub section of a larger tutorial that shows you how to make the whole diorama. If you want to make this diorama you can start that tutorial here. How to make the secret grotto diorama
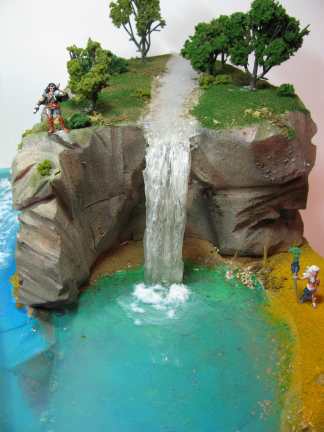
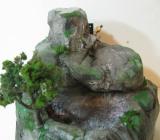
This picture shows the completed waterfall. The scene is a secret grotto where an adventurer (top left) stumbles onto the beautiful blue grotto to discover a group of warrior women in bikinis contemplating taking a swim :) A basic scene from just about every swords & sorcery movie ever made!
I have a tutorial showing how to make this diorama too! It is a good process that will teach you how to make good looking dioramas fast. How to make a foam diorama (the secret grotto).
Here are the Materials you need to make this waterfall:
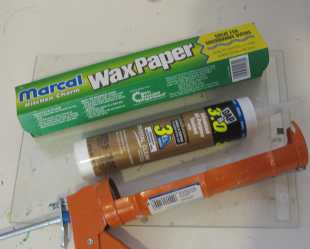
Some wax paper, a caulking gun and some DAP Crystal Clear Caulk
That's pretty much it! You should have a little bit of white paint too so you can touch it up. And, I will show you some other options for getting the waterfall really professional looking.
You can get this caulk at any hardware store like Lowe's or Home Depot etc. It is very common. And DAP makes a few different types. Just as long as it is labeled "Crystal Clear" you will be good. I like this exact type because it has antimicrobial properties and it dries in 3 hours. Here is a link to purchase it on amazon.com if you prefer:
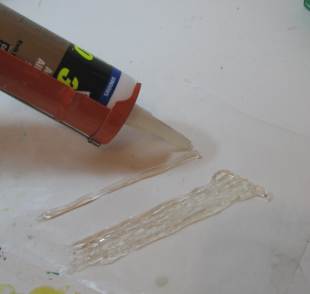
Cut a big square of wax paper and tape it down to a surface. Then apply strips of the caulk as shown in the picture. Be sure to measure the size waterfall you need and make the strips longer. You can trim them to size later.
Just lay out a series of caulk strips side by side and put them right up against each other so they will adhere together into a single piece.
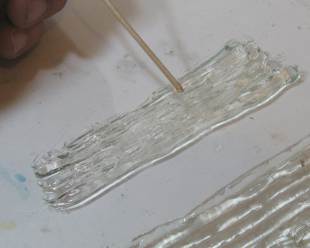
Use a toothpick or some kind of a thin wooden implement to put lots of lines in the waterfall. Be sure to push together the various caulk strips so they are bound together as a single piece. Run lots of vertical creases so it looks like water flowing.
I recommend that while you have everything ready you make several of these even if you only need one. This way you can experiment with them and have some spares in case you cut it too short or something else happens. Won't hurt to make a few extra ones.
Now just let it dry.
Once it is dry you can peel it off the wax paper. It might be tricky and it is quite alright if some of the wax paper stays on the back. You wont be able to see it anyway.
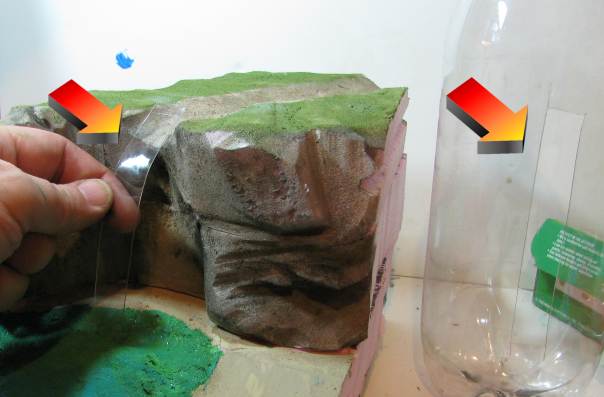
This caulk is a bit flimsy and it won't hold up well on the diorama so we make a stronger backing for it. Just cut a strip out of a 2 liter bottle. Make the strip about the width of your desired waterfall but make the lenght several inches longer. You will trim the length when ready to install it.
Bending the Plastic backing: Use a hair dryer on low setting to bend the plastic strip into the desired shape. Place it on your diorama, get a sense for where it should bend - then heat. Do this several times to get it to have just the bend you want.
 Continue on and let's finish off this waterfall Continue on and let's finish off this waterfall
RESOURCES and MORE
This is the water product that I use to make the surface water of the pond and the river. It is pretty nice stuff and very easy to use. You just pour it in and let it dry. No mixing required. But, you can only pour it to about 1/4 inch thick. Then let it dry and pour another layer. You can speed up the drying process with a fan.

- A heavy-bodies, moldable product that will hold it's shape
- Use to create pond ripples, waterfalls or rapidly moving water
- Dries clear in about 24 hours
- 8 fluid ounces
RESOURCES and MORE
Want to make a real waterfall that has actual running water in it? You can use this for a miniature scene, a diorama, a terrarium or just for display. I take you through the whole process including selecting, finding and using the little water pump.
How to make a terrarium waterfall from scratch I show you how to make a small waterfall that you can put in your terrarium. This is a complete tutorial that even includes a how to video How to make a terrarium waterfall
|