The Base painting
Next you should do the base painting of the diorama. This is a technique where you just paint in the rough underbase colors of everything. For example the water will be blue so you paint the blue base. Paint in the sand base, cliff base and the green for where grass and foliage will go.
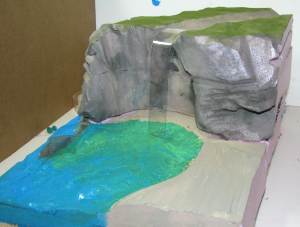
Let's take a closer look at the water though. It isn't a steady blue all the way through. You can see in the picture above that it gets greener toward where the waterfall would be. This is a nice technique that will add realism to the diorama and it is particularly important under the sections that will have water because you will see them more easily. A lot of the diorama will have a covering of textures that hides much of the color.
How to do this blending of colors very easily.
The technique I use is to start out with a dark blue in this case in the very lower left corner of the picture. Paint a little bit on the diorama then add a bit of green and paint a little more, add a little more green and paint a little more (all the while I am working toward the waterfall) continue adding green and painting more. Wnen you finally get to the end it should look mostly greener. This gives us that nice smooth transition from blue to green.
Typically you want the deeper water to be bluer and the more shallow water to be greener.
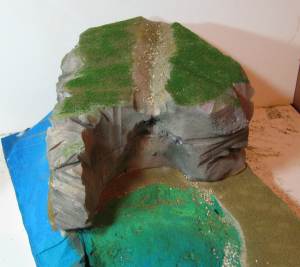
Okay, Let's add the textures. You use standard diorama textures and just glue them in place. You use a spray bottle to spray a mist of glue and then sprinkle the texture on. Follow your color scheme for woods, grass, sand etc. I have also added small pebbles and talus along the bank of the grotto and the bottom of the river bed at the top.
About the Textures
If you aren't familiar with the textures that I have sprinkled on this diorama they are a product from a company called Woodland Scenics. They are sold in bags and come in a lot of different colors and consistencies from very fine to very coarse. Just below is an example of one color texture. You can get it in bags or in shakers. I buy the bags because they are cheaper then just use my own spice bottles as shakers. (Lots more textures and colors on Amazon here: Woodland Scenics Turf and terrain Materials
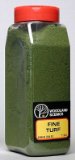 
Fine Turf Shaker, Green Grass
The following pictures show you the texture making techniques. It is for a different diorama but the techniques are exactly the same.
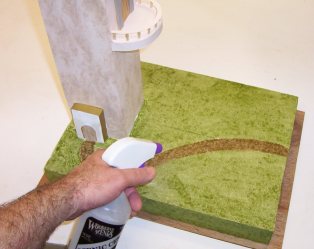
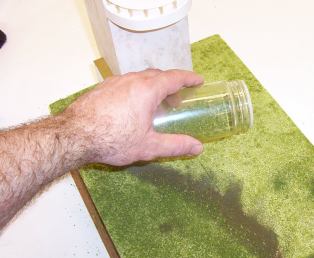
You can start sprinklin terrain textures on it while it is still wet but I prefer to let the paint dry then spray the surface with a scenic cement. Or white glue that is watered down in a 50/50 mix of glue and water.
Then you sprinkle on your fine terrain textures. When doing diorama terrain you always start with the finest textures first. Once you have covered the whole surface with a layer of texture you should spray it again with a thin coat of scenic cement or glue mix. This will lock it down in place.
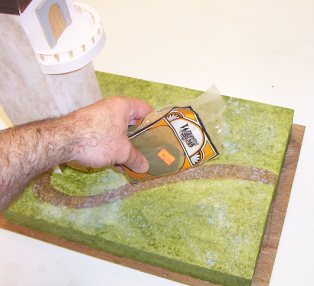
I put my textures in a wide variety of spice shakers. This way I can shake it evenly onto the surface. This picture shows me applying rougher texture. This texture is just a little coarser than then fine textures.
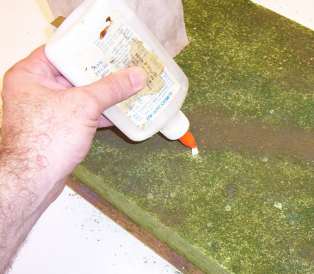
Next we work our way up to coarser textures and I am going to be applying small groups of bushes and shrubs so I place small dabs of glue then press the texture right into it to form the rough terrain.

After all the shrubbery is complete we continue to the larger terrain features and place small trees. Finally we place the large trees - gluing them right to the terrain.
Trees can be a challenge because the foam makes it difficult for them to stand upright while the glue dries. I overcome this by using small wires (bicycle spokes) on them. This holds them in place. Once dried I just remove the wires.
 Let's continue and do the actual water effects to our diorama Let's continue and do the actual water effects to our diorama
Check out my book on how to make fantasy and medieval dioramas. I put all my best techniques and tricks in this book!
How to make Fantasy and Medieval Dioramas
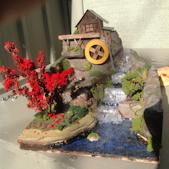
The Water Wheel Diorama
I love dioramas with water effects. And Frank has done an amazing job with this one. He used a lot of common materials to make it including the water and the waterfall. Check it out here.
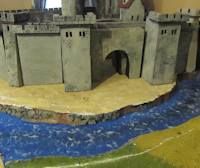
Storm The Castle Diorama Part 7: Water Effects, Make the Moat
The next installment of the massive castle siege diorama is done. In this part we add the moat around the castle. Storm The Castle Diorama Part 7 |