This project is not that hard and I give you all the instructions you need and the templates that you can print out as a guide for carving your ornamental knives. If you always wanted to try a little wood carving this is the perfect way to start because it is easy and looks good. Some Notes Before Starting
This project entails the use of some kind of knife or blade to do carving with. Hence it is not for small children. Any child or young adult should do this project only with the permission and supervision of an adult. Please be safe! I also use a hand drill in this tutorial and that absolutely can only be done by an adult.
The Video: I also have a video tutorial on this project here: Video on how to carve an ornamental dagger
Whats Needed for this project:
The Wood: You only need a few small pieces of wood to do this project (Each knife needs three pieces and an extra two pieces if you want to make the dagger sheath). And the type of wood I recommend is Pine. Its a reasonably durable wood and it will take some time and effort to carve the details but it is strong enough to last a long time. You can alternately use Balsa wood, which is extremely easy to carve and is very light. But the end product will be a bit delicate. If you never carved anything before you might want to start with the Balsa wood just because it will be easy to carve and give you a great first experience.
The Tools and accessories for this project
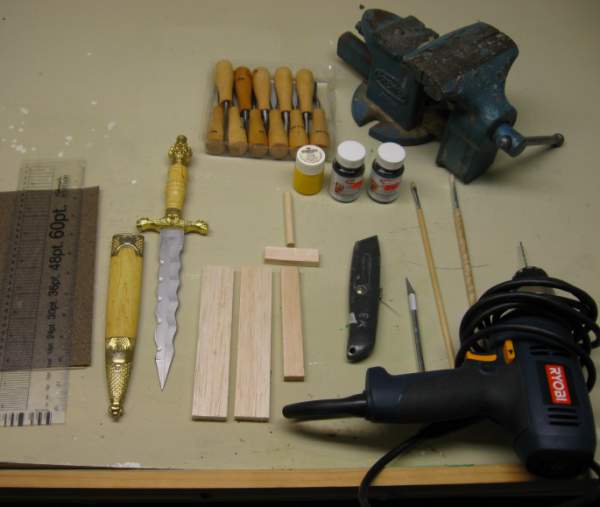
For this project I use the following items:
- Several pieces of Balsa Wood
- A Ruler
- Sandpaper
- A Knife to carve with
- Paint Brushes to paint the finished dagger
- wood glue, white glue works fine too
- An electric hand drill - Optional
- Paints - any colors you want; I use yellow, gold and silver
- A Vise for holding the parts and the drill
- Woodcarving tool set - totally optional but I recommend you get some if you want to carve!

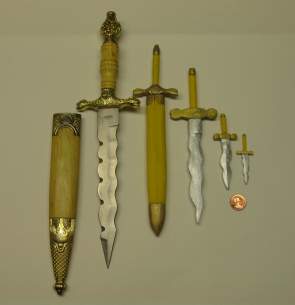
I have a one page template you can print up and use. It gives you the sizes and shapes of the three different daggers you can make. And it includes the blades, handles and hand guards. Ornamental Dagger Carving Template This is optional and you can make your own dagger just by following my tutorial and watching my video.
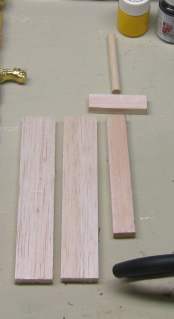
To make this dagger you need five small pieces of wood. Three of the pieces make the dagger and two of the pieces are for the optional sheath.
Here are the various dimensions used for the three different sizes of dagger:
- The Largest Dagger
- Handle: Round dowel 3" long by 5/16 thick
- Hand Guard Square 2 1/4 long x 1/2" square stock
- Blade: 5" long by 1" wide and by 1/4" thick
- Medium Dagger
- Handle: Round dowel 1 1/2 long x 1/4 thick
- Hand Guard square: 1 1/8 long by 1/4
- Blade: 2 1/2 long by 3/4 wide and by 3/8 thick
- Smallest Dagger
- Handle: 1" long dowel very thin and I sanded it thinner to about 1/8"
- Hand Guard Square: 1/8" square by 3/4" long
- Blade: 1 1/2" long by 1/4" wide by 1/8" thick
A Note about all these dimensions, You can use larger pieces of wood and just carve them down to size!
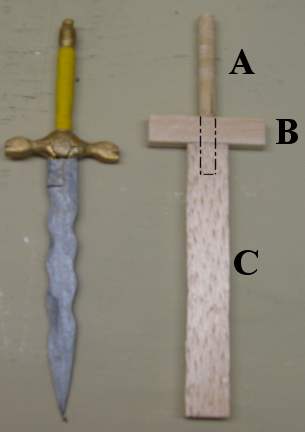
This picture shows the three wooden pieces of the dagger and how they are assembled together. Notice the dotted lines. They represent the handle part a that pierces through the hand piece and into the blade. So you will drill a small hole through the hand piece (B) and into the blade (C).
This is how the dagger is assembled and a little bit of glue is all you need. Do not assemble it before carving it though. You should carve all three of the pieces first then assemble and glue them together.
If you assemble them first and then try to carve them the pressure of your hands or the blade can break the assembly.
 Let's continue on with this tutorial and make the dagger Let's continue on with this tutorial and make the dagger
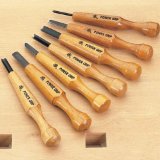
Power Grip Carving Tools, 7 Piece
- Perfect "gap fillers" between palm handled and full sized carving tools
- 7 piece set includes - 3mm (1/8") #9 gouge,7.5mm (5/16") skew and straight chisel,
- 6mm (1/4") #8 gouge, 4.5mm (3/16") V-parting tool, 9mm (3/8") #5 and #3 gouges
- 4-1/2" handles
- 1-1/4" laminated steel blades
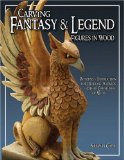
Carving Fantasy & Legend Figures in Wood: Patterns & Instructions for Dragons, Wizards & Other Creatures of Myth
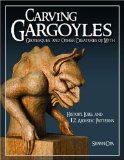
 Carving Gargoyles, Grotesques, and Other Creatures of Myth: History, Lore, and 12 Artistic Patterns Carving Gargoyles, Grotesques, and Other Creatures of Myth: History, Lore, and 12 Artistic Patterns
|


