I have created a video tutorial of all these steps if you would rather learn how to make mead by watching a video Mead Making Video
An overview of the Process
1. You mix a batch of water and Honey (typically it is 4 gallons of water and 12-15 pounds of honey. This 12-15 pounds of honey is about 4-5 quarts. Typically you heat this mixture but it isn't mandatory.
2. You add yeast and yeast nutrition to the honey water mix. The yeast will gobble up the honey and transform it into Mead. You should add some kind of nutrient to the mixture so the yeast can grow. This nutrient can be store bought or it can be a variety of things like lemon peels and tea leaves.
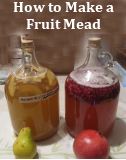
3. You let it sit for a period of time. Typically about two weeks is the amount of time it takes for the initial fermentation to occur. At this stage your mixture should be bubbling nicely. You then move it to a large clear bottle so you can keep an eye on it. Keep it in this new blass bottle for another two weeks to two months until it isn't doing anything anymore. (no more bubbling and no more activity)
4. Put it in individual bottles and store it! Depending on how much honey you put in the mixture it will be ready to drink anywhere from 3 months to a year. (Less honey means faster ready time)
That's pretty much the whole process in a nutshell. You really don't do much and you can even fudge a lot of this. The yeast does all the work for you! Just make sure you keep impeccable sanitation for everything because it is a foodstuff you are making and you want to make sure no external molds, bacteria or living organisms get a chance to find your mead. It will grow like crazy and you don't want anything to grow in your mead except your yeast!

A Note from Will: Does all this seem a bit complex? I do have some easier ways to make mead. You can do it without the boiling and you can start out with a one gallon batch which will keep the cost down. Fast Cheap Mead Making
Now lets take a look at the pictures of my mead making process.
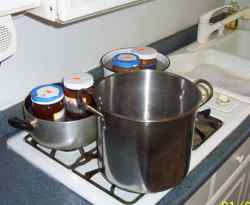
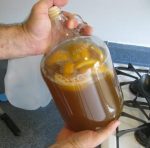
Here is where we begin. A pan for our Mead mixture (This mixture of water and honey is called Must) The four bottles of honey are sitting in hot water so it will flow easy and be easy to handle.
I put one and a half gallons of spring water in the pan and brought it to a boil. Then I added the four quarts of honey and let it simmer over 160 degrees for fifteen minutes. This 160 degrees is important to make sure all impurities are killed.
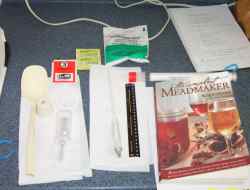
Let's take a look at some of the accessories for Mead Brewing.
Notebook for carefully logging what you do and when. A book about mead making ( I'll give you a link to this book later). A large spoon for ladling and stirring. Thermometer, hydrometer, yeast, yeast accelerant (yeast food), Flocculent for keeping the mead clear (very optional)
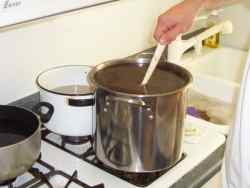
Here we go. The honey and water has been mixed and we are heating and stirring it. This is a pasteurization. Keep it going without boiling it over and you will be ready for the next step.
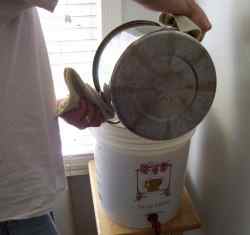
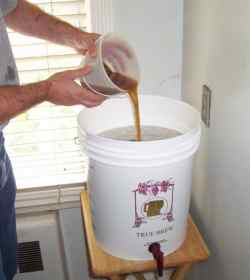
Pour the Must into your fermentation bucket. The must will stay in here for about two weeks.
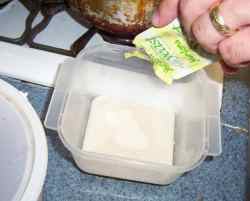
Now prepare your yeast for addition to the must. Generally you add yeast to warm water and let it sit for 15 minutes. This brings the yeast to life and prepares it for growth without a shock. This treatment of yeast has many variations and some people will prepare the yeast and give it nutrients a day or two before making the must. You don't need to worry about this for now. Just prepare the yeast according to the instructions that come with it.
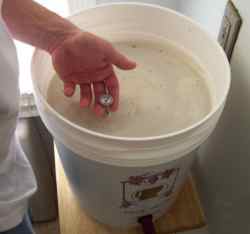
Checking the temperature of the Must. When your activated yeast is ready to be stirred into the honey/water mixture (called Must) You must be very careful that the temperature of the Must is under 80 degrees fahrenheit. If the Must is too hot it can instantly kill the yeast. So, cool your must down by waiting or by putting this bucket in a larger bucket with bags of ice. Or you can add frozen spring water.
Adding the Yeast accelerator. I have opted to add a yeast food to the mix. This will help to insure the yeast takes off and is healthy and happy. It will grow faster and work better. As with the yeast, you just follow the recommended instructions.
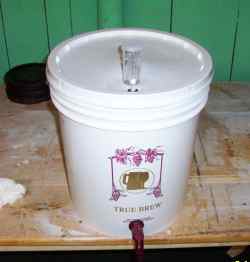
Okay, This part of the process is done. Now you just store your Must in a cool dry place (60-75 degrees) for about two weeks. The little clear plastic air valve on the top will start bubbling within a day or two. This means the yeast is working well. And this will go on for as long as two weeks. When the bubbling has slowed down significantly (about 1 bubble every 30 seconds) you will be ready to move the mead to its glass bottle.
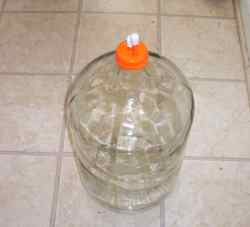
Here is the glass carboy we will be moving our Mead to.
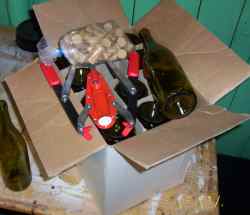
And here is the bottling equipment. Maybe you won't be bottling your mead but for me it is one of the best parts of the process. This picture shows a case of bottles, a bag of corks and the manual corking tool.
I will be going over all of this stuff with you.
 The Next section is ready: Go to the section on Racking the Mead into your glass carboy The Next section is ready: Go to the section on Racking the Mead into your glass carboy
New: The Ultimate Easy Guide to Successfully making one gallon of mead. - I have put together a video that shows you an almost fool proof method to make one gallon of mead. Doesn't cost much and isn't hard to do. The mead comes out great :)
Interested in Making your own Mead?

Love Kindle Books? I just published my kindle book on how to make mead. It is a no-nonsense easy guide to making a batch of mead. You can get it in the kindle store.
|