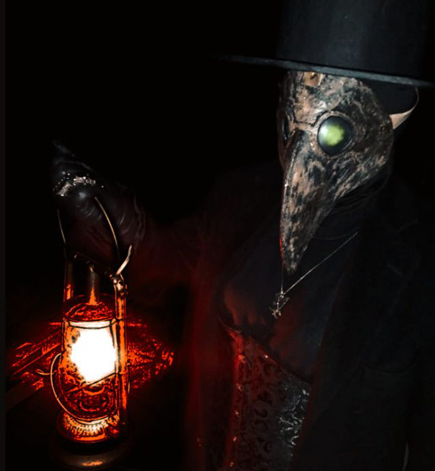
Here is Amberlee's completed mask with more!
I started the mask off the same way that you started yours in the video.
Did the skeleton work with the boxes (flat rate USPS cardboard envelopes work very well, too) and glued/taped everything together.
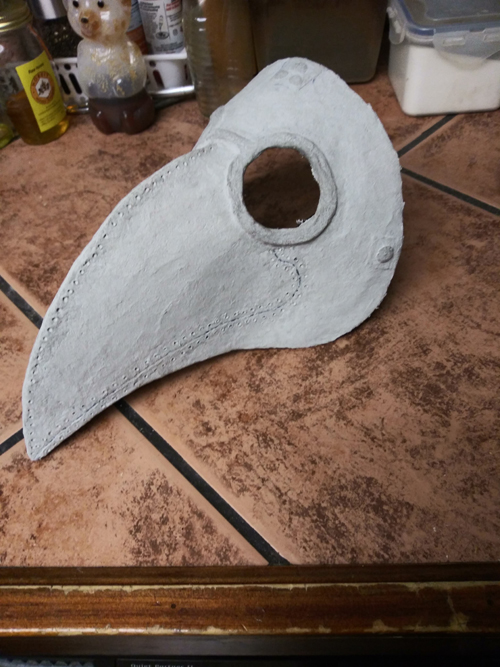
I wanted to take things a step further, so once everything was stuck together, I covered the cardboard in a layer of modge podge to keep the cardboard from falling apart, and did a layer of paper mache on it to help stiffen it up. 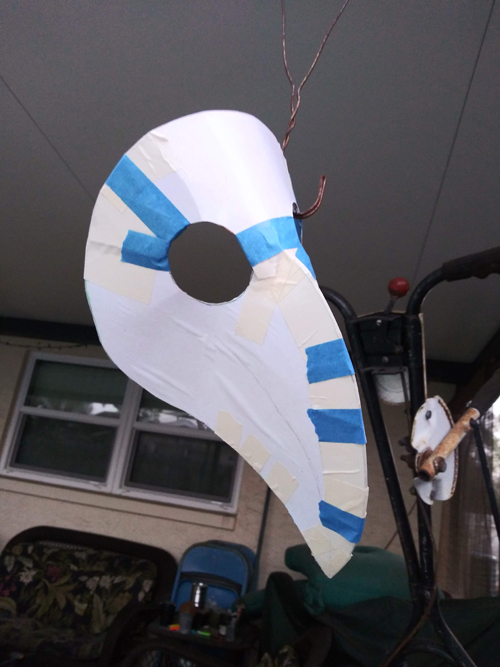
Another layer of modge podge later, I did the sculpting work on it with my paper mache clay I put together. Everything you see on the mask was hand sculpted - - I wanted more detail than just cardboard could give me!! Once everything was dried, I did a light sanding on the clay to help smooth some of the edges.
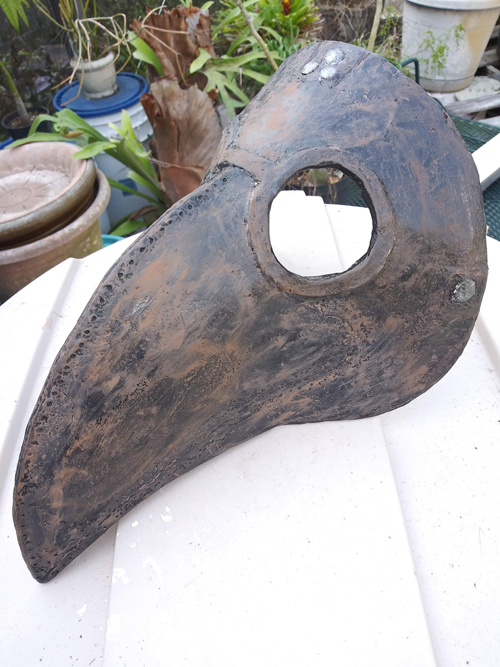
Then painted it and sealed it once more.
The strapping was an effort of love. I did the duct tape, but knew I didn't want it to look like duct tape! I had some left over black fabric that I wrapped the tape in and hot glued it. Colored it with paint, attached a buckle and actually stitched it in place (fair warning, stitching through layers of duct tape isn't easy, and can be dangerous if you're not super careful... Believe me, I know!)
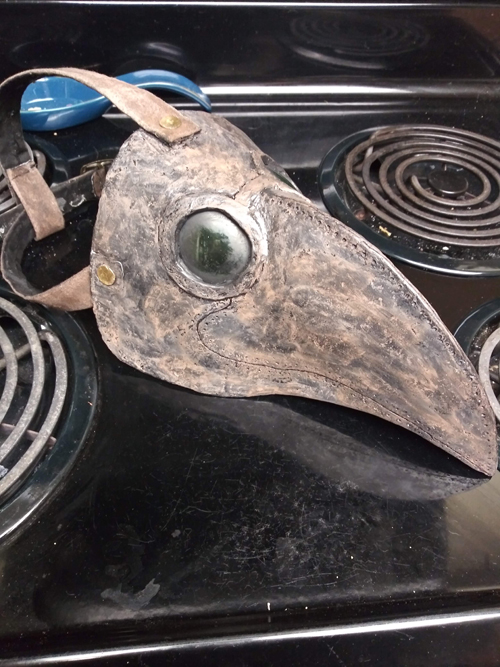
The lenses were made out of the top part of a 2 liter soda bottle. Where the bottle begins to bend inwards towards the top is was the perfect curvature for what I needed. I painted them first with dry brushing black acrylic paint onto the plastic, wiping off different spots here and there to give them character. After that, I just glued them in from the inside.
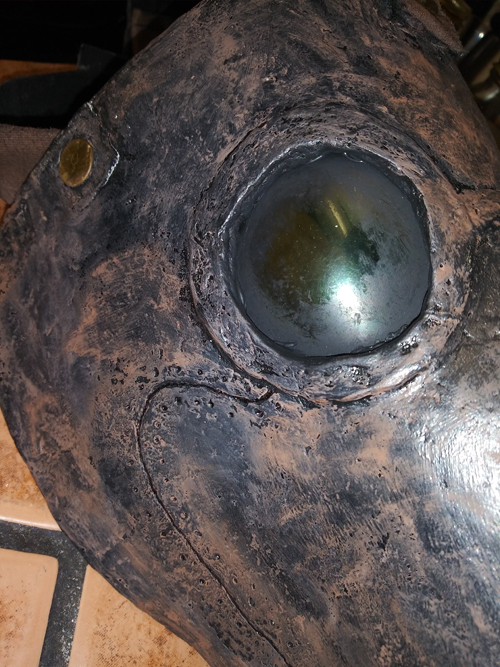
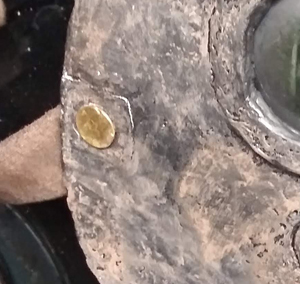 Originally, I had made the appearance of rivets with the clay, and just painted them silver, but, once the strapping was done, and it needed to be attached, simply gluing them on wasn't enough for me. ?? My Dad had some paper clip, things, honestly I'm not sure what they're called. You can see them in the photo where the strapping has been attached. We just drilled through the mask and the strapping, and slipped them in place. Later on, we drilled some holes into the bottom of the mask to help with airflow. After the mask was done, I used some electrical tape on the inside to cover up the ends of the clips to make it more comfortable. Originally, I had made the appearance of rivets with the clay, and just painted them silver, but, once the strapping was done, and it needed to be attached, simply gluing them on wasn't enough for me. ?? My Dad had some paper clip, things, honestly I'm not sure what they're called. You can see them in the photo where the strapping has been attached. We just drilled through the mask and the strapping, and slipped them in place. Later on, we drilled some holes into the bottom of the mask to help with airflow. After the mask was done, I used some electrical tape on the inside to cover up the ends of the clips to make it more comfortable.
If I knew what I know now, this wouldn't have taken me quite as long to make, but it was an awesome process and project. If someone is looking to add a bit more detailing work, and make their mask completely different, paper mache clay is the easiest way to do things. It's not always user friendly, especially if you can't find a decent recipe to follow or get your paper chunks small enough, but it opens up an entirely different field.
If I had to provide some tips and tricks, it would be these:
1. The tops of soda bottles make awesome lenses, and you can get a 2 liter anywhere. Just cut out two lenses from the top of the bottle, being mindful of any markings on the plastic. Sometimes, they'll be a date stamped on there. Try to avoid that!
2. Don't be afraid to add, or take away cardboard. I have a rather full face, so I added a few extra pieces with some hot glue! Staples work wonders for holding the cardboard together if you can't access glue, but once again, be mindful of the ends. If not folded correctly, they can definitely poke you.
3. Paper mache clay can be made with complicated recipes, or as simple as paper pulp, flour, and Elmer's glue. I got my recipe from the channel "Ultimate Paper Mache" on YouTube!
4. If you are going to stitch through duct tape, make sure you've got something to push the needle through with, something that's not your bare finger!! I couldddddddd have just used the fabric, but it was far too flimsy by itself. At least, to me it was.
Of course, the most important thing is to always just have fun with things. I've since taken my mask, removed the straps, and turned it into a wall piece! Its proudly displayed as one of the coolest things I've ever made.
Once again, thank you for your kind words. Being added to your website is a literal honor, and is now added to the list of "coolest things to ever happen to me."
Cheers to many more projects to come!!
Thanks! Amberlee
NEED MATERIALS?
 Mod Podge Waterbase Sealer, Glue and Finish (16-Ounce), CS11302 Matte Finish Mod Podge Waterbase Sealer, Glue and Finish (16-Ounce), CS11302 Matte Finish
Mod Podge dries clear in approximately 15-20 minutes and can be sanded to a smooth finish. Apply with brush or sponge applicator. Close container after each use. Clean up with water while wet. Once dry, Mod Podge cannot be removed. Use as a puzzle saver, a sealer glue, a quick finish, a textured finish,or a build-up finish." Non-toxic.
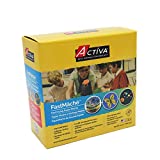
ACTIVA Fast Mache Fast Drying Instant Papier Mache - 2 pounds
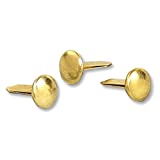
ACCO Brass Paper Fasteners, 1/2", Plated, 1 Box, 100 |


