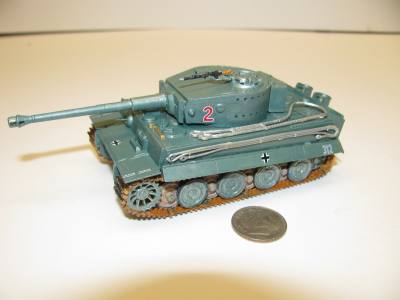
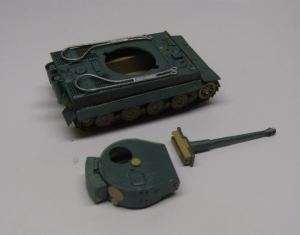
(This is the Tank I make in this tutorial)
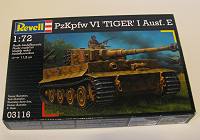
Tiger I Ausf E Heavy Tank Plastic Model Kit by Revell Germany
Okay! Let's begin assembling this Tank Model:
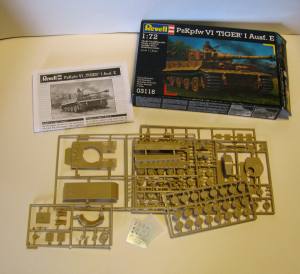
As with all plastic models. There are several things that come inside the box. You should inspect everything carefully to make sure nothing is missing. This model comes with several sprues with parts, an assembly procedure booklet and a small sheet of stickers (decals) that you will apply to the model when it is done.
You should inspect everything and make sure nothing is missing from the kit. You should also read over the whole assembly process. This is important because the assembly of parts can be affected by future parts. Gluing a part in place might need to be changed a little bit because of a part you will place in a later step.
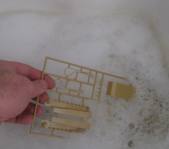
After inspecting and reading everything you should gently and carefully wash the plastic sprues in warm soapy water. Rinse them all off and let them air dry. This will make a difference in how the paint and decals adhere to the plastic.
It is a good idea to paint some of the smaller parts while they are still on the sprue. You can get them looking much better this way and painting them once they are assembled into the model can be difficult to do. The instructions will often give you recommendations on this.

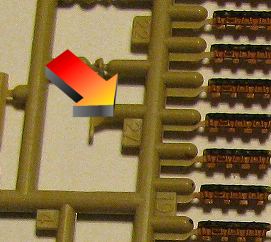
I have also painted all the tracks for this model. The tracks can be very difficult to paint once they are glued to the tank.
It is a good idea to figure out your painting scheme before you build the model and to paint some of the smaller parts while they are still on the sprue. This will give you a much higher level of detail. And painting some parts are they are glue into the model can be very difficult. They can be difficult to reach with a brush or painting them can cause paint to run over into other parts. Once these parts are cut from the sprue you can touch them up a bit before gluing them into place.
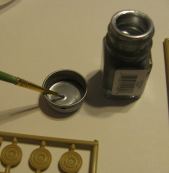
I often use the paint from the cap. This is a nice way to get small amounts of paint.
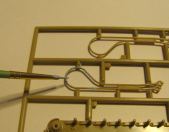
Once you are ready to start building the model you should cut the parts from the sprue with either side cutters or a hobby knife. (I prefer the hobby knife) This will help you keep the shapes exactly as they are intended without distortion or breakage. Only cut the parts from the sprue as you need them! You can end up with a mess of parts and not know which one is which!
Notice that the sprue will have numbers on it to show you which part is which. This is why you should keep each part on the sprue until you are ready to use it.
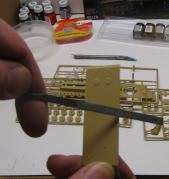
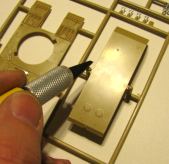
Once the part is removed from the sprue you will see it has a small burr on it where it was attached. You should carefully file this down with a micro file or small piece of very fine sandpaper.
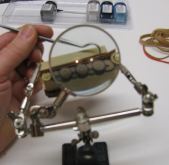
I really like the parts holder with magnifying glass. It holds the piece while you work on it. In this picture I am gluing the track to the tank. Having two free hands makes a big difference.
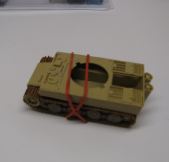
Plastic model cement really works well and it usually only takes 5-10 seconds of holding it before you can release it but sometimes using a rubber band (or clothes pins) to hold large parts together can really help.
Follow the assembly procedure in the instructions and paint as you go along. Once the model is complete you can do some touch up painting and once this has dried you can add the decals.
This is the completed tiger tank model. I have done a custom paint job for this tank. The recommended painting pattern is different. It has a more camouflauged look to it. I recommend you research tank paint patterns and choose the one that you like best. I like this one because it is simple and looks pretty good. It will also fit in very well with the diorama for this tank.
 This tank is part of a tutorial I have on how to make a WW2 Tank Battle Scene. You can check out that tutorial here: How to Make a WW2 Tank Battle Diorama This tank is part of a tutorial I have on how to make a WW2 Tank Battle Scene. You can check out that tutorial here: How to Make a WW2 Tank Battle Diorama
Books
How to Build Dioramas - Learn everything you need to know about making your dioramas look real! This fantastic revised edition will show you how with new projects, new photos, and expert tips. Includes painting, weathering, and detailing tips for figures, aircraft, vehicles, and more! 290+ photos with color throughout; 41 illus.; softcover.
  How to Build Armor Dioramas - Award-winning modeler Lynn Kessler leads, photo by photo, through the steps of building detailed armor vehicles and displaying them in a realistic scene. Topics include beginning and advanced kit assembly, designing a diorama concept, modeling and painting figures, finishing details and more. Perfect for beginner to advanced modelers. How to Build Armor Dioramas - Award-winning modeler Lynn Kessler leads, photo by photo, through the steps of building detailed armor vehicles and displaying them in a realistic scene. Topics include beginning and advanced kit assembly, designing a diorama concept, modeling and painting figures, finishing details and more. Perfect for beginner to advanced modelers.
  Terrain Modelling (Modelling Masterclass) - This title helps modellers who wish to display the results of their efforts to the best advantage in a diorama. This book provides detailed information on how to create many different types of terrain; the paints, glues, tools and materials that will be of help to the modeller; and how these can be obtained both in Europe and the USA. Illustrated with some 200 photographs and written by a master of diorama modelling with a lifetime's experience, this book provides the essential and invaluable guide to the materials and techniques needed to create top quality terrain for anywhere from Ancient Rome to the Western Front. Terrain Modelling (Modelling Masterclass) - This title helps modellers who wish to display the results of their efforts to the best advantage in a diorama. This book provides detailed information on how to create many different types of terrain; the paints, glues, tools and materials that will be of help to the modeller; and how these can be obtained both in Europe and the USA. Illustrated with some 200 photographs and written by a master of diorama modelling with a lifetime's experience, this book provides the essential and invaluable guide to the materials and techniques needed to create top quality terrain for anywhere from Ancient Rome to the Western Front.
|