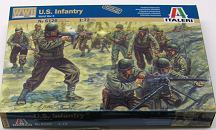
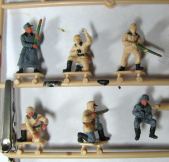
US Infantry Soldiers WWII (48) 1-72 Italeri
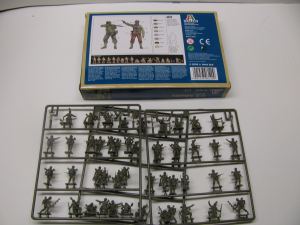
This is the back of the box and the contents inside.
Let's Get Started Painting These Miniature Soldiers
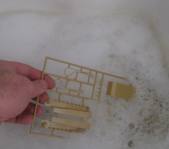
After inspecting and reading everything you should gently and carefully wash the plastic sprues in warm soapy water. Rinse them all off and let them air dry. This will make a difference in how the paint and decals adhere to the plastic.
The process of making these miniatures causes excess plastic to be created. This is called flashing. You should carefully cut away all this excess flashing and sand down or file down the rough edges left behind before painting.
 Factiod: What is Flashing? It is small amounts of unwanted plastic around the edges of the miniature. This is caused by the plastic manufacturing and molding process. You can remove this with a knife. Factiod: What is Flashing? It is small amounts of unwanted plastic around the edges of the miniature. This is caused by the plastic manufacturing and molding process. You can remove this with a knife.
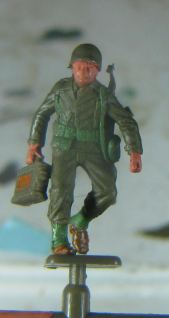
The Italeri Recommended Colors -Along with this kit of soldiers and anti tank gun Aliteri gives us their recommendations for how to paint the miniatures. If you other US Soldier miniatures you can use this color scheme. Of course the color schemes of soldiers changed over the war years and varied depending on a lot of factors like theatre of operation but these are some good guidelines to get your soldiers looking realistic.
- Cap, helmets: Olive Drab
- Boots: Leather
- Spats (leggings): Field Green
- Face and Hands: Flesh
- Pants: Field green (Sometimes a flat tan)
- Shirt:: Field Green
- Handguns and tip of rifle: Gun Metal
- Rifle Stock and handle: Wood
- Canteen cover: Field Green
- Various accessories on belt: Sand or field green
- Belt: Field Green
- Pistol Holster: Leather
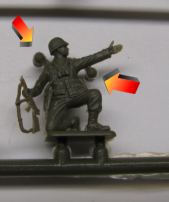
Here are the colors and steps I used for this Miniature:
- I paint the difficult inner parts. In this case it was the belt and suspenders: Field Green
- Next I paint the various accessories like the canteen and the Spats: Field Green
- The Boots: Leather
- The face and Hands: Flesh
- The Shirt and Pants: Olive Drab
- Finally the outermost and easy parts: Rifle (on his back) Brown with a little black for accents
- Ammo case he is carrying: Field Green and a little brown in the center
- Now the whole figure is painted and I will go back and touch things up with the various colors.
The important thing to understand about painting in this small scale is understanding what you can paint without smudging paint into other areas. You need to look really good at the shapes and lines of the miniature to know what parts you can paint and in what order. This will come with practice and seeing how the paint goes on.
Some Tips:
Just about the most important thing is the brush you use. Get the best brushes you can get and make sure they are very small! The quality of the brush will directly affect the quality of the paint job.
Do not rush and do not apply the paint too thick. If it is too thick it will ruin the finer details in the miniature.
When painting you will get a real good sense for the paint. You will notice that it goes on very wet and quickly starts to get a good tack. At this point where the tack is just right it will spread very evenly and smoothly. Quickly though it will get a bit too tacky and be difficult to spread evenly. So choose small areas to paint and work with the drying and the tack to get the best results.
Finishing up
There are two painting techniques you can use to get the most out of your miniatures:
1. The Washing Technique: Once the paints have dried you take a small amount of black paint, put it on the brush and then dip it in water so it is very wet. You then brush this lightly onto the miniature. The black color will run down into the cracks and folds of the clothing and form dark spots there. Brush it around good so the black isn't on the high spots of the clothing. You only want it to be in the cracks and folds.
2. Dry Brushing Technique: This is the technique of getting a little bit of light colored paint on the brush then wiping most of it off. You then gently brush the surface of the miniature just in the high spots. It will leave trace amounts of the color on the high parts of the fabric that the miniature is wearing. About the dry brushing color: Typically you take the color of the garment and add mix some white with it so it is a shade or two lighter than the actual garment color.
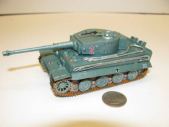
Here is a brief tutorial showing you how to make a 1/72 Scale Tiger Tank Revell Model. This tank is part of my Tank Diorama project: Making a Model Tiger Tank
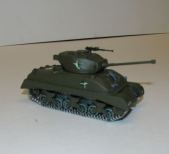
1/72 Scale Sherman Tank - This is a brief tutorial on making this Revell Sherman Tank. This is part of my How to Make a WW2 Tank Diorama Tutorial. The Revell 1/72 Sherman Tank Model
Tutorial on Painting German Soldiers. These are 1/72 Scale soldiers and I walk you through the process and give you some tips on how to paint them. How to Paint Miniature German Soldiers
|