Hi, Thanks for visiting my website. My name is Will and if you have questions
or would like to
contribute projects or ideas you can contact me
Some Sculpting Tips and a look at how I sculpted a Dwarf
Sculpting miniatures takes time and effort. You have to practice and it will go a lot faster if you know some tips and tricks. Here I have (along with a video) some good tips and techniques for you. I also go over some of my tools and some of the tools that I have made. This is not a how to tutorial. It is a tips and techniques tutorial.
If you are just beginning with sculpting minatures I recommend your first few subjects be dwarves. They are probably among the easiest body types to sculpt -that is if you want to do figures. You could start by making objects like treasure chests, coffins, and other type of static objects. But if you want to do figures then you should start with a dwarf. Their short and stocky figure makes for easy sculpting. You won't have to worry as much about detail and the thickness of their bodies makes it easier to work with the clay.
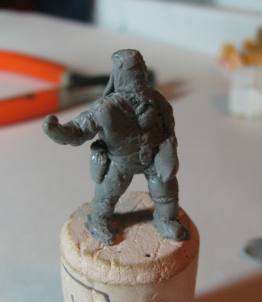
Here is a picture of my first dwarf. It is almost complete and I still need to add the details. His arms are posed in a way that will allow me to sculpt and add a pickaxe. He is a miner.
Note from Will: I have a very extensive series of tutorials (with over 2 hours of video) on how to sculpt fantasy miniatures. It is very complete and takes you from the very beginning all the way through completing a miniature. How to Sculpt Fantasy Miniatures
First Let's take a look at the modeling Clays that I use
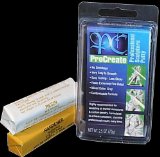
For this scale which is around the 25 -35 mm scale I use one of two different materials: either ProCreate or Green Stuff. They both work pretty good but I definitely have a preference for the ProCreate. It seems to me to be a bit better. It takes tooling better and holds detail better. Just a bit easier to work with. Green Stuff is good too and it is usually easier to get.
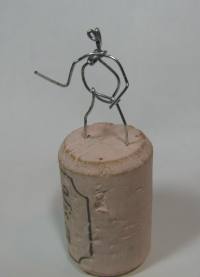
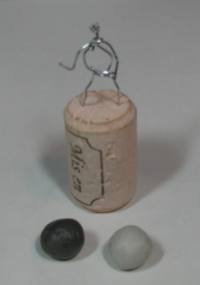
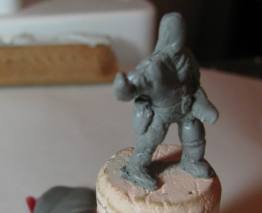
This photo shows two important parts of sculpting a mini. First you need some way to comfortable hold it and rotate it. I use a cork for this. I stick the armature into it. This is a very comfortable way to work on a mini and it gives you a good excuse to go out and buy a bottle of wine :)
Second: You should almost always create a wire armature of the mini. It doesn't have to be really fancy but it should give a good shape of the intended gesture of the mini. Think of it as the skeleton of the figure.
You break off two pieces of the two-part epoxy and ball them up so you can see they are about the same size. Then you thorougly mix them together by folding, rolling and twisting.
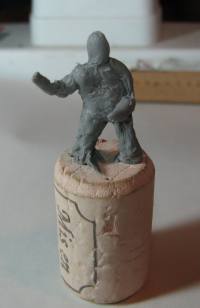
Apply the clay to the armature in small amounts that simulate the rough musculature. Notice the shoulders biceps, thighs and head?
You are roughing out the general musculature of the miniature.
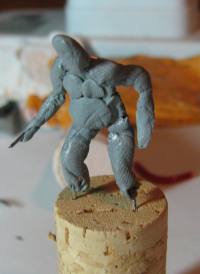
This is another dwarf that I am working on. You can see that the pose is different. This one will be holding a shovel. But, you can see in this picture how I apply the rough pieces of clay to the mini. I do it in a way that mimics the sculpture. The stomach is a good thing to note. This dwarf has a bit of a belly :)
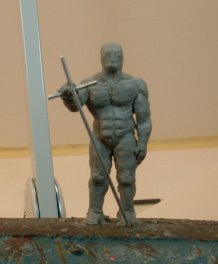
You have roughly between an hour and a half and two hours to sculpt the mini so grab your tools and start sculpting. I generally work from the legs up. The legs are pretty easy so you can finish them up quick and move up to the more complex parts. Get the body shape right. You don't have to get it completed. You can sculpt out the shape as if the mini is wearing minimum clothing and you can mix up a new batch and add the clothing later if you want.
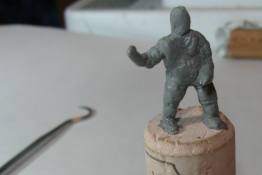
I have begun to add the major details in this session. You can see the belt and pouch.
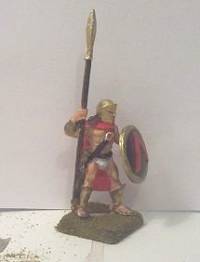
Continue with the sculpting. Here I have added the beard, clay for the helmet and hair. This dwarf is starting to take shape. It still needs lots of work and you cansee the hands, arms and legs need further sculpting. And I still need to do the final details.
Watch the Video Tutorial Here:
Tutorial series: How to sculpt fantasy miniatures
This is a very in-depth series of tutorials that take you through the whole process of sculpting your own fantasy miniatures. It includes a series of videos. How to Sculpt Fantasy Miniatures