Hi, Thanks for visiting my website. My name is Will and if you have questions
or would like to
contribute projects or ideas you can contact me
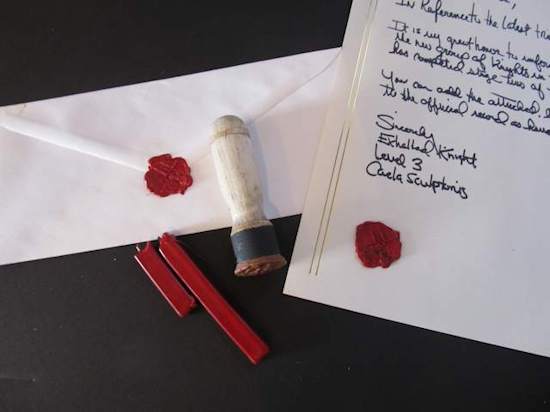
How to Make a Medieval Wax Sealer
This is a tutorial showing you how to make a wax seal stamper so you can seal envelopes or scrolls with a fancy wax seal. Fun project and pretty easy to do. We make the actual medallion that forms the shape with FIMO clay that you bake in the oven.
If you came here from youtube thanks! I will have this tutorial posted within a day so bookmark and come back soon!
I also have a video tutorial for this project. It is at the bottom of this page.
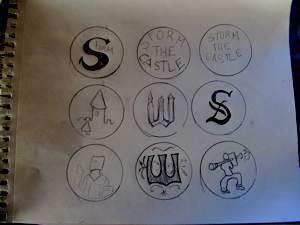
We don't yet have a design so the first thing I did was draw out a lot of large circles as my potential stamp. They are much larger than the actual stamp would be and that is good. It gives us some freedom. I just bounced around lots of ideas.
A castle, letters, logo, single letter and more. This is just the initial stage to see if something strikes me as good.
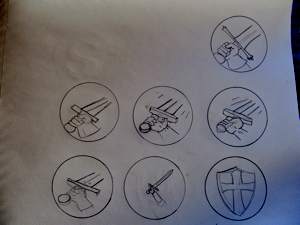
I hit on the hand holding a sword and I really liked that design so I developed that further as you can see in this series of pictures.
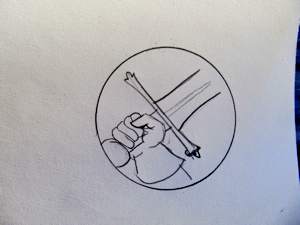
And that is it. I refined that to get my final drawing at this size. This is what our stamp will look like.
From here I drew some smaller circles that would be the exact same size as our actual stamp (One inch). This way I could re draw this design out and see how it looks at actual size.
Now let's make the stamp
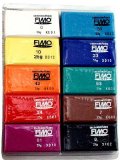
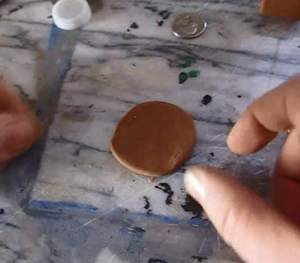
Knead out the clay and press it into a medallion like shape as you see here.
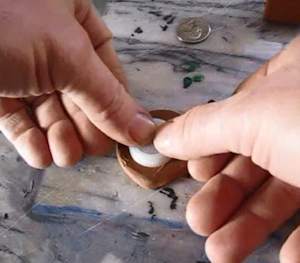
Now we need to cut that clay to the size we want (One inch) I found a water bottle cap that was perfect for this so I pressed it into the clay. This cuts us a nice circle of clay that is the right size.
You can use any technique you want to cut the clay circle.
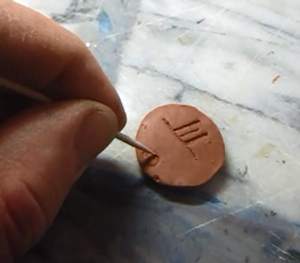
Now you can go ahead and sculpt the clay to the impression design that we decided on. Toothpicks, pick tools, dental picks and even pins work well for this. Go lightly at first to get the design, then you can go deeper.
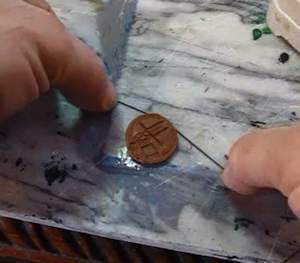
Ok! The sculpting is almost done! Keep at it and take your time. Remember that this is an opposite of what the wax seal will look like. So, low points on this are high points on the wax.
Ok, once you have finished with the design you will probably have trouble separating it from your workspace so use a piece of string or thread like this. Slide the thread right under it and it will separate nicely from the table.
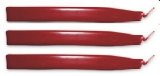
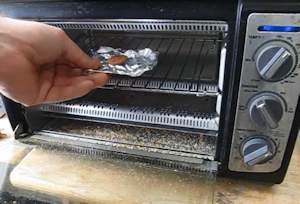
OK! Pop that thing in the oven or toaster oven and bake it according to the instructions. It is 235 degrees fahrenheit for 30 minutes. It would be a longer time if it were thicker.
Would you consider a donation of $1 to support my work? Paypal makes it very easy and safe. Click here to donate $1 - Every little bit helps Will to keep making great tutorials and projects. Thanks!
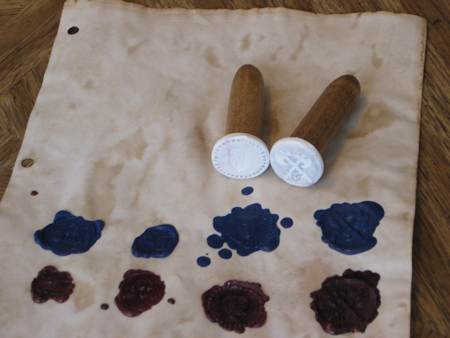
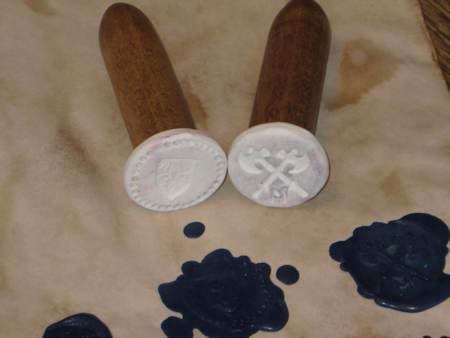
Can you make a wax seal stamper? You sure can! Here is a wonderful pair omade by Jim. One has a shield and the other has crossed Axes!
Do you like making projects and exploring a variety of hobbies?
Sign up for my free newsletter. I give you regular updates on hobbies and projects you can make. it is totally free and I don't share your email with anybody.