Casting minis takes a bit of practice just like anything else. And you are probably going to have a few problems or questions as you do it. This is absolutely normal but with a little bit of practice and some know-how you wil be making some terrific minis.
TIPS
- Mixing the rubber or plastic. When making a rubber mold or casting the miniature you will be mixing two liquids together. Try to get the amounts to be as equal as possible. Use three small containers pour equal amounts into two containers (one in each) then pour these into the third container. And when stirring them up be sure to be brisk and thorough. Mix them thorougly so the chemical reaction is completed. But, try not to cause too many air bubbles.
- If you don't mix the plastic throughly you might end up with a part that isn't complete.
- Take your time when pouring the plastic into the mold, tap the mold frequently to help the plastic fill in all the various details.
- Use mold release if possible! This will be a big help when it comes time to separate the two halves of the rubber mold.
- Allow everything to cure for the recommended period of time. Don't rush the curing process.
- Use a Syringe - This is a great tip that will help you insure your mold fills up entirely. You can inject the plastic into the mold with a syringe.
Casting a complex figure in a single piece mold - You can often times make a one part rubber mold that totally envelops the miniature you want to duplicate. Once the rubber has solidified and dried you can use a sharp hobby knife to gently cut into the rubber enough to get the miniature out. You don't have to cut the mold totally in half - just cut it enough to get the miniature out. This will make for a very good mold but it does take some skill to do. You not only have to get your miniature out but you will have to get your plastic duplicates out without damaging them. I recommend you try doing this after you have done a few regular two part molds.
About Making Complex Molds
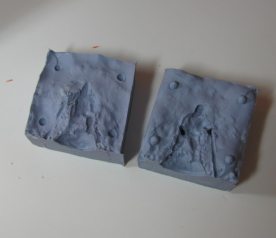
Most tutorials lead you toward making the two halves of your mold rather flat like the one shown in the picture here. This works very well but can be difficult when it comes to casting miniatures that have arms or appendages like weapons sticking out at odd angles. It can be difficult to get the plastic to fill everything in fully.
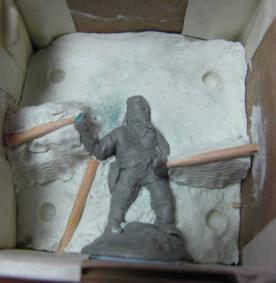
When creating the clay first half of the mold you can build up areas like shown in this picture. This way you can put breathing vents and sprues in places to insure the plastic will entirely fill the appendages, weapons and arms. This takes more work but will create a better miniature.
Make sure that any mounds you build are rather thick so they don't tear during the mold separation. And use plenty of mold release when casting the second half.
Build these mounds in a way so you still can easily get the miniature out without cutting. It takes a bit of time but is worth it.
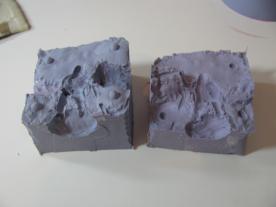
This is what the rubber mold looks like after it is made with the clay base as shown in the prior picture.
RESOURCES
Easy Mold Silicone Molding Rubber for Casting and Jewelry Making 1 Pound
Easymold Silicone Rubber
Brushable/pourable
Easily Create Blanket, Glove Or Block Molds
Odorless, Non Toxic
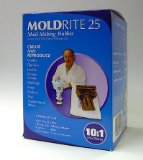
MoldRite 25 Mold Making Rubber
MoldRite 25 Mold Making RubberMoldRite is used by mold makers sculptors prototypers crafters and artists for long lasting silicone rubber molds to create and reproduce architectural pieces candles figurines jewelry picture frames plaster moldings prototyping soap statuary toys and any other item requiring high quality silicone rubber molds. The rubber cures quickly and will reproduce perfect detail from any original model. Once the mold is completed it can be cast in EZ Cast resin gypsum clay or polyester. Features include: No release needed; Easy to use; Makes reusable molds; Highest tear strength; Quick curing; Easy to pour; Sticks to itself (for multiple coats where needed); High detail. The 3 pound box will make 1 pint of MoldRite 25.
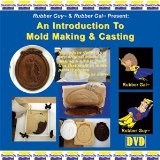
Introduction to Mold Making and Casting DVD
Smooth-On, the most trusted name in moldmaking presents "An Introduction to Mold Making And Casting." This video will introduce you to the endless world of mold making and casting and will expose you to basic concepts associated with reproducing the detail from an original model by making a rubber mold. It will introduce you to the most common mold rubbers used for making molds today as well as important terms associated with using mold rubber. You'll learn considerations and the right questions to ask when faced with selecting a mold rubber for your project. We'll show you how to prepare your original model so that mold rubber will properly cure against it and release from from it. You'll learn how to mix and pour mold rubber so that it cures properly. You will also learn about different materials available for casting into your mold to make an exact copy of your original. To help guide us on our journey, we've enlisted the help of Rubber Guy & Rubber Gal, Mold making super heroes whose job it is to defend the world from the evil Doctor Mold Doom - the cause of mold making and casting disasters.
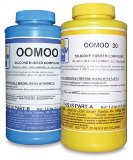
Smooth-On Oomoo 30 Silicone - 2.8 lbs, Oomoo 30 Silicone
This is the stuff that you mix together and pour. It forms the rubber mold. I use this material in this tutorial on how to cast a miniature
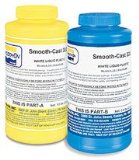
Smooth-On Smooth-Cast 300 - Smooth-Cast 300
This is the plastic you cast into the rubber mold.
This company also sells a complete kit that gives you the rubber mix, the plastic mix and other things.
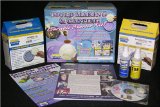
Moldmaking & Casting Pourable Starter Kit- Mold rubber can be used to capture exact detail from any model. This starter kit will allow you to make a rubber mold of a small, simple 2 or 3 dimensional model using silicone rubber. Then pour our fast cast plastic to make one or more reproductions of the original. If you are an absolute beginner to casting then you might want to consider getting this kit. It has everything you need to get started including the casting materials and mold making materials. I have this kit and I use it for some of my tutorials. It actually will save you money because it gives you reasonable quantities of the varous needed things. You would pay more if you try to buy things separately. It also comes with a DVD that shows you exactly how to do everything. |