Hi, Thanks for visiting my website. My name is Will and if you have questions
or would like to
contribute projects or ideas you can contact me
How to Sculpt Fantasy Miniatures Part 3: Making the armatures
Lets start first by making an armature of the miniature.
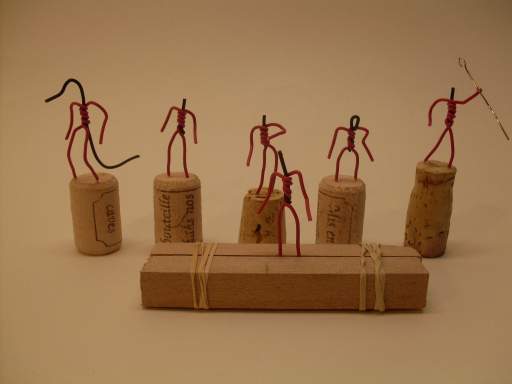
An armature is a wire structure that will be underneath the figure. It is kind of like a skeletal system. Here is a picture of several different wire armatures.
The five armatures stuck in the corks from left to right are a lizard man, a humanoid, another humanoid, a dwarf and a wizard. The one in the front is a humanoid.
One of the difficult things about making a small miniature is holding it while you are working on it. Many professional miniature makers use a cork just like you see in the picture. It makes it easy to hold and rotate. If you don't have any corks you have plenty of other options. The miniature in the forefront of the picture shows the armature squeezed between two pieces of wood that are held together by elastic bands. Miniature vises also work well for this.
This will depend on the size of the miniature you are making. But it should always be solid wire, not stranded. I use anything from 22-28 gauge solid wire. It can be either copper or aluminum. They also make wire that is specifically for armatures. You can also find suitable wire that is used by jewelry makers. And you can even use the wire that florists use. If you are making a large miniature then go with something around 22 gauge and for the smallest of miniatures go with the 28 gauge.
Remember that the armature gives you the shape of your miniature so you want to think about the action of the figure. Don't just make it a static character standing straight up. Try some different poses. Use your sketch book a lot or just have fun making some armatures and see what you come up with. An interesting pose will make all the difference in your miniature.
Let's bend an armature
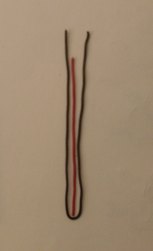
There are lots of different ways to bend armatures and you will no doubt find ways that are comfortable for you. This is a technique that I developed for humanoid shapes. It's pretty easy to do and all you need is a pair of pliers and some wire. In the example below I am using two colors just so you can see the process better. The actual color doesn't mean anything and you can use the same wire for both pieces.
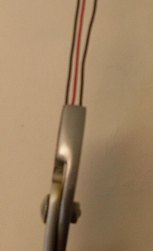
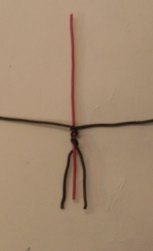
Step 1: Cut two pieces of wire, make one twice as long as the other and bend it in half as shown. Place the shorter one right in the middle.
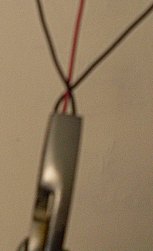
Step 2: Now grab the wires with a pair of pliers as shown.
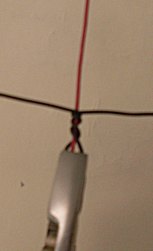
Step 3: And twist the outer wires (Black) around the inner (Red) Allow the inner wire to stay straight with no bending or twisting. YOu are just twisting the black around it.
Step 4: Give it several twists so it is about the size of your miniatures torso.
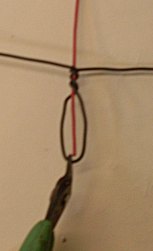
Step 5: Snip the loop
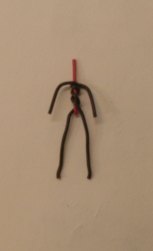
You can see there is a humanoid shape in there somewhere. Now all you have to do is snip it into shape. and this includes the little red section on the bottom that looks like a tail. Leave it if you want your character to have a tail!
Here is the completed humanoid armature. Make sure that the legs are longer than you really need them! This is because you need to stick them in the cork.
I recommend you have some fun with this! Bend yourself plenty of armatures and try all different kinds of figures like horses, dragons, dwarves, elves and more. A good armature will go a long way to helping you make a good miniature.
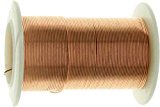
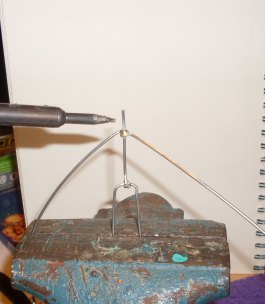
In the next part of this tutorial we will make a six inch miniature. For this I used some heavier gauge wire and a soldering pencil as shown in the picture. For your first miniature you can use any solid wire that you can get. Coat hanger wire usually doesn't work well because it is difficult to bend.. 14 gauge copper house wire will work well for this.
Miniatures are supplied unpainted and assembly and prep work may be required.
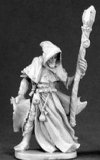
Reaper minatures are 28mm scale.
Miniatures vary from 1/4in to 3in depending on the item.
Tutorial: How to sculpt a miniature dwarf. A dwarf is a great first project because their body is easy to make. Their thick limbs and short size make them easy for beginner sculptors. See some pics and get some tips here: Sculpting a Miniature Dwarf