Hi, Thanks for visiting my website. My name is Will and if you have questions
or would like to
contribute projects or ideas you can contact me
Sculpting a Miniature Sphinx
This is a tutorial with an included video that shows you the process I use for sculpting a miniature. I sculpt a sphinx. A lot of the video is also in 10x speed so you can watch the whole process from beginning to end. I also have sculpted a second sphinx which looks better and I explain a little bit about that.
One important lesson for you here is that sculpting miniatures is just like any other pursuit. You have to practice and do it more! If your miniature doesn't come out as nice as you want then do another one! You improve with each project. Keep after it. Before you know it you will get pretty good at sculpting miniatures.
In this tutorial I give you a nice look at everything you need to know to do some nice sculpting. I tell you what materials to use, how to make a wire frame and how to proceed with the sculpting in a logical way.
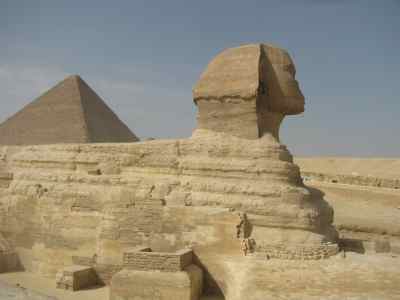
Here is a picture I took of the real sphinx. This is what I used as a reference for the second sphinx I sculpted.
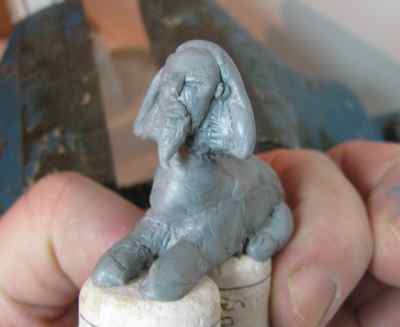
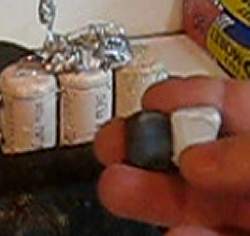
This is the sphinx I sculpt in the video and the one I use for most of this tutorial. I use Procreate Putty for this miniature.
I didn't refer to a picture to make this one. I just made it out of my minds eye.
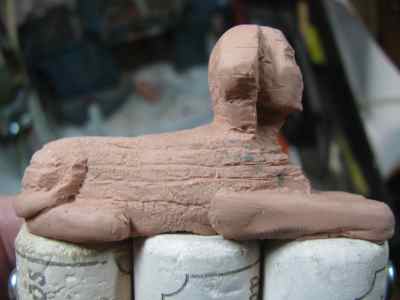
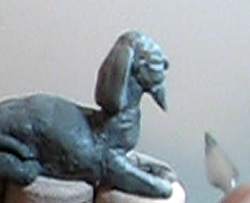
Here is the second and better sphinx. To make this one I printed out a picture of the actual sphinx to use as a reference. If you can do this then you should. It helps a lot. And if you can't get a picture of the object, say because you are making something up then you should do some sketches and drawings. It will make a big difference.
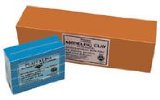
Rather than ProCreate I used Plastalina to make this sculpture.
Let's begin with the Tutorial
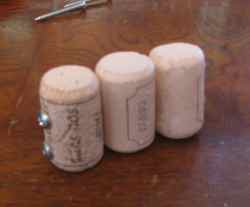
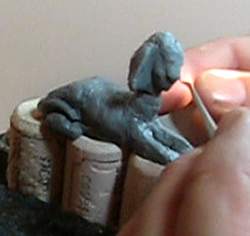
When I sculpt a miniature I like to attach it to a cork. This makes it very easy to work on. In the case of this miniature because of the size and the supine position of the sphinx I needed more than one cork so I screwed three of them together.
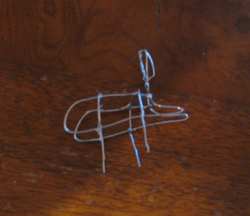
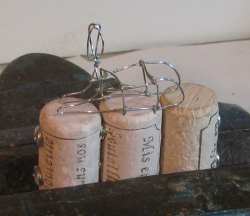
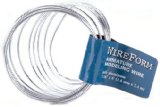
Next I make a wire frame of the miniature. This should give you the size and a good shape of the form and gesture of the miniature. Notice how there are four spikes sticking down from the wire frame. I will push these into the corks. I used a few basic tools to shape the wire frame and I used a soldering pencil to secure it all nice and tight together. This soldering is optional but if you have a soldering pencil you should do it.
Now we are ready to start adding the clay and do the sculpting.
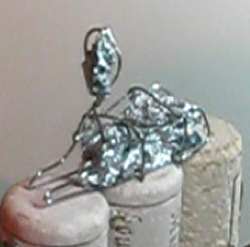
The next thing you should do is stuff some balled up aluminum foil into the body of the miniature. This will make the job easier, it will go faster and you will save on clay.
Let's start adding the clay. You cut off two equal pieces of the procreate and mix it together by kneading it. You now have about 2 hours to work on the clay before it hardens. Quite ok to just mix up a little bit for now and then mix more as you need it. In effect this extends your modeling time.
Now start on the basic adding of the clay. Just add bulks of clay to fill it out a bit. Keep the general shape and the gestures of the miniature. This is just a bulking out of the wire armature.
Now we get the body shape right. Use tools to sculpt the figure. don't worry about the small details at this point. Get all the body into the right shape. Add clay, remove clay and manipulate everything to get it looking right.
After you have the body shape just right you would normally start to add clothing, jewelry, armor and other accessories. But in the case of the sphinx there is none of this then we move on to the detail work.
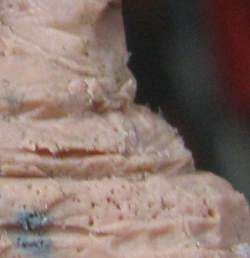
Now use your tools to do the fine detail work. Hair, eyes, nose and any of the small texture effects. To get the sand worn look like on the real sphinx I used a paintbrush with firm bristles.
The plastalina sphinx shows the detail work that I did with the bristles of a paint brush. keep this in mind. You can use all kinds of things as tools, paper clips, pins, needles and even sandpaper to get texture. Make tools as you need them.
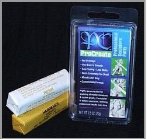
Some Notes about Using ProCreate. This is a great two part epoxy for making very fine miniatures. It holds details extremely well and it hardens to it's final form so you don't have to bake it or do anything with it other than let it dry. And once it is dry you can sand it drill it or file it. You can even add more clay to it if you need to.
I will be adding this sphinx to an Egyptian Diorama that I am making. You can see that Diorama here: The Egyptian Diorama
The Video Tutorial (I show you the full sculpting of the sphinx including 10x speed through all of the actual sculpting)
Sculpt a treasure chest - Nice for gaming and wargaming. I sculpt a treasure chest and I also show you how to make plastic copies
Tutorial: How to sculpt a miniature dwarf. A dwarf is a great first project because their body is easy to make. Their thick limbs and short size make them easy for beginner sculptors. See some pics and get some tips here: Sculpting a Miniature Dwarf
With the body of a lion and the head of a human, the Great Sphinx, still one of the wonders of the ancient world, was carved from the bedrock of the Giza plateau as a protector of the people. Our scaled replicas are artistically rendered, then cast in quality designer resin and highlighted in a faux stone finish to resemble the weathered aging of Egypt's masterpiece. A historic and exotic addition to any collection and a treasure for any traveler! Medium: 3"Wx7"Dx5"H. 1 lb.
ProCreate is a new generation of epoxy putty formulated specifically for the professional artist to create original miniature sculpture. ProCreate has a fine, non-grainy consistency that makes it easy to mix, sculpt, smooth and allows for extremely fine detail.
Quality, economically priced modeling clay. Never hardens, remains pliable and plastic and can be used time and time again. Self-adhering, non-toxic and used by sculptors, model makers, clay animators and artists of all ages.
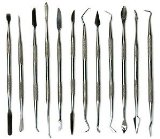
Some uses for these instruments are: amateur and professional taxidermy; cleaning archaeological artifacts; uncovering and cleaning fossils and shells; woodworking and furniture refinishing; ceramics, mosaics and pottery work; wood and clay carving; soap and candle carving; computer and mechanical work; doll-making and repair; and much more!