Can you make this shield? Sure you can. I have a couple of pictures submitted to this site by a web visitor who made this shield. He also offers us a couple of neat tips: Spartan Shield pics submitted by a web visitor (And if you make this shield be sure to send me some pics!) I also have a set of pictures submitted by someone who has made almost the complete set of gear!
I also have some other 300 Spartan equipment projects which currently include a helmet and a spear. I will also be making a shield and the chest plate. The projects are here: Make a Spartan Helmet - Make a Spartan Spear - Make Spartan 300 Vambraces (ArmGuards) - Make Spartan Leg Guards - Make a Spartan Sword
And I have lots of other cardboard and paper mache weapons and armor projects.
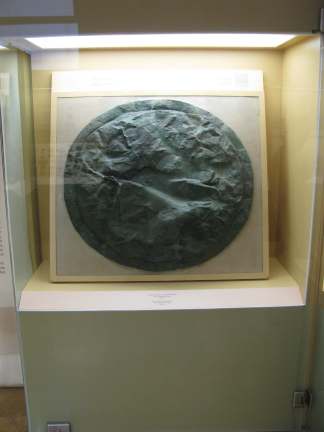
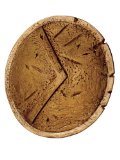
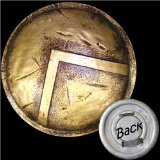
Before we move on to the project I thought you might want to take a look at a real Hoplite shield. I took this picture in a museum in Athens, Greece. The Plaque reads: Bronze Spartan Shield - loot from the Battle of Pylos 425 B.C. You can see a larger picture here
This shield has seen some action.
I also have a home video of the monument at the actual battlefield of Thermopylae where the battle of the 300 took place. It is on my youtube channel here: The Battle of Thermopylae monument
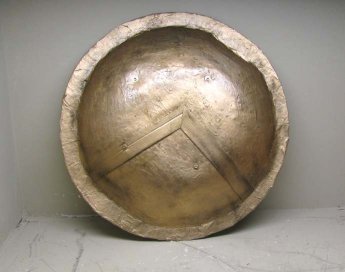
 And here is a spectacular spartan shield made by Dan. Wow, this really came out great! My thanks go to him for sharing the pic. And here is a spectacular spartan shield made by Dan. Wow, this really came out great! My thanks go to him for sharing the pic.
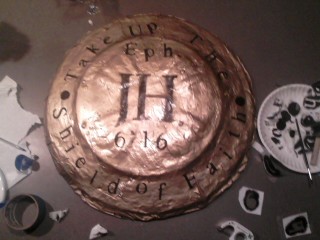 Here is a fantastic Spartan Shield Made by Josiah. He actually re made it and repainted it several times until he got it right! It's a great lesson in having fun and being persistent! My thanks to Josiah for sending in the pics! This thumnail shows the different versions made: Here is a fantastic Spartan Shield Made by Josiah. He actually re made it and repainted it several times until he got it right! It's a great lesson in having fun and being persistent! My thanks to Josiah for sending in the pics! This thumnail shows the different versions made:
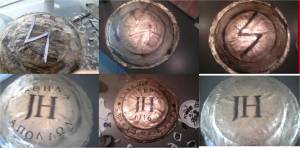
What Josiah has to say about these:
In order left to right, top to bottom: 1: Just before 1st time painting. 2: just after 1st time painting 3: 2nd time painting, decided to make the bolt black because the actual spartans put the inverted V (Greek "L") black. 4: I decided to repaint with my initials. 5: I put the names of 2 greek gods on there. 6: I put some of the bible verse about taking up the shield of faith on the front, there is the whole verse and 2 other verses on the inside. (I intend to keep it at step 6)
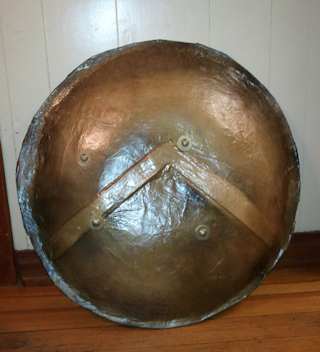
Can you make this spartan shield? You sure can!! Here is one made by a web visitor (Tolling) using this tutorial. My thanks go to him for sending in the pic!
Here are the materials you will need to make this project:
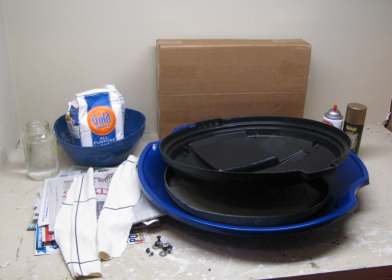
- Some type of round plastic object, You can use a flexible flyer sled, or a barrel cover. This can be either plastic or metal. If it is metal you can hammer it into a nice bowl shape. If it is plastic you can trim away any excess plastic to get the bowl shape.
- Flour
- Water
- Large mixing bowl
- Some newspapers cut into 2 inch wide strips
- Two strips of durable cloth
- Four bolts, four nuts and eight washers
- Large piece of cardboard
- Paint: Gold (or bronze), Black, and a sealer for shine and durability
- No
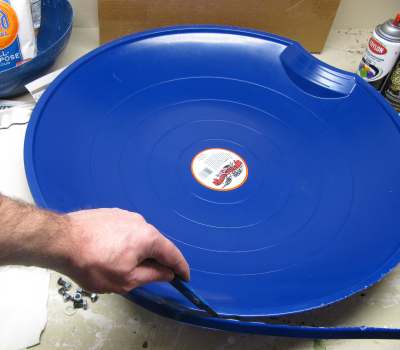
Trim the plastic on your sled or barrel cover. Remove any plastic that doesn't breaks the shape of the bowl . It is ok to cut away handles or any other type of shapes that stick out. You can patch holes with paper mache or cardboard. Or you can just tape over the holes.
With this flexible flyer sled all I had to do was cut away the edge.
Amazon.com does have a three pack of this item. You might be able to search their website and find singles: Paricon Flying Saucer Sled (3-Pack)
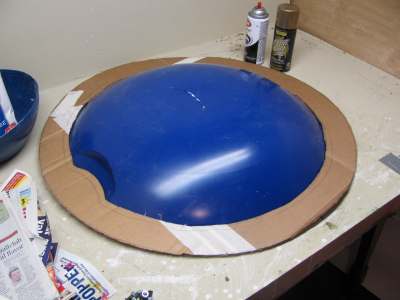
Attach the cardboard ring around the edge of the shield body. You can use glue, tape or a hot glue gun. I used a hot glue gun. The ring shown is 3 inches wide. This is a bit wide and I ended up trimming almost an inch off this so I recommend you make your ring 2 inches wide.
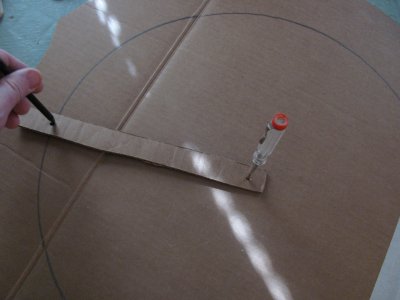
This is how I measured the circle. I created a little tool using a long strip of cardboard. Put two holes in it and in 1 hole is a pencil for drawing the line and in the other hole is a screwdriver so I can rotate the tool around and draw a circle.
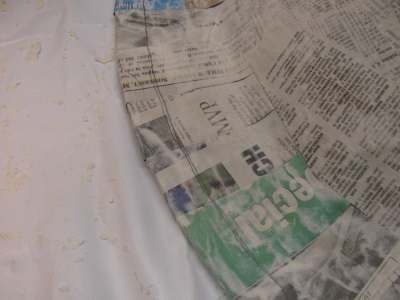
Now let's coat the whole shield both sides with paper mache. Mix up paper mache in a big bowl by adding together two cups of flour, two cups of water and one tablespoon of regular table salt. Mix it up until it is nice and smooth, almost creamy. Cut up lots of strips of newspaper into pieces that are around 12 inches long and 3 or 4 inches wide. Lots of various strip sizes are good.
Dip a strip in the mix, wipe off the excess and apply it flat to the shield.
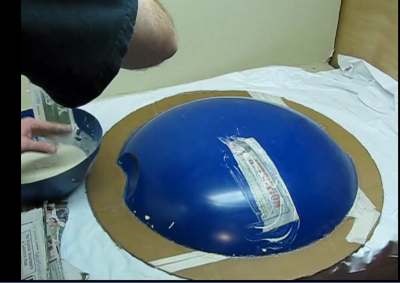 In this picture you can see I have begun applying the paper mache to the shield. Notice how I am using my fingers to wipe the excess flour mix off of the strip of newspaper. In this picture you can see I have begun applying the paper mache to the shield. Notice how I am using my fingers to wipe the excess flour mix off of the strip of newspaper.
Do a niceh thick and complete covering of the whole shield front and back. And vary the direction of the strips of newspaper. Overlap them so at least 1/3 rd of each strip overlaps with another. You can't put too much paper mache on! The more you put the stronger it will be.
After completing 1 coat set it aside to dry and once dried go ahead and do another complete coat.
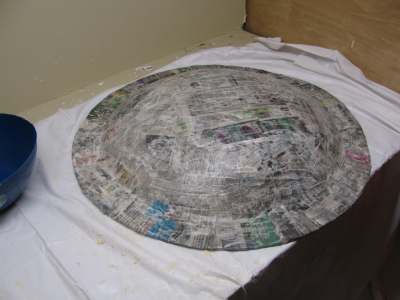
The paper mache is applied and drying. It looks great. In this picture you can see that the cardboard ring is a bit wide. I trimmed 3/4 of an inch off of this to make it look more realistic.
This picture shows the 3/4 inch line I drew so I could trim it down. The important thing to note about this is that you can modify it as you go. Trim things, re mache them and improve it as you go.
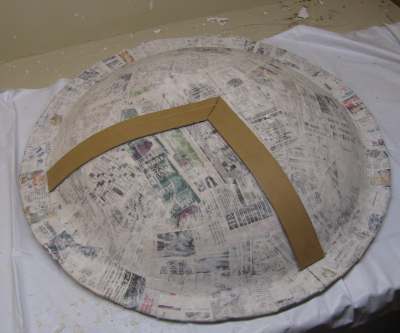
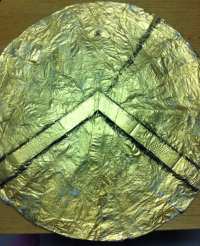
Cut out strips of cardboard that are two inches wide and glue them to the shield as shown. They form an angle that is a bit more than 90 degrees.
 Lets finish off this Spartan Hoplite Shield Lets finish off this Spartan Hoplite Shield
RESOURCES
Rubies Costume Co. 300 The Movie, Spartan Shield, 17 This is an inexpensive yet good looking costume shield. It is 17" in diameter and looks like it just came out of a battle. It is made out of PVC material and it is an officially licensed accessory.
Spartan Warrior Sword -
Make your own stand against the Persians! This is an exact replica of the sword carried by the famed King Leonidas and his 300 Spartans at the Battle of Thermopylae in 480 B.C. The heroic performance of these fierce warriors is remembered even today as a symbol of courage against overwhelming odds. We offer you the opportunity to relive the legend and to experience the power of this mighty sword. This sword measures 34 1/2" overall and breathes strength. The 26" hand forged blade is heat tempered from solid carbon steel and is nearly an amazing 1/2" thick. The leather wrapped handle is contoured and surrounded by the distinctive extended guard and pommel. Relive the history of the Spartans with this sword in your hand!

King Leonidas 300 Spartan Greek Replica Shield Pro New -
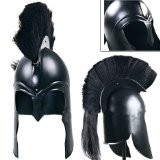 
Spartan King Leonidas Full Size Helmet Replica
This is the Spartan Helmet Replica 18 Gauge Steel. This helmet is similar to the one worn by King Leonidas.The helmet has been constructed from 18 gauge steel with an all black finish. The front of the helmet has been detailed with a ridge lines. The plum of the helmet is black horse hair. The plum is easily mounted with two screws.
|


