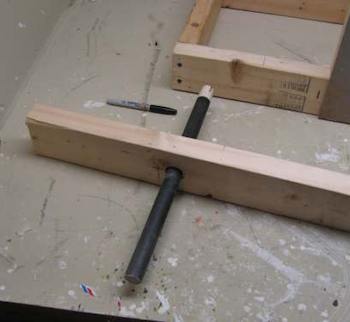
Now, take the 40 inch long swing arm and measure from one end ten inches. Drill a hole at that point. Make the hole big enough so your rod, pipe or broomstick will fit easily through it and rotate without any friction. It should be loose.
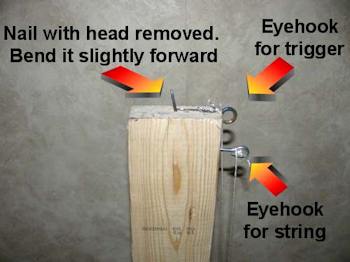
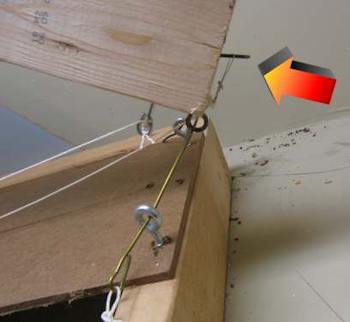
Now this is a little bit tricky but you have to put two eyehooks and 1 nail on the other end of the swing arm. Do it as shown in the picture. The nail is a straight nail with the head cut off. This is important, you don't want any kind of head on the end of this nail so the string and loop can easily slip off it. When the string and loop slips off this nail the pouch is opened and the projectile flies.
Firing Note: When you are testing your trebuchet you are going to adjust the angle of this nail. Leaning it slightly more forward will have the tennis ball release a bit later (lower arc) and leaning it toward the back will have the tennis ball release a bit earlier (higher arc) This dramatically affects how your trebuchet performs so experiment with this angle. the angle I have shown here works perfectly for my trebuchet.
Now, this next part can be a bit tricky. I don't know what you have as an available couterweight! But if you use two ten pound dumbbelss like I have here you can simply use a hose clamp to clamp them in place. Improvise whatever you need to get this right.

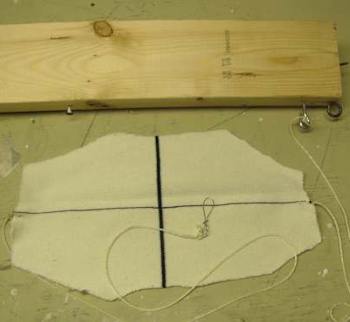
Make your pouch out of thick fabric. I used an old sweater. It is approximately 12 x 6 inches in size.
Tie a string approximately 24 inches to one end and attach the other end of the string to the eye hook as shown.
Tie a string that is approximately 27 inches to the other end of the pouch and attach it to a small wire hook that you make out of wire.
Finish the assembly by putting the swing arm into the middle of the uprights and feeding the rod or dowel through all three.
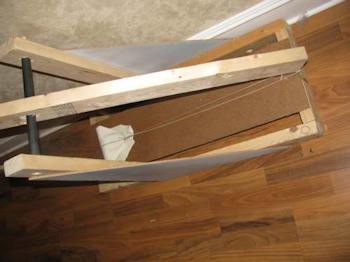
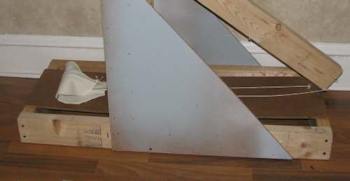
With the trebuchet in the loaded and ready to fire position as shown in the picture below you put the little ring you made onto the straight nail. When the catapult fires this little ring will come off the nail and allow the pouch to open and release the tennis ball.
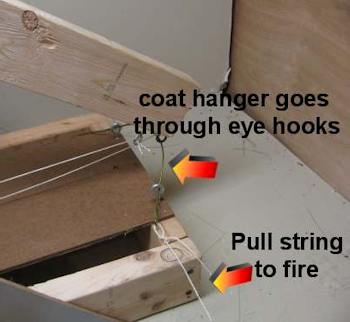
The Locking mechanism and trigger.- The coat hanger goes through one eyehook then through the eyehook on the swing arm and finally through the eyehook on the far side. Pulling on the string releases the swing arm.
The picture below shows the trebuchet ready to fire the tennis ball. Notice how the strings are nice and straight along the bottom and how the tennis ball sits in the pouch. Adjust the lengths of the strings as needed to get everything nice and even like this.
Your Trebuchet is complete. Now Go Storm Some Castles!
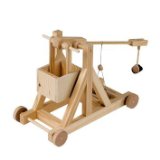 The Miniature Trebuchet by Timberkits The Miniature Trebuchet by Timberkits
The trebuchet was the ultimate artillery weapon of the medieval period and early renaissance. A large and unwieldy weapon, it was typically built on-site during battle, and tuned to lob great weights - such as the carcasses of rotting horses and pots of burning pitch, over the castle walls and onto its inhabitants. Precision carved by computer controlled machinery for guaranteed fit and accurate joinery. The detailed instructions include loads of photos of each step of the construction process, tuning tips and safety notes. Included in the kit are four wooden projectiles, all the necessary components for the sling, trigger, and counterweight bucket as well as all the parts for the kit. The only thing you'll need to supply are 88 pennies for counterweight and a few simple tools - Scissors, a ruler, a utility knife, wood glue and a few rubber bands to hold the pieces together while the glue dries. Manufactured by RLT Industries
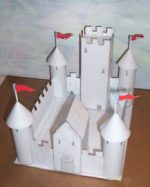
I have another project you might like. It is the Paper Castle and it has everything you could want in a castle making project including all the art work you can download. You just follow the instructions and make it yourself with some glue and cereal boxes. Build a Paper and Cardboard Castle It also has a learning sheet that helps to learn about castles when you are building it.
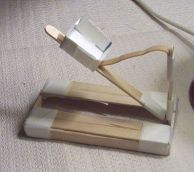 If you are looking for something easier to make you might want to try my project on making a popsicle stick catapult. Fast, easy and fun project! Goes great with the paper medieval castle. Make a popsicle stick catapult If you are looking for something easier to make you might want to try my project on making a popsicle stick catapult. Fast, easy and fun project! Goes great with the paper medieval castle. Make a popsicle stick catapult
|


