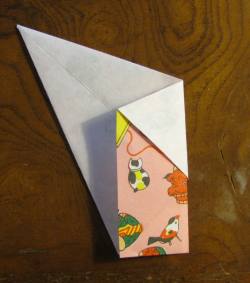
This is where we left off on the previous page.
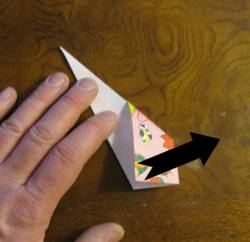
This picture shows how you will do the next fold. I have drawn a black line where the fold will be. The arrow shows that you take the right side of the fold line and fold it underneath.
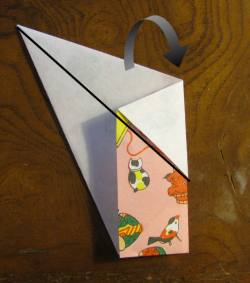
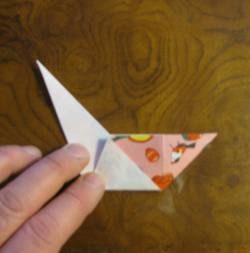
This is what it looks like after you fold it.
The arrow shows what to do in this step. Grab the bottom left corner (just grab the top layer) and pull it out toward the right and fold it all flat.
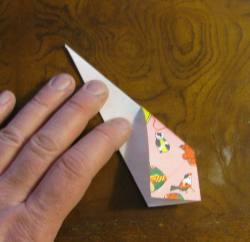
This is what it looks like after the fold. This step can be a bit tricky. Just keep after it.
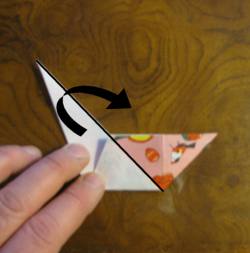
The black line in this picture shows the line you will fold along. Grab the left side of this swan and fold it over to the right.
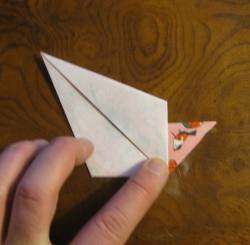
This shows what it looks like after completing the fold.
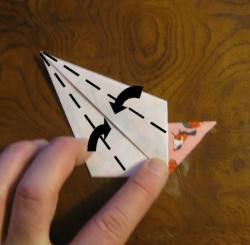
This picture shows how you will do the next fold. The dashed lines are the fold lines. You bring each side of this into the center line. In effect you are making this triangle about half as thin as it was. This is the neck of the crane.
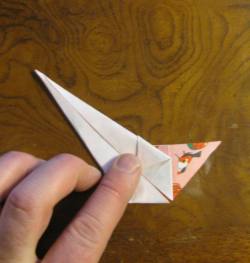
This is what it looks like after being folded.
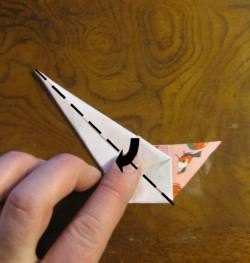
This picture shows how you do the next fold. Grab the right side and fold it over onto the left side along the center line.
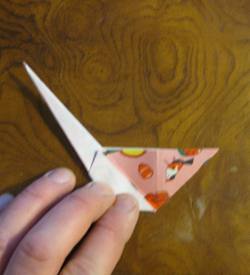
This is what it looks like after the fold. What we have done here is made the neck of the swan even thinner.
 Okay,We are going to do the most difficult fold, this is called a mountain fold; You are almost done! Continue Okay,We are going to do the most difficult fold, this is called a mountain fold; You are almost done! Continue
RESOURCES to More Origami Stuff
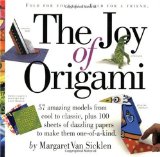  The Joy of Origami The origami book, reinvented. From Margaret van Sicklen, author of the Origami Page-A-Day® Calendar and a tireless proselytizer for her craft, The Joy of Origami brings a delightfully fresh twist to the ancient art of paper folding. Traditional in spirit-she reaches back to origami's original aim, as a way to share unique gifts with friends and family-yet contemporary in look and feel, with 100 sheets of paper featuring bold, often whimsical patterns specially designed to complement the models, it's a jazzy, essential book for every origami hobbyist, whether an old hand at folding or new to the craft. The Joy of Origami The origami book, reinvented. From Margaret van Sicklen, author of the Origami Page-A-Day® Calendar and a tireless proselytizer for her craft, The Joy of Origami brings a delightfully fresh twist to the ancient art of paper folding. Traditional in spirit-she reaches back to origami's original aim, as a way to share unique gifts with friends and family-yet contemporary in look and feel, with 100 sheets of paper featuring bold, often whimsical patterns specially designed to complement the models, it's a jazzy, essential book for every origami hobbyist, whether an old hand at folding or new to the craft.
The 57 models range in difficulty from a simple Elephant in Pajamas to a more challenging Tyrannosaurus Rex. There are models for special occasions (Stars and Stripes Pinwheel), action models (the Foxy Puppet), models for kids (One-Trick Pony) and models for friends (the Kissing Cranes). The Everyday Paper section includes models using found paper: four cool ways to fold a dollar bill, an awesome newspaper baseball mitt, and fun ways to turn unwanted business cards into origami creatures.
Origami Zoo will challenge and delight anyone with a penchant for creating something wonderful out of (almost) nothing.
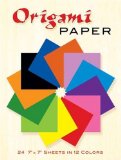  Origami Paper: 24 7 x 7 Sheets in 12 Colors - High-quality Japanese origami paper specially manufactured to resist tears and produce clean lines and crisp folds. Each sheet is colored one side only to make it easier to understand the various folds and a sturdy shrink-wrapped folder keeps papers neat and clean until ready for use. Origami Paper: 24 7 x 7 Sheets in 12 Colors - High-quality Japanese origami paper specially manufactured to resist tears and produce clean lines and crisp folds. Each sheet is colored one side only to make it easier to understand the various folds and a sturdy shrink-wrapped folder keeps papers neat and clean until ready for use.

Do you like making projects and exploring a variety of hobbies?
Sign up for my free newsletter. I give you regular updates on hobbies and projects you can make. it is totally free and I don't share your email with anybody.
|