- 000_001.jpg
- 000_002.jpg
- 000_003.jpg
- and etc..
This numbering system makes it easy for me to know the order of the pictures. If you rename your pictures make sure you use a numbering system so you know the order.
Now open up Windows Movie Maker
 Press the Start button, Select "All Programs" then Select Windows Movie Maker and Movie Maker starts up. Press the Start button, Select "All Programs" then Select Windows Movie Maker and Movie Maker starts up.
It looks like this:
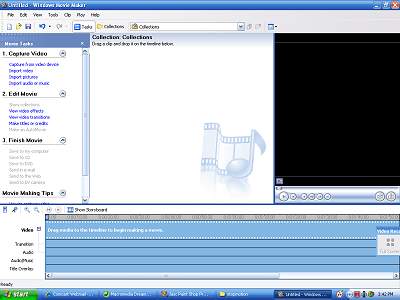
At the top of the screen is the menu bar. Press the "File" button and from the drop down menu select "New Project"
And before we start we are going to set a global setting for how fast this movie plays. Pull down the tools menu item and select options.
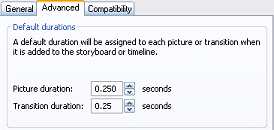
The Options dialog comes up -Press the Advanced Tab and scroll picture duration so it reads .250 and scroll the transition duration so it reads .25 then press OK. This sets the amount of time each picture will be displayed and the amount of time in between pictures. You should tinker with these settings to get your movie to look the way you want. For now these settings should be good.
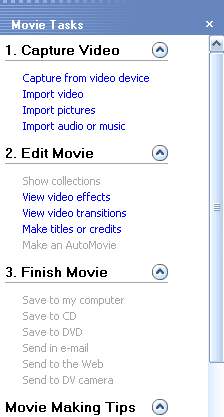
Now we are going to start making our movie and Movie Maker makes this very easy for you. On the left side of the screen is the Movie tasks panel and you can see that it has 3 steps to making a movie. Capture Video, Edit Movie, Finish Movie. We are going to follow these steps.
Press the import pictures button
Now browse to where you stored all the pictures you took.
Select all the pictures and Press the "Import" button. You can easily select all the pictures by single clicking on the first one, hold down the shift key and then single click on the last one. All the pictures will turn blue which means they are all selected. .
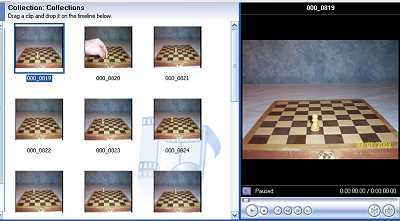
Voila, your pictures come into the Movie Maker software. If you single click on one of them it will show up in the big screen image on the right. Just like my picture shows here.
I had a little problem with my video! Oops My hand is in one of the pictures! I had to take this out. Make sure you delete any pictures that don't belong in the sequence.
Now single click on the first picture in the collections window so it turns blue just like mine shows above. It shows up in the big window.
Pull down the Edit menu item from the tool bar at the top and select "Select All". Now all the pictures turn blue.
Look at the bottom of movie maker. You should see a bunch of empty white squares. This is the story board.
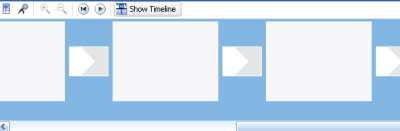
If you don't see these white squares then you have the timeline option displayed. Look for the little button called Show Story Board and press it. The white squares show up.
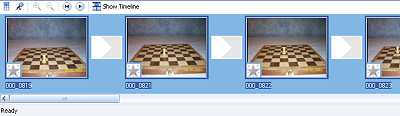
Single left click on your first picture in the collections screen, and hold the mouse button down. This selects all the pictures. Now drag the mouse down and drop the pictures into the first frame of the animation timeline bar. That's the first white square.
Each picture is placed in a white square.
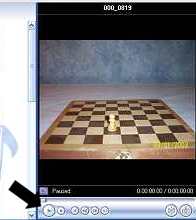
Now you can see your animation in action. In the movie player press the play button (shown by the black arrow). There ya go, a movie!
Let's Format it so it can be put on the web, on youtube or in a file so other people can watch it.
Under Step 3 of the Movie Tasks Panel "Finish Movie" click "Save to my computer"
Give it a name, choose where you want to save it and follow the prompts. You are done! You have made your first stop motion animation. Now there is lots more to learn and I have more tutorials coming but for now you should experiment and learn some things on your own. Make another movie but this time get more creative.
RESOURCES TO MAKING STOP MOTION ANIMATION
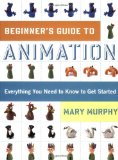 
Beginner's Guide to Animation: Everything You Need to Know to Get Started
To beginners, making an animated movie can seem like voodoo magic. And in fact, until recently, animation was expensive and time-consuming. But now with the help of Beginner's Guide to Animation, anyone can make animated movies, using a digital camera, basic software, and a computer. The book begins with an illustrated guide to setting up a simple animation studio at home, including a list of essential items. Then, new animators hit the ground running with six innovative, instructive projects designed to develop technical skills and explore the potential of animation. A full collection of scannable templates makes it even easier to get started and to finish up. Tips, tricks, and clear instructions on editing, scoring, even making your own show reels and shorts make this the complete one-volume guide to amazing friends and family-and everyone on YouTube!-with great I-made-it-myself animation.
The Klutz Book of Animation: Make Your Own Stop Motion Movies
Welcome to the wide-open world of animation. It used to take an empire the size of the Magic Kingdom to make an animated film. And to get viewers, you'd need access to cineplexes or television networks. In other words, you were either in the industry or in the audience. That was then. Today, creating animation for a potential audience of 600 million requires a laptop, a camera, and an internet connection. That's it. The barriers have come down, the people have taken over, and the results are amazing. The Klutz Book of Animation is a complete how-to treatment of this newly accessible art form. It combines practical instruction and ready-to-shoot scripts. Real-life samples of all the projects are viewable online - the perfect marriage of book and web. Speaking of web, the software you'll need is available as a free download. It's plug and play on any computer (PC or Mac). Attached to the book is a piece of low-tech, non-toxic clay, ready to be molded into a million different heroes starring in a million different films - all of them animatedly yours.
 
Secrets Of Clay Animation Revealed 3!
Secrets of Clay Animation Revealed 3 is a book teaching all methods the experts use to make stop motion films from start to finish. After reading Secrets you will know how to create several types of armatures, learn how puppets are sculpted, make a motion control rig, light your sets, make your own surface gages, use video reference, chroma key, capture programs and more.
Stop Motion: Craft Skills for Model Animation, Second Edition (Focal Press Visual Effects and Animation)
This authoritative primer of the craft skills required in model animation teaches the basic building blocks of the creation of character driven animation.

Do you like making projects and exploring a variety of hobbies?
Sign up for my free newsletter. I give you regular updates on hobbies and projects you can make. it is totally free and I don't share your email with anybody.
|